

Skip the Pro: Wallpaper Around Windows With Custom Panels in 1–3 Days
Use the flush-window method (hang over, cut diagonally at the architrave, trim) for framed windows, and the reveal-fold method (overhang, horizontal cuts, fold into the recess) for recessed windows. Peel-and-stick works well for both; traditional paste often handles textured reveals better. Expect a variable amount of time per window, depending on trim complexity.
TL;DR:
- Peel-and-stick wallpaper is easier to reposition and less likely to tear during folding into window reveals, especially on intricate or textured surfaces.
- Recessed windows require more patience, as wrapping wallpaper into the reveal involves horizontal cuts and patching to avoid gaps and misalignment.
- Using a double-cut overlap seam with a sharp blade produces nearly invisible joins, but maintaining a clean cut near trim or corners demands frequent blade changes and careful technique.
- Ordering custom-sized panels significantly reduces the need for pattern matching and patching, making large or irregular window openings more manageable for DIYers.
- Budget an afternoon for a single flush window with peel-and-stick paper, but expect longer timeframes for complex recessed or multiple-window projects, often favoring professional installation.
Table of Contents
- What Tools and Materials Do You Need to Wallpaper Around Windows?
- How Do You Wallpaper Around a Flush Window?
- How Do You Wallpaper Around a Recessed Window?
- How Do You Get Invisible Seams and Sharp Trim Lines?
- What Are the Most Common Wallpapering Mistakes Near Windows?
- What Installation Guidance Does Walls Need Love Offer?
- Should You DIY This or Call a Professional?
- Make Reveals Easier With Custom-Sized Wallpaper
- Sources
- FAQ
What Tools and Materials Do You Need to Wallpaper Around Windows?
Getting the right supplies together before you start saves you from mid-project trips to the hardware store, and it keeps your cuts sharp instead of ragged. Here’s what belongs in your kit:
- A utility knife with extra blades (change often, since a dull blade drags and tears paper instead of slicing it)
- Wallpaper scissors for wide curves and rough trimming
- A smoothing tool or wallpaper brush to press out air pockets
- A seam roller to flatten joins without crushing the pattern
- Paste brush or roller for traditional paper, or nothing at all for peel-and-stick beyond your hands
- A tape measure, pencil, and a small level for straight vertical lines.
Material choice matters more around windows than almost anywhere else in a room. Peel-and-stick wallpaper repositions easily, which is a real advantage when you’re folding paper into a tight reveal and need a second try. Traditional paste, however, tends to grip better on textured or uneven reveal surfaces where removable adhesive can lift at the edges.
Before you hang anything, clean the wall and trim of dust and grease, and loosen (don’t fully remove) window casing if you want a tucked, inset look. Skim-coat any textured drywall near the window so the paper doesn’t telegraph bumps once it’s dry.
Measuring matters just as much as prep. Experts recommend adding 1 to 2 inches of extra paper on every strip near a window for trimming and pattern matching, and measuring reveal depth precisely before you cut anything. Our wallpaper installation tools guide breaks down what each tool does if you’re buying from scratch.
Pro Tip: Dry-fit your first strip against the window without paste or adhesive backing removed. You’ll catch pattern misalignment before it’s permanent.
How Do You Wallpaper Around a Flush Window?
A flush window sits level with the wall, trimmed with architrave or simple molding and no recessed sill. This is the more forgiving of the two window types, and it’s where most first-time DIYers should start.
- Hang your full-length strip from ceiling to floor as if the window weren’t there, letting it drop directly over the opening. Match the pattern to the adjacent strip before you touch a blade to it.
- At each corner of the architrave, make a short diagonal snip, from the paper’s edge in toward the trim corner, so the paper can fold around the molding without bunching.
- Fold the paper flat against the trim, then trim the excess with a sharp blade, running the blade along the edge where wall meets trim.
- Smooth the paper with a wallpaper brush, working from the center of the strip outward, then run a seam roller along any edge that meets woodwork to seat it flat.
- Cut and hang the top piece above the window and the bottom piece below it separately, each with a 1 to 2 inch overlap for trimming, then repeat the diagonal-cut and fold process at every corner.
This diagonal-cut, fold, and trim sequence is standard technique among professional paperhangers, and Fine Homebuilding’s installation walkthrough shows it in more visual detail than words alone can capture.
If you want an exact-inset finish, where the paper appears to end perfectly at the trim line with zero visible tuck, remove the casing entirely before hanging, paper straight across the opening, then trim to the wall line and reinstall the trim over the paper’s edge. This takes longer and requires care not to crack old paint or molding when prying it loose, but it produces the cleanest look available to a DIYer.
Pro Tip: Keep a fresh blade in reach at all times near trim corners. A blade that’s cut more than two or three strips will drag and tear paper right at the point where precision matters most.
How Do You Wallpaper Around a Recessed Window?
Recessed windows, the kind with a sill and side reveals set back from the wall face, take more patience. The paper has to wrap into a three-dimensional space instead of just around a flat trim edge, and that’s where most DIY mistakes happen.
- Hang your strip with generous overhang into the reveal, both above and below the window opening, rather than trying to cut precisely on the first pass.
- Make straight horizontal cuts at the top and bottom edges of the reveal, then fold the paper inward into the recess, smoothing as you go so it hugs the reveal’s inside surface.
- At the corners, where the top and side folds meet, gaps are common. Patch them with small offcuts matched to the pattern, using an overlap and double-cut technique so the seam disappears.
- Continue the same overhang and horizontal-cut method on the opposite side of the reveal, checking that the pattern lines up across the whole opening before you commit to a final trim.
That overhang, horizontal cut, and fold sequence matches the method Wickes outlines for recessed windows, and it holds up whether you’re working with a standard 20.5 inch repeat pattern or a large-scale mural panel.
A few things worth knowing before you start:
- Plan your panels so the repeat lines up across the reveal and the adjacent wall strip, not just within a single piece of paper.
- Papering the reveal faces gives a finished, cohesive look, but sills take a beating from condensation and daily use, so many decorators leave the sill itself unpapered or add a protective strip.
- Small offcut patches work best when cut slightly oversized, then trimmed back once positioned, rather than cut to exact size beforehand.
Our guide on reading pattern repeat is worth a look before you cut your first sheet for a recessed window, since a repeat miscalculation here is far more visible than it would be on an open wall.
Pro Tip: Professional hangers make small relief cuts right at the inside corners of the reveal before folding. It stops the paper from tearing under tension exactly where two folds meet.
How Do You Get Invisible Seams and Sharp Trim Lines?
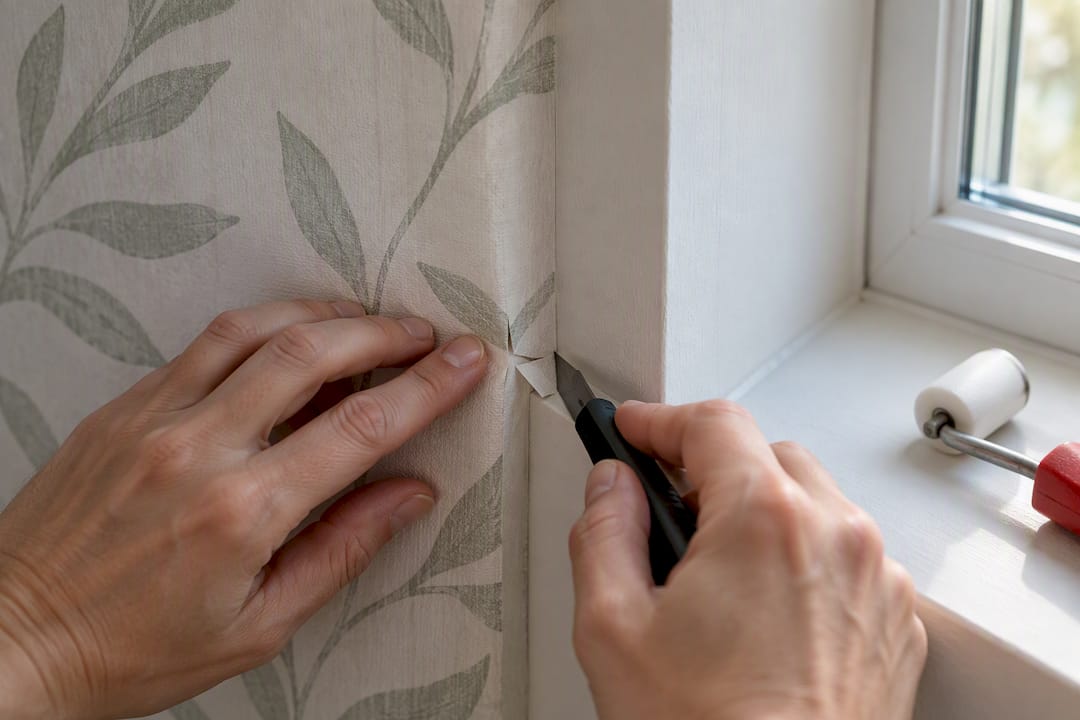
The difference between an amateur job and a professional-looking one usually comes down to seams, not the big cuts. A double-cut overlap seam, where you layer two edges of paper, then slice through both layers at once with a sharp blade before peeling away the offcut, creates a seam so tight it’s nearly invisible once rolled flat. This technique is especially useful in reveals, where a standard butt seam has no room to hide imperfections.
Run your seam roller with light, even pressure. Too much force crushes raised or textured patterns and leaves a visible track down the seam line. A smoothing tool, used first to press out air before the seam roller ever touches the paper, prevents that problem almost entirely.
Pattern repeat matters again here. Check the repeat number printed on your paper’s spec sheet, and plan for a vertical offset on drop-match patterns so the design lines up correctly across a window opening rather than jumping at the seam. Our overlap method breakdown covers this technique step by step if you want a deeper look.
A few finishing habits that separate a clean job from a sloppy one:
- Swap your blade every two to three cuts near trim and reveals, where precision counts most.
- Wipe paste residue off woodwork immediately with a damp sponge before it dries and yellows.
- Seal delicate paper corners near high-traffic areas like window sills with a thin bead of clear adhesive if the paper edge shows signs of lifting.
Pro Tip: If a seam still shows after rolling, it’s almost always trapped air underneath, not a cutting error. Lift the edge gently, add a touch more paste, and re-roll before you blame your blade.
What Are the Most Common Wallpapering Mistakes Near Windows?
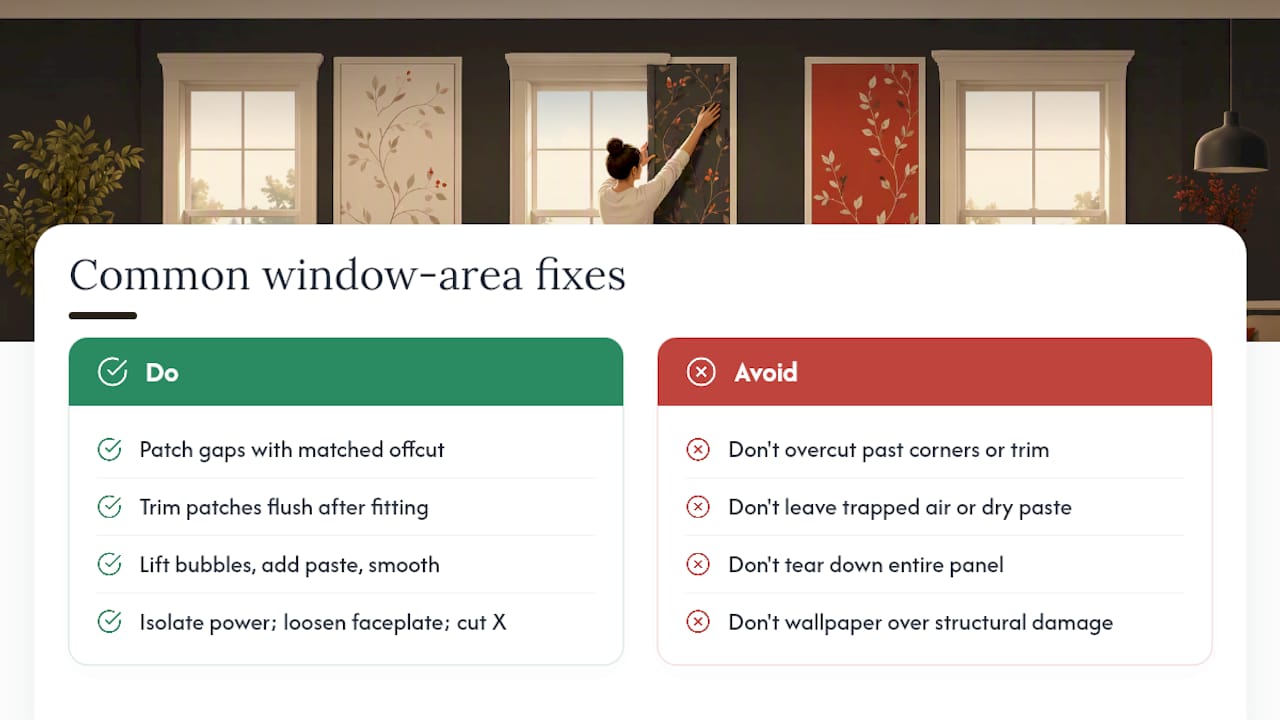
Overcutting is the single most common DIY error, and it’s almost always fixable without a full rehang. Cutting too far past a corner or trim line leaves a gap that a small patch, cut from a matched offcut and taped lightly on the back edge, can hide almost seamlessly once trimmed flush.
Bubbles and wrinkles usually mean trapped air or paste applied unevenly. Lift the affected section with your blade edge, add a little more paste underneath, and smooth it back down with your brush before it dries.
Pattern mismatches near a window opening call for a staggered seam correction: shift the offending strip slightly and hide the seam with a small inserted patch rather than tearing down an entire panel.
Working near outlets and switches close to a window needs its own caution. Safety guidance recommends isolating power at the breaker if you’re unsure, loosening the faceplate rather than removing it fully, and cutting a small X in the paper to trim back to the plate, avoiding the overcutting mistake mentioned above.
Some problems are beyond a patch job. Structural damage to a reveal, water-warped drywall, or trim that’s rotted underneath needs a contractor’s attention before any wallpaper goes up.
What Installation Guidance Does Walls Need Love Offer?
Some wallpaper providers offer both peel-and-stick and traditional paste wallpaper, which matters for window work since reveals and trim behave differently depending on the format you choose. Custom orders are often made within a few days, and some inks are Greenguard Gold certified and free of vinyl and PVC, a detail worth knowing if you’re papering a child’s bedroom window nook. Many companies also work with local artists across collections, so pattern choices can extend beyond mass-market prints.
A few habits worth borrowing directly from that installation guidance:
- Test a sample swatch directly in the reveal you’re working on, not just on the open wall, since light and adhesive performance often differ in a recessed space compared to a flat surface.
- Measure your reveal depth and window width precisely before ordering a custom mural panel, since a pre-sized piece cut to your exact opening eliminates several seams you’d otherwise have to fold and trim by hand.
- Photograph your window opening with a tape measure in frame before ordering, so sizing questions later have a clear reference point.
Should You DIY This or Call a Professional?
A single flush window with peel-and-stick paper and a simple, non-directional pattern is a reasonable weekend project for most homeowners. Multiple recessed windows, large-scale murals with strict pattern matching, or reveals with damaged or irregular trim push the job toward hiring a professional hanger, since mistakes there compound fast and cost more to fix than they would have cost to prevent.
As a rough guide, budget an afternoon per flush window if you’re new to this, and expect recessed windows to take noticeably longer per opening. Professional installation costs vary widely by region and project scope, so treat any number you hear as a starting estimate, not a quote.
— WallsNeedLove
Make Reveals Easier With Custom-Sized Wallpaper
Wallsneedlove is the alternative to hiring a professional hanger for tricky window reveals: custom sizing means fewer seams to fold and trim by hand, and a typical 1 to 3 day turnaround means you’re not waiting weeks to start your project.

If a recessed window’s odd dimensions have been the thing holding your project back, ordering a panel sized to your exact opening cuts out most of the corner-patching and pattern-matching guesswork covered above. For larger openings or feature walls that include the window, the wall mural collection offers scenic and custom designs sized to fit a full wall rather than pieced together from standard rolls. And if you’re not sure paste is right for your reveal, the peel-and-stick removable line repositions easily while you get the fold right.
Order a sample swatch, test it directly in your reveal the way this guide recommends, then browse the full wallpaper collection to find a pattern that fits your window and your repeat requirements.
Sources
A few outside resources go further than any text guide can, particularly for the fiddly diagonal cuts and reveal folds that are easier to see than to read:
- Fitting Wallpaper Around Trim | Fine Homebuilding
- How to Wallpaper Around a Window | Wickes
- How to wallpaper a room – expert advice | Which?
- 5 steps for safely wallpapering around sockets | Homebuilding
FAQ
Do You Wallpaper Toward a Window or Away From It?
Most professional hangers start at a focal point, often the wall opposite the window, and work outward in both directions, ending at the window last. This way, any pattern mismatch that occurs from adjusting for the room’s dimensions lands near the window trim, where a cut edge is easier to disguise than on an open wall.
Should I Wallpaper Inside a Window Frame or Reveal?
You can, and it creates a cohesive, finished look, but it depends on your window type. For recessed windows, papering the reveal faces looks intentional and polished; leaving the sill itself unpapered is common since sills take more wear from condensation and daily contact. For flush windows, the “frame” is really just architrave trim, which typically stays painted rather than papered.
Where Should You Avoid Putting Wallpaper?
Avoid unprotected wallpaper in areas with heavy moisture exposure, like directly on a window sill that collects condensation, or in spots with constant direct water contact. Textured or heavily damaged wall surfaces also need skim-coating or repair before wallpaper goes up, since imperfections show through most papers once they’re dry.
What Is the Current Trend in Window Wall Treatments?
Bold, large-scale patterns and scenic murals around window openings have grown popular, often used to frame a view rather than compete with it. Peel-and-stick formats have also become a dominant trend for window areas specifically, since the format allows repositioning during the trickiest part of any window job: the fold into the reveal.
How Long Does It Take to Wallpaper Around a Window?
A single flush window with peel-and-stick paper is a reasonable weekend project for most homeowners once the wall strip is already hung. Recessed windows with multiple folds and corner patches can take a few hours per opening, especially on a first attempt.


Leave a comment