

The Wallpaper Overlap Method: Double-Cut for Seamless Seams
The wallpaper overlap method, known in the trade as double-cutting, involves hanging two adjacent panels so they overlap by a set amount, then slicing through both layers in a single vertical pass. The result is a factory-fresh edge on each side of the seam, matched precisely and free of the millimeter irregularities that hand-butting creates. Professional paperhangers call it the gold standard for invisible seams, and for good reason: it works on patterned murals, outside corners, uneven walls, and anywhere strong side lighting will expose a sloppy joint.
Use the double-cut overlap method when:
- Hanging a high-contrast or repeating pattern where seam alignment is visible from across the room
- Working around outside or inside corners where walls are not perfectly plumb
- Installing in rooms with strong grazing light (windows, sconces, or raking ceiling fixtures)
- Hanging large scenic murals where panel continuity matters most
Table of Contents
- How does double-cutting differ from butt-joining?
- When should you use the overlap method?
- What tools and materials do you need?
- How to double-cut traditional paste wallpaper step by step
- How do you handle overlaps with peel-and-stick wallpaper?
- How much overlap should you leave, and when do you cut?
- How do you fix visible seams, gaps, and other common problems?
- Why does double-cutting produce an invisible seam?
- Wallsneedlove installation resources and product compatibility
- Key Takeaways
- The case for double-cutting in high-visibility spaces
- Custom murals and wallpaper designed for clean installs
- Sources and further reading
How does double-cutting differ from butt-joining?
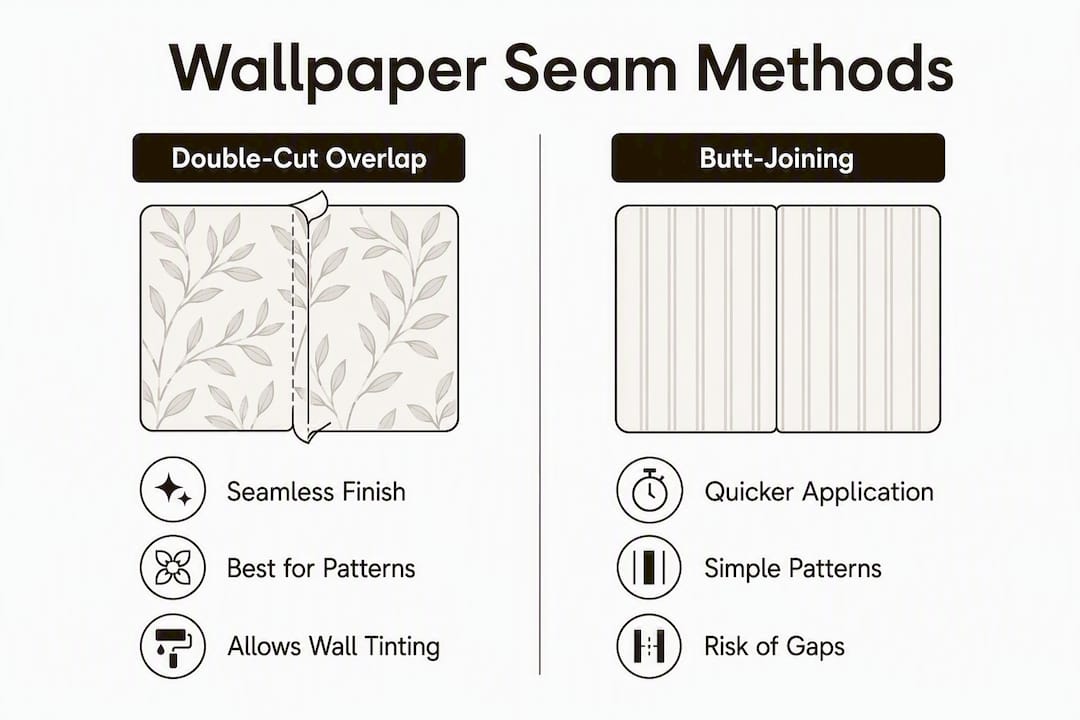
The butt-join method places two panel edges exactly side by side, relying on factory-cut edges to meet cleanly. Double-cutting intentionally layers one panel over the other, then removes the overlap with a single cut through both sheets.
Pros of double-cutting:
- Hides edge irregularities from trimming or handling
- Compensates for slight shrinkage as paste dries
- Produces a tighter seam under direct or raking light
- Corrects for walls that are not perfectly plumb
Cons of double-cutting:
- Uses a small extra amount of paper at each seam
- Requires sharp cutting tools and careful blade handling
- Generates slightly more waste than butt-joining
For seamless scenic murals or any wall with a strong pattern repeat, double-cutting is the better choice. Butt-joining works well on uniform, non-directional patterns and smooth, plumb walls where speed matters more than seam perfection. A quick, uniform bedroom accent wall in a solid texture, for example, is a reasonable candidate for butt-joining. A large wallpaper in an open-plan living space with multiple sightlines almost always benefits from the double-cut approach.
When should you use the overlap method?
The decision comes down to four factors: pattern complexity, wall condition, lighting, and material type.
Scenarios that favor double-cutting:
- High-contrast patterns or large repeats where a misaligned seam is immediately visible
- Uneven walls or corners that prevent a clean butt-join
- Rooms with strong natural or artificial side lighting
- Multi-panel scenic murals where image continuity is the priority
Scenarios where you should avoid double-cutting:
- Thin or delicate peel-and-stick films that tear easily under a blade
- Papers with a very short pattern repeat on smooth, plumb walls where butt-joining is reliable
- Any material whose manufacturer explicitly advises against cutting through two layers
A simple decision guide: if the wall is plumb, the pattern is simple, and the lighting is even, butt-joining is fine. If any one of those conditions fails, default to double-cutting. Always check the manufacturer’s installation instructions before choosing a method, since some specialty papers have specific seam requirements.
What tools and materials do you need?
Gathering the right tools before you start prevents mid-job problems. For complete guidance on every item, the Wallsneedlove installation tools guide covers usage tips alongside the checklist below.
Essential tools:
- Sharp utility knife or single-edge razor blade
- Extra blades (change frequently — a dull blade tears instead of cuts)
- Long metal straightedge or drywall T-square (48" minimum)
- Seam roller
- Smoothing brush or plastic smoother
- Plumb line or 48" level
- Paste or adhesive appropriate to your paper type
- Sharp scissors for trimming top and bottom edges
- Cutting mat for off-wall trimming
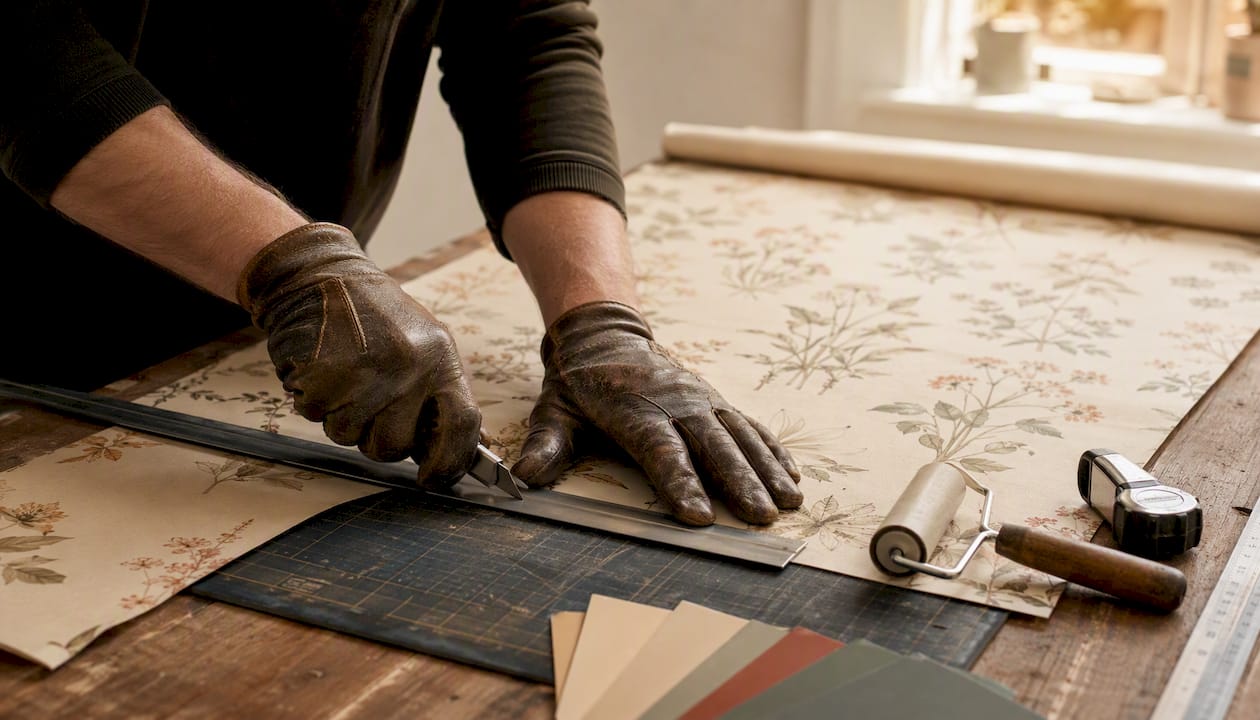
Blade advice: A fresh blade is not optional for a clean double-cut. A dull blade drags through the paper, compresses the edges, and leaves a ragged seam that is visible after drying. Change blades every two to three panels, or sooner on thick vinyl.
Safety notes: Always secure the straightedge firmly before cutting. Cut away from your body in a single, controlled stroke. Keep a cutting mat under the work when trimming on a table, and keep children and pets away from the work area during any cutting step.
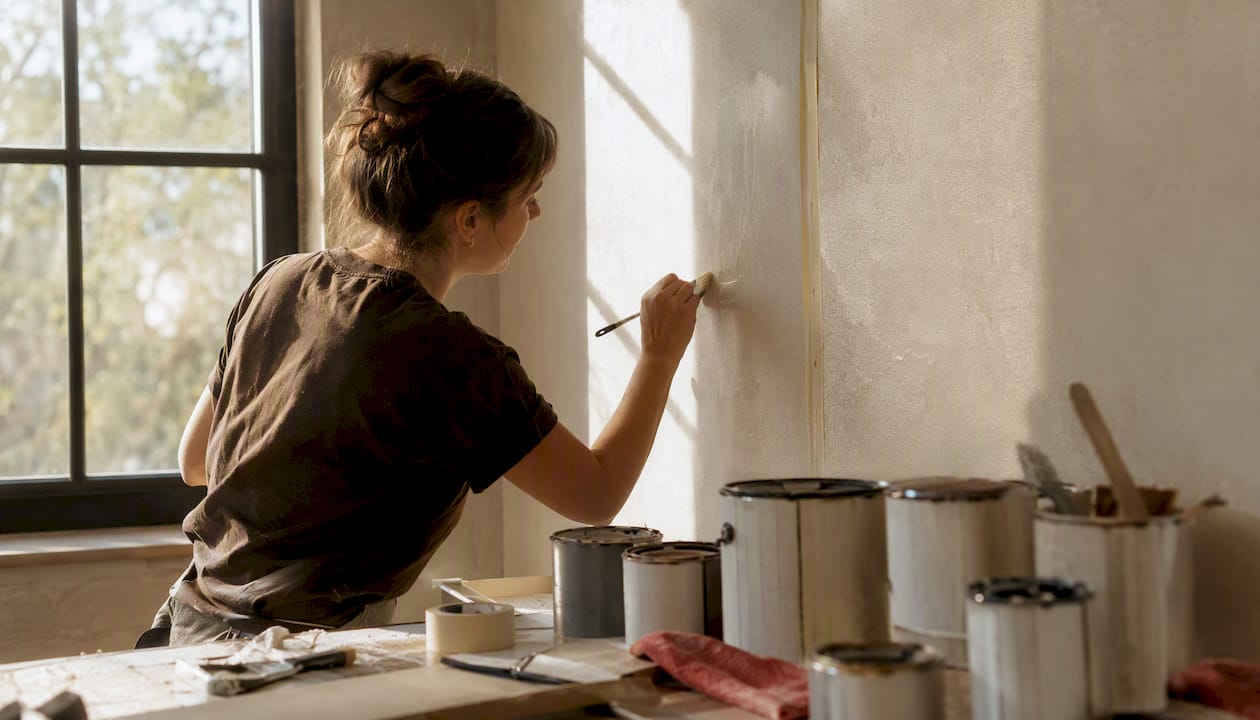
Pro Tip: Before hanging the first panel, tint the wall behind each planned seam location to match the wallpaper’s base color. If panels shrink slightly while drying, no white line appears at the joint. This is one of the most reliable tricks professional installers use on every job.
How to double-cut traditional paste wallpaper step by step
This procedure applies to both paste-the-wall and paste-the-paper installations. Using a sealer or primer before pasting helps panels slide and align cleanly; skipping primer can cause paste to soak into drywall and make repositioning nearly impossible.
- Prep the wall. Apply a sealer or primer and let it dry fully. Tint the wall at each planned seam location to match the wallpaper’s base color.
- Mark a plumb line. Use a level or plumb bob to draw a true vertical line for the factory edge of the first panel. Starting from a plumb reference keeps every subsequent strip aligned.
- Hang the first panel. Apply paste to the wall or paper per the manufacturer’s instructions. Position the factory edge on the plumb line, smooth from center outward, and trim the top and bottom.
- Hang the second panel with overlap. Align the pattern first, then let the second panel overlap the first by 1/4" to 1" depending on material thickness and pattern. Smooth the second panel fully before cutting.
- Position the straightedge. Place a long metal straightedge vertically through the center of the overlap zone. Press it firmly against the wall.
- Make the double-cut. Using a fresh blade, draw the knife along the straightedge in one continuous stroke, cutting through both layers. Apply steady, even pressure.
- Remove the waste strips. Carefully peel away the top waste strip, then lift the edge of the top panel and remove the bottom waste strip from behind it.
- Seat the seam. Press both edges flat with a seam roller, applying light, even pressure. Rolling the seam firmly promotes adhesion and prevents edges from lifting as paste dries.
- Wipe excess paste. Use a damp sponge to clean any paste from the face of the paper immediately.
- Check alignment. Step back and check the seam under raking light before moving to the next panel.
Pro Tip: Change your blade after every double-cut, not just every few panels. The cut passes through two layers of material, which dulls the edge faster than a standard trim cut. A sharp blade on every seam is what separates a professional result from a visible joint.
For visual guidance, consult demo videos and the installation resources available at Wallsneedlove.
How do you handle overlaps with peel-and-stick wallpaper?
Peel-and-stick wallpaper behaves differently from paste. The adhesive grabs quickly, the film can stretch or crease under tension, and repositioning is limited once the panel contacts the wall. Many experienced installers prefer paste-the-wall for reliable alignment precisely because peel-and-stick leaves less room for adjustment.
That said, double-cutting peel-and-stick is possible with the right approach.
Before you hang:
- Read the manufacturer’s instructions. Many peel-and-stick panels are printed with a deliberate 1" overlap built into the design, which tells you the intended seam zone.
- Check whether the manufacturer recommends double-cutting or a simple overlap-and-trim approach.
- Test on a wallpaper sample or a scrap piece before committing to a full wall. A small overlap-and-cut test behind a removable panel reveals how the film responds to the blade.
During the cut:
- Use slower, more deliberate strokes than you would on paste paper. Rushing causes the film to shift under the straightedge.
- Hold the straightedge with firm, consistent pressure throughout the entire cut.
- Avoid pulling the blade at an angle; keep it perpendicular to the wall surface.
Thin or delicate peel-and-stick films that tear easily are not good candidates for double-cutting. In those cases, follow the manufacturer’s overlap guidance and use a simple trim rather than a through-cut.
How much overlap should you leave, and when do you cut?
| Material type | Recommended overlap | When to cut | Shrinkage note |
|---|---|---|---|
| Traditional paste (standard) | 1/4"–1/2" | After smoothing, before paste fully sets | Expect slight shrinkage; double-cut compensates |
| Heavy mural vinyl (paste) | 1/2"–1" | After smoothing, while paste is still workable | Heavier material shrinks less but needs a firm cut |
| Peel-and-stick (standard film) | Per manufacturer (often 1") | Immediately after smoothing both panels | Minimal shrinkage; cut promptly to avoid adhesive lock |
| Peel-and-stick (thick vinyl) | 1/2"–1" | Immediately after smoothing | Same as standard film; check product instructions |
The timing of the cut matters as much as the overlap amount. For paste wallpaper, cut while the paste is still workable but after both panels are fully smoothed. Waiting too long lets the paste set, which makes it harder to remove the waste strip cleanly and increases the risk of tearing. For peel-and-stick, cut promptly after smoothing both panels, since the adhesive continues to bond the longer it sits.
Drying shrinkage is the main reason double-cutting outperforms butt-joining on paste papers. As pasted wallpaper dries, it contracts slightly. A butt-joined seam can open by a fraction of a millimeter, revealing the wall behind it. A double-cut seam, combined with a tinted wall behind it, stays invisible through the drying process.
When planning your wallpaper order, account for the overlap allowance at each seam. On a wall with multiple panels, the extra material adds up, so order accordingly.
How do you fix visible seams, gaps, and other common problems?
Even careful installations run into issues. Most are fixable without rehanging the entire wall.
- Visible seam after drying: Press the seam with a seam roller and apply a thin bead of seam repair adhesive under any lifted edge. If the wall color is showing through, tinting the wall before the next install prevents this on future panels.
- Small gap between panels: Slide a thin artist’s brush with a small amount of paste under each edge, press flat, and roll with a seam roller. For peel-and-stick, use a compatible adhesive touch-up product.
- Bubbling: Lift the affected area gently, smooth out the bubble, and re-adhere. Avoid stretching the paper while lifting. On paste paper, add a small amount of fresh paste if the adhesive has dried out.
- Pattern mismatch: A small offset at one seam can sometimes be corrected by gently repositioning the panel while paste is still wet. A large mismatch usually means rehanging the nearest strip, recut at a less obvious point in the pattern repeat.
- Torn edge from a dull blade: If the cut tore rather than sliced cleanly, apply seam adhesive to both edges, press flat, and roll. If the tear is significant, partial removal and rehanging of the affected strip is the cleaner fix.
When to re-double-cut: If the first cut was slightly off-plumb or the waste strip did not release cleanly, you can re-cut provided the paste has not fully set. Use a fresh blade and reposition the straightedge.
When to call a professional: Persistent tearing across multiple panels, a large misaligned mural run, or a compromised substrate (soft drywall, peeling paint) are signs that professional help will save more material and time than continued DIY attempts. Avoiding common installation mistakes from the start reduces the likelihood of reaching this point.
Why does double-cutting produce an invisible seam?
The mechanics are straightforward. When two panels overlap and a single blade passes through both layers simultaneously, the cut edge of the top panel and the cut edge of the bottom panel are geometrically identical. They were created by the same blade stroke, so they fit together without any gap or ridge.
Butt-joining relies on factory edges, which are consistent but not perfect. Over a run of panels, small inconsistencies accumulate. By the fifth or sixth panel, the cumulative error can be visible, especially under raking light. Double-cutting eliminates those millimeter irregularities that build up when edges are placed by hand.
Shrinkage compounds the problem for butt-joined seams. As paste dries, each panel contracts slightly toward its center. Two panels that were perfectly butted when wet can show a hairline gap when dry. A double-cut seam, where both edges were cut simultaneously and the wall behind is tinted to match, stays closed through the drying cycle.
Pro Tip: On walls with outside corners or uneven surfaces, double-cutting is especially valuable. Corners that are not perfectly square cause butt-joined panels to pull away or show misaligned repeats. Wrapping the paper around the corner and double-cutting re-establishes a tight, plumb seam on the return wall.
Wallsneedlove installation resources and product compatibility
Wallsneedlove offers both peel-and-stick and traditional paste wallpaper and wall murals, and provides installation guides to help customers choose the right seam method for their specific product.
Product compatibility notes:
- Multi-panel scenic murals (such as the Java Mountain wall mural): double-cutting is the recommended approach for achieving continuous image flow across panels. The overlap zone aligns the pattern before the cut removes the excess.
- Geometric and seamless repeat patterns — both double-cut and butt-join can work depending on wall condition. Smooth, plumb walls may allow clean butt-joining; uneven walls benefit from double-cutting.
All Wallsneedlove wallpapers carry Greenguard Gold certification, confirming low chemical emissions for indoor environments. Installation guides are available on the Wallsneedlove website for material-specific overlap and seam instructions.
Key Takeaways
The double-cut overlap method is the most reliable technique for invisible wallpaper seams, particularly on patterned murals, uneven walls, and rooms with strong side lighting.
| Point | Details |
|---|---|
| Double-cut is the gold standard | Cutting through both overlapping layers simultaneously creates matched edges that butt-joining cannot replicate. |
| Overlap amount varies by material | Leave 1/4"–1/2" for standard paste paper, 1/2"–1" for heavy mural vinyl, and follow manufacturer guidance for peel-and-stick. |
| Blade sharpness determines seam quality | Change blades after every double-cut; a dull blade tears edges and creates a visible seam. |
| Tint the wall behind seams | Matching the wall color to the wallpaper’s base prevents white lines from appearing if panels shrink while drying. |
| Wallsneedlove murals suit double-cut installs | Multi-panel murals like the Java Mountain wall mural are designed for overlap-and-cut installation with product-specific guides available on the Wallsneedlove site. |
The case for double-cutting in high-visibility spaces
The conventional advice for first-time wallpaper installers is to keep it simple: butt-join the panels, use a seam roller, and call it done. That advice is reasonable for a low-traffic hallway or a wall that nobody looks at closely. For any wall that gets real attention, it falls short.
Double-cutting takes a few extra minutes per seam. The payoff is a joint that disappears under direct light, holds through the drying cycle, and does not open up six months later when the paper has fully settled. The technique is not complicated, but it does require a sharp blade, a steady hand, and the patience to cut once rather than rush.
The other underrated factor is wall prep. Tinting the substrate behind seams costs almost nothing and prevents the most common complaint after a paste installation: the faint white line that appears as panels dry. Combined with a clean double-cut, it makes the difference between a wall that looks professionally installed and one that clearly was not.
For DIYers tackling their first patterned mural, the recommendation is straightforward: read the product instructions, gather the right tools, test the overlap-and-cut on a scrap piece, and default to double-cutting wherever the seam will be visible. The method exists precisely because butt-joining is not reliable enough for demanding installations.
Custom murals and wallpaper designed for clean installs
Wallsneedlove custom-printed wallpapers and wall murals are built for exactly the kind of installation this guide covers. Multi-panel scenic murals like the Java Mountain wall mural are printed with panel continuity in mind, making them well-suited to the double-cut overlap method. Peel-and-stick options, including geometric and repeating patterns, come with product-specific overlap guidance so you know the recommended seam approach before you hang the first panel.

Orders are custom-made within 1–3 days, and every product carries Greenguard Gold certification for indoor air quality. If you want professional measurement and installation support alongside your order, professional install services are available as a complement to the DIY guides on the Wallsneedlove site. Browse the full collection and access installation resources at Wallsneedlove.
Sources and further reading
The following resources provide additional procedural guidance, manufacturer instructions, and installation references for the techniques covered in this article. Always consult your specific product’s manufacturer instructions first, since overlap allowances and cutting recommendations vary by material.
- Double-Cut Wallpaper for Perfect Overlap Seams — Fine Homebuilding: step-by-step demonstration of the double-cut method by professional paperhanger John Clift
- Best Practices for Installing Wallpaper — Fine Homebuilding: corner handling, re-cutting technique, and guidance for out-of-plumb surfaces
- How to Hang Wallpaper for the First Time — Interior Design Coterie: primer and paste-the-wall technique, peel-and-stick vs. paste comparison
- Wallpaper Installation: 10 Tips for Newbies — Driven by Decor: pro installer tips including wall tinting behind seams
- What Are 10 DIY Wallpaper Mistakes to Avoid — Networx: common installation errors and remedies for first-time installers


Leave a comment