Wallpaper Installation Tools: Your Complete DIY Guide
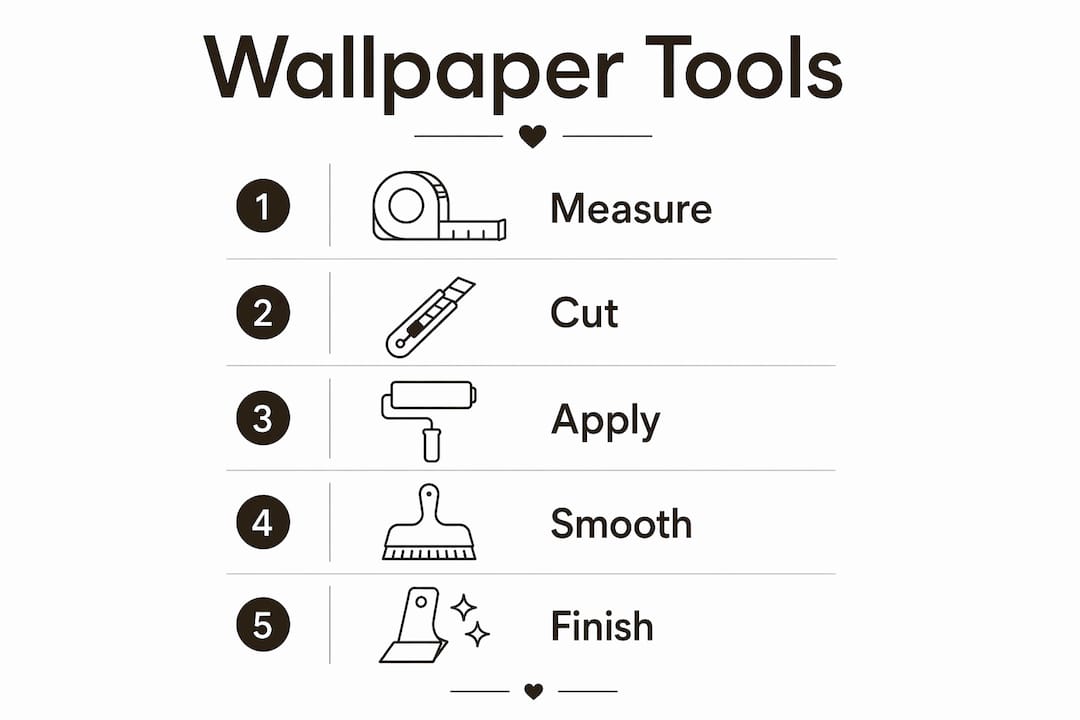
Wallpaper installation requires a specific set of tools designed for measuring, cutting, applying adhesive, smoothing, and finishing to achieve a clean, professional result. Knowing what tools are needed for wallpaper installation before you start saves time, prevents costly mistakes, and produces a finish that looks like professional work. The core categories are measuring tools, cutting tools, adhesive applicators, smoothing tools, and finishing supplies. Skipping any category or substituting makeshift alternatives leads to misaligned patterns, ragged edges, and bubbles that are difficult to fix after the paste dries.
What tools are needed for wallpaper installation?
The complete tools needed for wallpaper installation fall into five categories: measuring and layout, cutting, adhesive application, smoothing, and finishing. Each category serves a distinct function, and gaps in any one of them show up clearly in the finished wall. Makeshift substitutes such as kitchen knives or credit cards consistently produce poor results compared to dedicated wallpaper tools. Investing in the right set before you start is the single most effective way to get a clean outcome on a DIY project.
The five tool categories work together as a system. A perfect cut means nothing if the adhesive is applied unevenly. Even adhesive means nothing if you lack a smoothing tool to push out air pockets. Think of the list below as a checklist, not a menu of options.
Measuring and layout tools for accurate wallpaper alignment
Accurate measurement is the foundation of every successful wallpaper job. Beginners consistently underestimate this step and pay for it with cascading misalignment across every strip that follows the first.
The core measuring and layout tools are:
- Tape measure. Measure wall height and add a 4-inch trim margin per strip (2 inches at the top and 2 inches at the bottom) to allow for pattern matching and clean trimming at the ceiling and baseboard.
- Level or plumb line. Most walls are not perfectly square. A vertical plumb line for the first strip prevents the entire pattern from drifting as you work across the wall.
- Pencil. Mark your plumb line and panel positions directly on the wall. Pencil marks disappear under wallpaper and do not bleed through paste.
The plumb line step surprises many first-time installers. A wall that looks straight to the eye can be off by a full inch over eight feet. That small deviation compounds with every strip and produces a visibly skewed pattern by the time you reach the far corner.
Pro Tip: Measure each strip individually rather than cutting all strips at once. Wall height can vary by a quarter inch or more from one end of a room to the other.
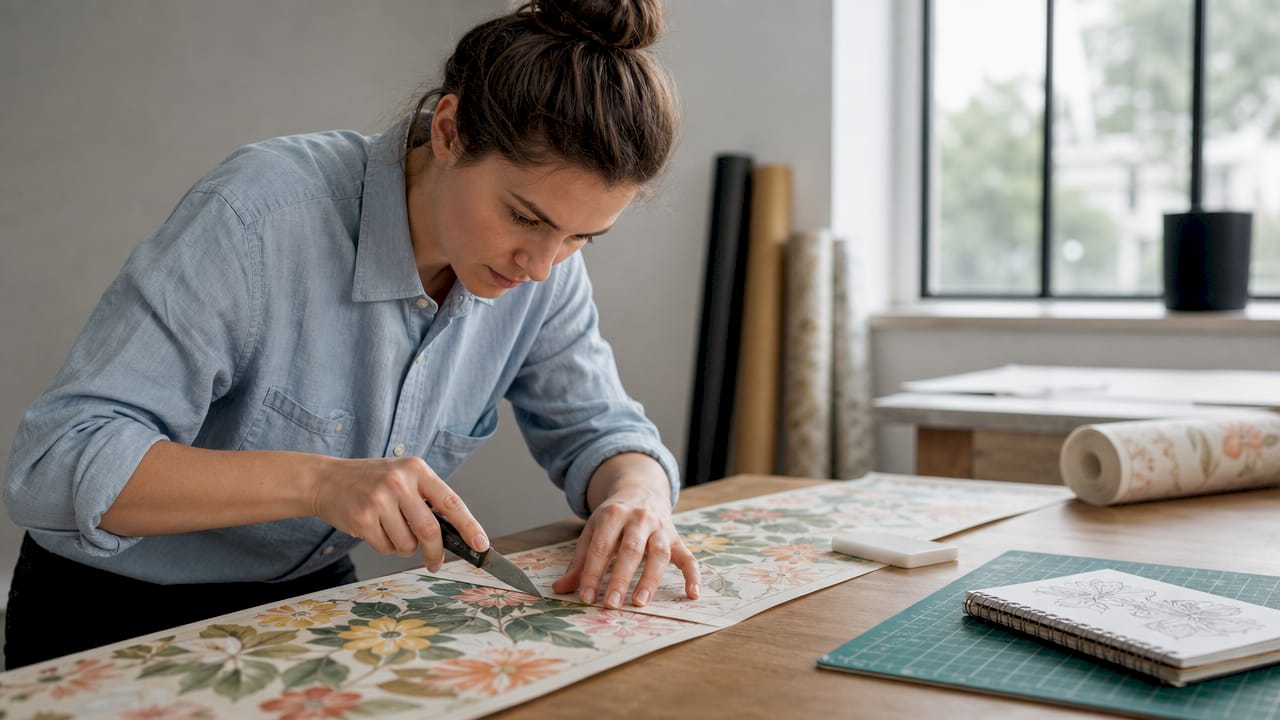
Cutting tools for precise wallpaper trimming
Clean cuts define the quality of a finished installation. Ragged or torn edges at seams and trim lines are visible from across the room and cannot be corrected after the paste sets.
The cutting tools needed for a DIY wallpaper install are:
- Sharp utility knife or snap-off blade knife. A sharp blade combined with a metal straight edge produces clean, controlled cuts. Snap-off blades are practical because a fresh edge is always one click away.
- 6-inch metal straight edge or ruler. Never use a plastic ruler as a cutting guide. Metal holds its edge under knife pressure and keeps the cut line true.
- Putty knife. Use a putty knife to hold wallpaper against the wall or molding while trimming the excess at the ceiling and baseboard. It protects the surface and gives the utility knife a clean stopping point.
Blade sharpness is the variable most installers overlook. A dull blade drags and tears the paper fibers instead of slicing them. Change blades more often than you think necessary, especially when cutting vinyl-coated or heavier wallpapers.
Pro Tip: Cut slowly and steadily with light, consistent pressure. One controlled pass beats two rushed passes every time.
How do adhesive application tools affect the final result?
Adhesive application tools determine whether wallpaper bonds flat and stays flat. Uneven paste causes bubbles, lifting edges, and pattern distortion that appear hours or days after installation.
Follow these steps for correct adhesive application:
- Choose the right applicator. A wide paste brush works well for traditional wallpaper paste. A short-nap paint roller covers large panels faster and applies a more even coat on smooth surfaces.
- Apply paste edge to edge. Even adhesive coverage across the entire wallpaper surface is critical. Dry spots at the edges are the most common cause of lifting seams.
- Avoid overloading. Too much paste saturates the paper, causes it to stretch, and makes pattern matching nearly impossible. A thin, even coat is the target.
- Use the booking technique. After applying paste, fold the pasted sides of the strip together without creasing the fold. Let the strip rest for the time specified by the manufacturer. This step, called booking, allows the paper to relax and expand evenly before it goes on the wall.
- Adjust for pre-pasted wallpaper. Pre-pasted wallpaper is activated by water rather than brush-applied paste. Use a water tray or damp sponge to activate the adhesive. For a stronger bond, many installers apply a thin layer of additional paste over the pre-applied adhesive. The Wallsneedlove wallpaper adhesive guide covers adhesive type selection in detail.
The booking technique is one of the most skipped steps in DIY installations. Skipping it causes the paper to expand unevenly on the wall, which distorts the pattern and creates bubbles that no amount of smoothing will fully remove.
Smoothing and finishing tools for a flawless result
Smoothing tools remove air pockets and secure seams. Finishing tools clean up excess adhesive and trim the final edges. Both are required for a professional-looking result.
Smoothing tools
- Plastic smoothing brush or squeegee. Start at the center of each strip and push air bubbles outward toward the edges. Working from the center out prevents trapping air under the paper.
- Seam roller. A seam roller applies light, firm pressure along the joints between strips. This step bonds the edges without stretching or damaging the paper surface.
Finishing tools
- Sponge and bucket of clean water. A damp sponge removes excess adhesive from the wallpaper surface, molding, and ceiling line as you go. Dried paste is much harder to remove and can stain light-colored papers.
- Utility knife and straight edge. Trim the excess paper at the ceiling and baseboard after each strip is smoothed and positioned. Do not wait until all strips are hung.
The table below summarizes the smoothing and finishing tools and their specific functions:
| Tool | Function |
|---|---|
| Plastic smoothing brush | Pushes air bubbles from center to edges |
| Squeegee | Flattens paper on smooth or non-porous surfaces |
| Seam roller | Bonds strip edges without surface damage |
| Damp sponge | Removes excess adhesive during installation |
| Utility knife | Trims ceiling and baseboard excess cleanly |
Pro Tip: Wipe each strip with a clean, damp sponge immediately after smoothing. Paste that dries on the wallpaper surface is visible under certain lighting conditions, even on patterned papers.
Additional tools and preparation tips that make installation easier
A few supplementary items separate a frustrating installation from a smooth one. None of these are expensive, and all of them solve real problems.
- Step ladder. A stable step ladder is required for reaching the top of the wall and the ceiling line. An unstable ladder makes precise trimming at the ceiling nearly impossible.
- Trestle table or flat work surface. You need a clean, flat surface to measure, paste, and book each strip. A trestle table at waist height prevents back strain and keeps paste off the floor.
- Painter’s tape. Use painter’s tape to hold strips temporarily against the wall while checking pattern alignment before committing to the paste. This is especially useful for large-repeat patterns and scenic murals.
- Wallpaper sizing or primer. On new drywall or previously painted surfaces, a sizing coat improves adhesion and makes repositioning easier during installation. Check the wallpaper manufacturer’s recommendations before skipping this step.
- Gentle cleanser. Keep a mild soap solution nearby to clean hands and tools during the job. Paste-covered hands transfer adhesive to the wallpaper face, which attracts dust and leaves marks.
Organizing all tools on a trestle table before the first strip goes up saves repeated trips across the room. Paste dries quickly, and a strip left unattended while you search for a sponge can become difficult to reposition. The Wallsneedlove wallpaper ordering guide includes a full stage-by-stage breakdown of which tools to use at each point in the process.
Key Takeaways
The right tools for wallpaper installation cover five categories: measuring, cutting, adhesive application, smoothing, and finishing, and skipping any one of them produces visible errors that cannot be corrected after the paste dries.
| Point | Details |
|---|---|
| Measure with a margin | Add 4 inches per strip (2 top, 2 bottom) for pattern matching and clean trimming. |
| Start with a plumb line | Walls are rarely square; a vertical reference line prevents pattern drift across the room. |
| Change blades often | Dull blades tear wallpaper; fresh snap-off blades produce clean, controlled cuts. |
| Book the paste | Fold pasted strips and let them rest before hanging to allow even expansion. |
| Clean as you go | Wipe excess adhesive with a damp sponge immediately to prevent staining and dried paste buildup. |
What working with wallpaper tools has taught us at Wallsneedlove
The most common mistake Wallsneedlove sees from DIY homeowners is not buying the wrong tools. It is starting without all the tools present and then improvising mid-installation. A strip of wallpaper with paste on it does not wait. Once you are committed to the wall, you need every tool within arm’s reach.
The second pattern worth noting: homeowners who invest in a dedicated seam roller and a quality plastic smoother consistently report better results than those who use a credit card or a damp cloth as substitutes. The difference is control. A seam roller applies consistent pressure along the full length of a seam. A credit card applies uneven pressure and can crease or stretch thinner papers.
The booking technique is the single most underused step in DIY wallpaper installation. Skipping it is the primary cause of the bubbles and distortion that homeowners blame on the wallpaper itself. The paper is rarely the problem. Rushing the paste step is.
The honest advice: buy the full tool kit once, store it properly, and use it for every project. The cost of a complete set of wallpaper tools is a fraction of the cost of replacing a damaged roll or repainting a wall after a failed installation.
— Wallsneedlove
Wallsneedlove wallpaper styles worth installing right
Wallsneedlove carries a wide range of wallpaper styles suited to any room and skill level, from bold scenic wall murals to geometric patterns and faux textures. Every design is available in peel-and-stick or traditional paste formats, and orders are custom made within 1–3 days. All products carry Greenguard Gold certification, making them safe for bedrooms and family spaces.
The removable wallpaper collection is a practical starting point for first-time installers. Peel-and-stick formats are forgiving during repositioning and require fewer tools than traditional paste applications. Browse the full range at Wallsneedlove and use the installation guides to match the right tools to the right product before your order arrives.
FAQ
What are the basic tools needed to hang wallpaper?
The basic tools for hanging wallpaper are a tape measure, level or plumb line, utility knife, metal straight edge, paste brush or roller, plastic smoother, seam roller, and a damp sponge. These cover every stage from measuring to finishing.
Do I need special tools for peel-and-stick wallpaper?
Peel-and-stick wallpaper requires fewer tools than traditional paste wallpaper. A level, plastic smoother or squeegee, and a utility knife for trimming are the primary tools needed for a clean peel-and-stick installation.
How often should I change the blade on my utility knife?
Change the blade after every 2–3 strips, or immediately when you feel the knife dragging rather than slicing cleanly. Frequent blade replacement prevents ragged cuts and torn edges.
Why do I need a plumb line if my walls look straight?
Most walls are not perfectly square, even when they appear straight to the eye. A vertical plumb line for the first strip prevents the pattern from drifting and becoming visibly skewed by the time you reach the far corner of the room.
What is the booking technique in wallpaper installation?
Booking is the process of folding a pasted wallpaper strip paste-side to paste-side and letting it rest before hanging. This allows the paper to expand evenly from the moisture in the paste, which prevents bubbles and pattern distortion on the wall.


Leave a comment