

How to Put Wallpaper on Glass: DIY Methods That Work
Wallpaper on glass is workable, and for most DIY projects, peel-and-stick is the right starting point. For permanent installs, an adhesion-promoting primer plus a contact or dispersion adhesive is the reliable path. Wallsneedlove offers both peel-and-stick and traditional paste options, and ROMAN Decorating Products confirms that adhesion-promoting primers formulated for non-porous surfaces are often a deciding factor for a durable permanent result.
Quick method comparison:
- Peel-and-stick: Fastest, lowest risk, renter-friendly, easy to remove, best for mirrors and smooth glass panels
- Double-sided tape: Works for lightweight craft paper on small pieces only; not suitable for full-size panes
- Primer + contact or dispersion adhesive: Required for heavy, textured, or exterior-facing installs; longer setup, harder to reverse
- Specialty glass-fiber wallcoverings: Designed for wet environments with waterproof primer systems; professional installation usually recommended
Key Takeaways
Peel-and-stick is the right first choice for most DIY glass and mirror projects; permanent installs require an adhesion-promoting primer plus a contact or dispersion adhesive matched to the wallcovering weight.
| Point | Details |
|---|---|
| Method selection | Use peel-and-stick for temporary, renter-safe installs; use primer plus adhesive for permanent, high-humidity applications. |
| Surface prep | Clean glass with isopropyl alcohol and allow full dry time before any adhesive or primer is applied. |
| Pane joints | Never bridge wallpaper across non-contiguous glass panes; treat each pane as a separate surface. |
| Removal | Peel-and-stick lifts cleanly at a low angle with gentle heat; permanent adhesive requires solvent and careful scraping. |
| Wallsneedlove | Custom-sized, Greenguard Gold certified peel-and-stick options are a practical fit for mirrors, cabinet glass, and smooth interior panes. |
Table of Contents
- When should you use temporary vs permanent methods?
- Which wallpaper materials and adhesives actually work on glass?
- Preparation checklist: clean, measure, and test before you start
- How to apply peel-and-stick wallpaper to mirrors, windows, and smooth glass
- How to make a permanent installation using primer and adhesive
- Wallpapering framed mirrors, cabinet doors, and small glass panes
- How to remove wallpaper from glass and clean up adhesive residue
- Common problems: bubbles, lifting edges, and visible seams
- When does a glass wallpaper project need a professional?
- Wallsneedlove peel-and-stick options for glass projects
- What Wallsneedlove recommends based on customer patterns
- Wallsneedlove peel-and-stick wallpaper for your next glass project
- Sources
When should you use temporary vs permanent methods?
Choosing the right method depends on the project, not personal preference. Peel-and-stick wallpaper is the lowest-risk option for renters and low-commitment makeovers because it removes cleanly in most cases and requires minimal surface prep.
Use peel-and-stick when:
- You rent and need a damage-free solution
- The project is a framed mirror, cabinet glass door, or small smooth pane
- You want to swap designs seasonally or test a pattern before committing
- The area has low moisture (living rooms, bedrooms, hallways)
Use double-sided tape when:
- The piece is very small and lightweight (craft paper on a shadow box, for example)
- No other adhesive is practical for the scale
Use primer + permanent adhesive when:
- The glass faces high humidity long-term (bathrooms without proper ventilation, laundry rooms)
- The wallcovering is heavy, textured, or a specialty glass-fiber product
- The install is exterior-facing or in a space where the paper must hold for years
- You own the space and removal is not a concern
Pro Tip: *Before committing to any method, apply a small test patch in an inconspicuous corner. Check it after 24 hours for adhesion, bubbling, or lifting.
Which wallpaper materials and adhesives actually work on glass?
Peel-and-stick self-adhesive wallpaper is the simplest option for covering glass because its backing is designed for smooth, non-porous surfaces and typically removes cleanly. Vinyl-backed peel-and-stick products are the most forgiving: they resist moisture better than paper-backed options and reposition easily during installation.
For permanent installs, the adhesive choice matters more than the paper type.
Adhesive options for glass:
- Adhesion-promoting primer: Changes the chemical interface of the glass surface so adhesives grip properly. Apply before any permanent adhesive or paste. Primers formulated for non-porous surfaces (tile, glass, melamine) are the correct category.
- Dispersion adhesive (paste-the-wall type): Water-based, lower odor, suitable for lighter wallcoverings on primed glass. Drying takes longer on glass than on drywall because paste cannot be absorbed into a non-porous surface.
- Contact adhesive: Solvent-based or water-based; bonds on contact. Better for heavier papers and textured wallcoverings. Requires ventilation and careful positioning since repositioning after contact is difficult.
- Double-sided tape: Suitable only for very lightweight paper on small craft projects. Not reliable for full-size panes.
When glass panes are segmented, lining paper applied first can smooth the surface and reduce the visibility of joins. For wet environments, specialty glass-fiber wallcoverings designed for tile and glass substrates, applied over a waterproof primer system, are the high-performance option.
Safety note: Solvent-based contact adhesives require open windows and cross-ventilation. Work in temperatures between 60°F and 80°F. Avoid application in direct sunlight or on cold glass, as both affect cure time and adhesion quality.
Pro Tip: Check the adhesive manufacturer’s technical data sheet for minimum application temperature. Many dispersion adhesives fail below 55°F, and the bond won’t recover even after the room warms up.
Preparation checklist: clean, measure, and test before you start
Skipping prep is the most common reason wallpaper fails on glass. A clean, dry, grease-free surface is non-negotiable.
Step-by-step prep:
- Clean the glass thoroughly. Wipe with isopropyl alcohol (70% or higher) to remove grease, fingerprints, silicone residue, and cleaning product film. Let it dry completely, at least 15–20 minutes.
- Remove hardware and trim. Take off mirror clips, door handles, or frame hardware that would interfere with clean edges.
- Measure the glass. Record height and width. Add 1–2 inches on each side for trimming. For patterned paper, calculate the pattern repeat and add that to your total length.
- Plan your layout. Decide whether a single strip covers the pane or whether seams are needed. Center the pattern on the glass before cutting.
- Run a primer compatibility test (permanent installs only). Apply a small amount of adhesion-promoting primer to a hidden corner. Wait the full recommended cure time, typically 12–24 hours, before applying adhesive or paper over it.
- Gather tools before starting. You’ll need: squeegee or smoothing tool, sharp razor or craft knife, metal straightedge, soft microfiber cloth, level or plumb line, and a spray bottle with water (for repositionable peel-and-stick).
Supplies checklist:
- Isopropyl alcohol and lint-free cloths
- Measuring tape and pencil
- Adhesion-promoting primer (permanent installs)
- Appropriate adhesive or peel-and-stick wallpaper
- Squeegee, smoothing brush, or credit card
- Razor blade and metal straightedge
- Painter’s tape for edge protection
Note that non-contiguous glass panes should never have wallpaper bridged across their joints. Each pane must be treated as a separate surface, with paper cut to fit within the pane boundary.
How to apply peel-and-stick wallpaper to mirrors, windows, and smooth glass
Peel-and-stick is the fastest, lowest-risk method for most DIY projects on glass. Careful smoothing with a squeegee or credit card, precise trimming with a razor, and a helper for large pieces reduce bubbles and make peel-and-stick mirror makeovers successful.
Step-by-step installation:
- Clean and dry the glass using isopropyl alcohol. Wait until completely dry.
- Cut your strip to the measured length, adding 1–2 inches for trimming. Pre-cut all strips before peeling any backing.
- Dry-lay the strip against the glass without peeling to confirm alignment and pattern placement.
- Peel 6–8 inches of backing from the top of the strip only. Do not peel the full backing at once.
- Align the top edge using a level or the top frame edge as a guide. Press the top section firmly into place.
- Slowly peel the backing downward while smoothing the paper from the center outward with a squeegee or soft cloth. Work in 6-inch increments.
- Smooth out bubbles immediately as you go. Use the squeegee in firm, overlapping strokes from center to edge.
- Trim excess at edges with a sharp razor and metal straightedge. Score once cleanly rather than sawing.
- Press edges firmly with a smoothing tool. For windows prone to condensation, apply a thin strip of painter’s tape along the bottom edge for the first 48 hours to prevent lifting while the adhesive fully seats.
Bubble and seam management:
- Small bubbles often self-resolve within 24–72 hours as the adhesive settles
- Persistent bubbles: lift the nearest edge, re-smooth, and press back down
- Micro-bubbles: pierce with a fine pin, press flat, and smooth over
- Seams: butt edges tightly without overlapping; a double-cut seam (overlap both strips, cut through both layers, remove the excess) gives the cleanest result
Pro Tip: For large mirror panes, work with a helper. One person holds the strip taut and feeds the backing while the other smooths. Trying to manage a full-length strip alone almost always causes misalignment or creasing.
How to make a permanent installation using primer and adhesive
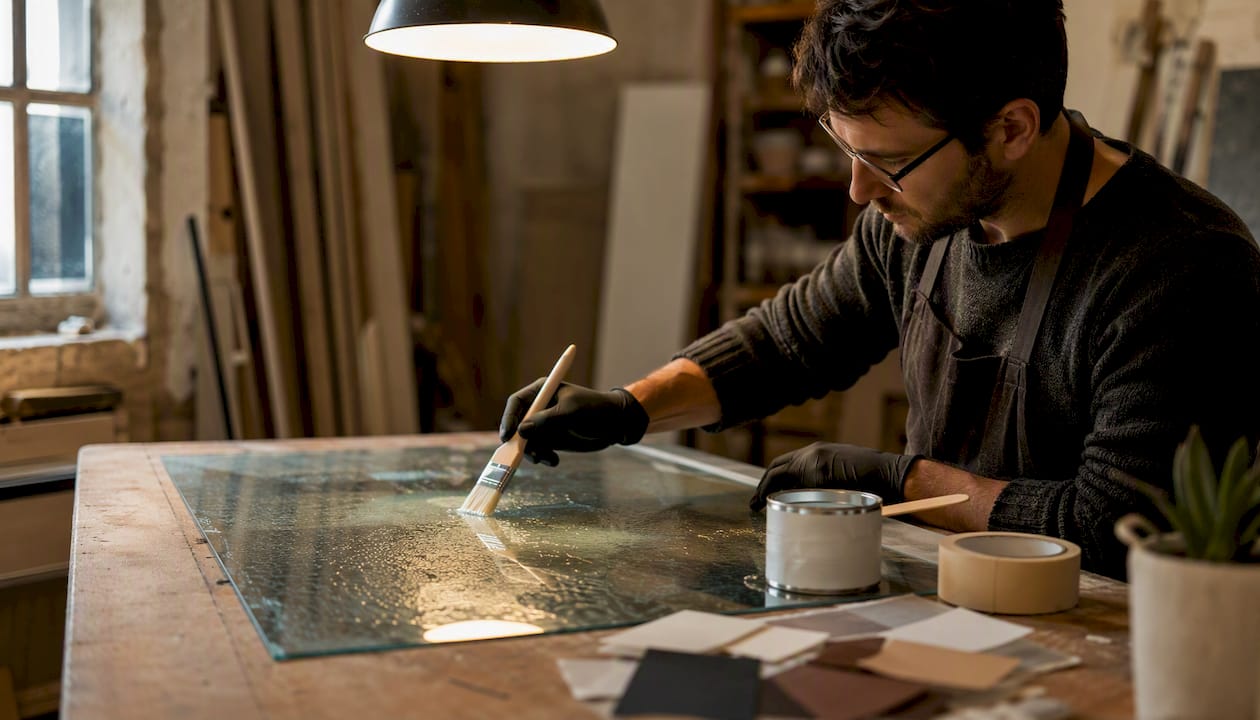
Permanent installs require a primer formulated for non-porous surfaces plus an appropriate adhesive. This approach takes more time and skill, but it holds up in conditions where peel-and-stick would eventually fail.
Step-by-step permanent installation:
- Clean the glass with isopropyl alcohol and allow it to dry fully.
- Apply adhesion-promoting primer with a short-nap roller or brush, following the manufacturer’s instructions. Cover the full glass surface evenly.
- Allow full cure time. Most non-porous surface primers require 12–24 hours before wallpaper application. Do not rush this step.
- Choose your adhesive. Use a dispersion adhesive for lighter papers; use contact adhesive for heavier or textured wallcoverings. See the adhesive types guide for wallpaper adhesive categories before purchasing.
- Apply adhesive. For paste-the-wall method: roll adhesive onto the primed glass surface. For paste-the-paper: apply to the back of the wallpaper and allow it to soak for the time specified on the adhesive label. For contact adhesive: apply to both surfaces, allow to tack, then position carefully.
- Position the paper. Align from the top, using a plumb line or level edge. Lower the strip slowly onto the adhesive surface.
- Smooth from center outward using a wallpaper brush or roller. Work methodically to push air toward the edges.
- Seal edges with a seam roller and wipe away any adhesive squeeze-out with a damp cloth immediately.
- Allow full cure. Avoid moisture or direct sunlight on the surface for at least 48 hours.
Safety callout: Solvent-based contact adhesives release fumes that accumulate quickly in enclosed spaces. Open windows on opposite walls to create cross-ventilation. Wear nitrile gloves and avoid prolonged exposure. Water-based contact adhesives are lower-risk but still benefit from ventilation.
Pro Tip: Dispersion adhesive is the better choice when you need some working time to adjust position. Contact adhesive is better when the paper is very heavy and must grip immediately without sliding. For most interior glass projects, dispersion adhesive with a primed surface is the more forgiving option.
Wallpapering framed mirrors, cabinet doors, and small glass panes
Covering a mirror face and wallpapering a mirror frame are two different projects with different techniques. Knowing which one you’re doing changes every decision that follows.
Mirror face vs. frame:
- Mirror face: Peel-and-stick vinyl is the practical choice. The reflective surface is smooth and clean, which is ideal for self-adhesive backing. The result is a fully covered mirror, often used to create a decorative panel or privacy screen.
- Mirror frame or furniture inset: This is where Mod Podge and decoupage techniques are commonly used. Mod Podge works well as both adhesive and sealant on wood frame surfaces. It is not designed for the mirror face itself.
Techniques for small and framed pieces:
- Choose small to medium pattern repeats. Large repeats waste material on small panes and create awkward cuts at edges.
- Plan seams before cutting. On a narrow frame rail, a single strip often covers the full width without a seam.
- For curved frame edges, score the back of the paper lightly with a bone folder or the back of a craft knife to help it bend without creasing.
- On cabinet glass doors, apply peel-and-stick to the glass insert rather than the frame for a cleaner, swap-friendly result.
Pro Tip: For furniture with multiple small glass panes, use a single consistent pattern cut from the same sheet position on each pane. This creates the illusion of a continuous pattern even across the frame rails between panes.
Removable peel-and-stick is the preferred approach for furniture glass because it allows seasonal updates without refinishing or repainting the frame. For glass interior doors, the same logic applies: peel-and-stick gives a decorative effect that can be reversed if the door style changes.
How to remove wallpaper from glass and clean up adhesive residue
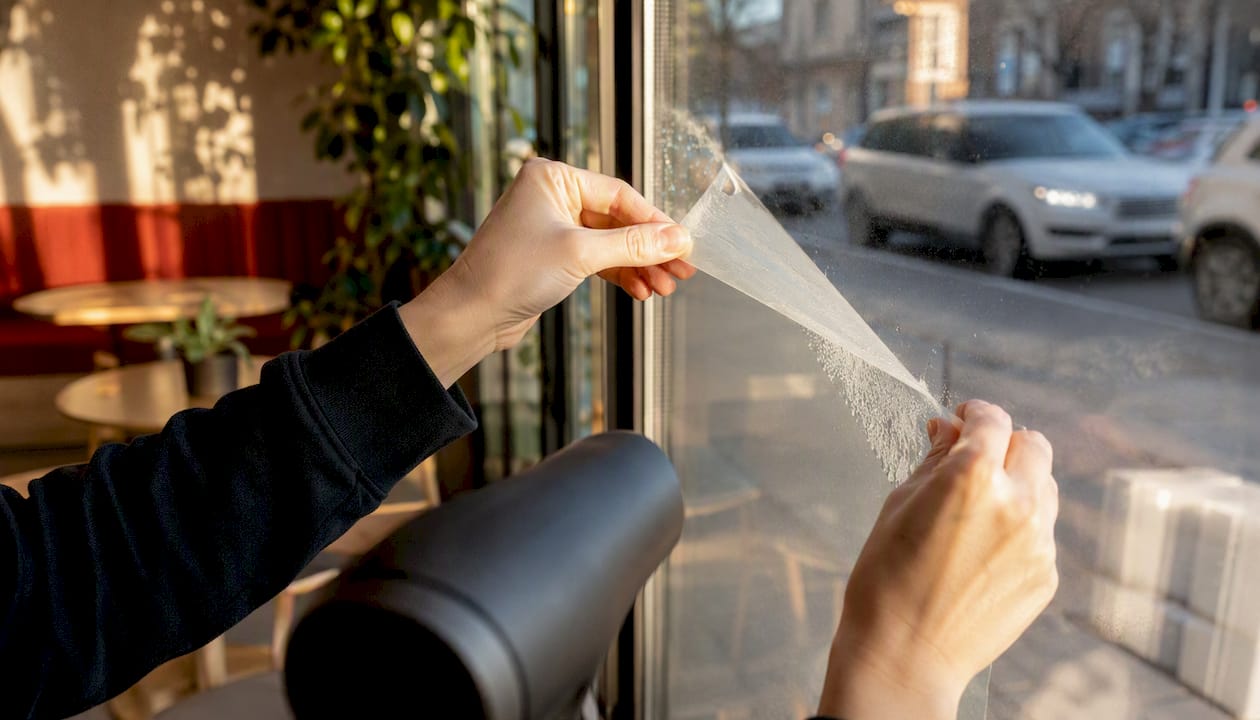
Peel-and-stick comes off glass more cleanly than from drywall. Pull slowly, use heat for stubborn areas, and the adhesive usually follows the paper.
Peel-and-stick removal:
- Lift a corner with a fingernail or plastic scraper. Avoid metal scrapers on mirror surfaces.
- Pull the strip back at a low angle (roughly 45 degrees) rather than straight out. Slow, steady tension releases the adhesive more cleanly than a fast pull.
- For stubborn sections, apply gentle heat with a hair dryer on a low setting for 15–20 seconds. The adhesive softens and releases more easily.
- Work in sections rather than trying to pull a full strip at once.
Permanent adhesive removal:
- Score the paper surface lightly with a scoring tool to allow solvent penetration.
- Apply a citrus-based adhesive remover or isopropyl alcohol to the surface. Allow it to soak for 5–10 minutes.
- Gently scrape with a plastic scraper. On mirror glass, use a razor blade held at a very low angle (15–20 degrees) to avoid scratching.
- Reapply solvent as needed for thick adhesive deposits.
- Wipe the surface clean with a damp microfiber cloth, then follow with a dry cloth.
Final cleanup:
- Use a non-abrasive glass cleaner and a clean microfiber cloth for the final polish
- Check edges and corners for adhesive residue, which is easiest to remove while still slightly tacky
- For complete removal guidance, including solvent recommendations by adhesive type, refer to a dedicated removal resource
Common problems: bubbles, lifting edges, and visible seams
Most wallpaper failures on glass trace back to one of three causes: surface contamination, wrong adhesive for the surface type, or installation in poor temperature or humidity conditions.
Diagnosing and fixing common issues:
- Bubbles immediately after install: Usually trapped air from insufficient smoothing. Re-squeegee from center to edge while the adhesive is still workable. For peel-and-stick, lift the nearest edge and re-smooth.
- Bubbles that appear after 24 hours: Often caused by outgassing from the glass surface or a temperature change. Small ones can be pierced with a fine pin and pressed flat. Large ones that reappear indicate an adhesion failure, usually from contamination or wrong adhesive.
- Lifting edges: The most common cause is residual grease or silicone on the glass. Re-clean the edge with isopropyl alcohol, allow to dry, and press back down. A thin bead of clear wallpaper seam repair adhesive along the edge holds it reliably.
- Visible seams: Caused by gaps between strips or by paper shrinkage as adhesive dries. For peel-and-stick, butt seams tightly during install. For paste applications, allow the paper to soak fully before hanging so shrinkage is minimized.
- Pattern misalignment: Dry-lay all strips before peeling or pasting. Mark a plumb line on the glass with a removable chalk line before starting.
Both extremes affect adhesive cure and long-term bond strength. Spring and fall are the most reliable seasons for glass wallpaper projects.*
For a deeper look at why adhesion fails on smooth surfaces, the wallpaper won’t stick guide covers the full range of causes and fixes.
When does a glass wallpaper project need a professional?
Most mirror and small-pane projects are well within DIY range. A few scenarios shift the calculation toward hiring an installer.
- Large contiguous glass walls: Seam alignment across multiple strips on a floor-to-ceiling glass wall requires precision that is difficult to achieve without professional tools and experience. A single misaligned strip affects every strip that follows.
- High-humidity or wet areas: Shower enclosures and steam rooms require specialty wallcovering systems with waterproof primers and sealed finishes. Standard peel-and-stick and most dispersion adhesives are not rated for continuous moisture exposure.
- Heavy or specialty wallcoverings over large areas: Applying glass-fiber or commercial-grade wallcoverings with contact adhesive over large primed glass surfaces involves significant working time pressure and positioning challenges.
- Work at height: Covering glass panels above 8 feet, or working on glass skylights or high transom windows, introduces fall risk that warrants professional scaffolding and safety equipment.
- Warranty or insurance requirements: Commercial spaces and rental properties sometimes require documented professional installation for warranty coverage or lease compliance.
For projects that involve replacing or upgrading the glass itself rather than covering it, interior door design trends offer context on when a door swap may be a more practical long-term solution than wallpapering existing glass.
Wallsneedlove peel-and-stick options for glass projects
Wallsneedlove peel-and-stick wallpaper is a practical fit for glass installations because the products are custom-sized, use removable adhesive, and carry Greenguard Gold certification for low VOC emissions.
Why these products work well on glass:
- Custom sizing means a single strip can cover a mirror or glass panel without unnecessary seams
- Removable adhesive releases cleanly from smooth glass surfaces, making it renter-safe and swap-friendly
- Greenguard Gold certification confirms low chemical emissions, which matters in enclosed spaces like bathrooms and bedrooms where glass installs are common
- Orders are typically produced within 1–3 days, so project timelines stay on track
Selection tips for glass projects:
- Choose small to medium pattern repeats for mirrors and furniture glass. Large repeats create awkward cuts on narrow panes.
- Order a sample or a small cut before committing to a full roll. Glass surfaces show every imperfection in the paper, so confirming the pattern scale and color in person prevents costly mistakes.
- For bathroom glass, check the best peel-and-stick options for moisture-prone areas before selecting a product.
- Consider a single-strip width that covers the full pane. This eliminates seam management entirely.
Pro Tip: For framed mirror makeovers, the geometric peel-and-stick options from Wallsneedlove work particularly well because the repeat aligns cleanly at edges, reducing visible cut lines on small panes.
What Wallsneedlove recommends based on customer patterns
Renters consistently choose peel-and-stick for glass and mirror projects. The removability is the primary driver, not the price. Homeowners who own their space and want a longer-lasting result tend to move toward primer-plus-adhesive installs, particularly in bathrooms and kitchens where the wallcovering needs to hold through humidity cycles.
Wallsneedlove’s custom print capability, quick 1–3 day turnaround, and Greenguard Gold certification give customers a reliable starting point for both approaches. Installation guides and product support are available directly through the site, covering both peel-and-stick and traditional paste applications.
Wallsneedlove peel-and-stick wallpaper for your next glass project
Wallsneedlove offers a direct path from idea to finished glass or mirror project: custom-sized peel-and-stick wallpaper, produced in 1–3 days, with removable adhesive and Greenguard Gold certification. No adhesive sourcing, no primer guesswork for temporary installs, and no minimum order that forces you to buy more than one pane’s worth.

The hand-drawn geometric peel-and-stick and sketch floral options are particularly well-suited for mirror makeovers and cabinet glass doors, where pattern scale and clean edges matter most. For larger glass-adjacent feature walls, the full Wallsneedlove mural and wallpaper catalog includes custom sizing across every style category.
Order a sample first. Confirm the pattern scale against your glass dimensions before committing to a full panel.
Sources
- Hanging Wallpaper on Glass and Mirrors
- Can You Put Wallpaper On Glass and Windows? - Painting Tips
- How To Wallpaper Furniture An IKEA Mirror Hack - Pillar Box Blue
- Bathroom Mirror Makeover On A Budget Using Peel And Stick Wallpaper


Leave a comment