Why Wallpaper Won't Stick: Causes and Fixes
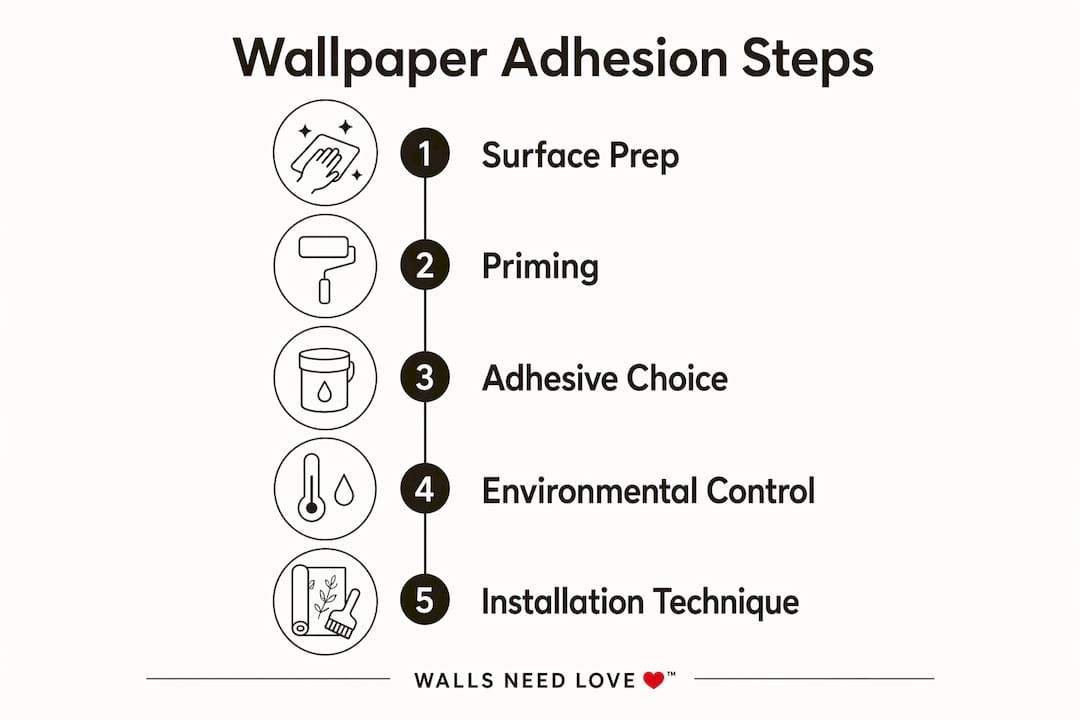
Wallpaper adhesion failure is defined as the loss of bond between a wall covering and its substrate, caused by surface contamination, inadequate priming, or adhesive mismatch. These are the core reasons why wallpaper won’t stick explained in practical terms. Improper surface prep, including dust, grease, or uneven texture, is the leading cause of wallpaper peeling off walls. Moisture levels, adhesive type, and room environment all play supporting roles. Getting each factor right before the first strip goes up is what separates a lasting installation from one that fails within weeks.
Why wallpaper won’t stick: surface conditions explained
Wall surface condition is the single biggest factor in wallpaper adhesion. A wall that looks clean and smooth can still carry invisible contaminants or structural issues that prevent a solid bond.
Porosity is the most overlooked problem. Unprimed drywall acts like a sponge, pulling moisture out of the adhesive before it can cure properly. The result is a weak, dry bond that peels at the seams within days. The same issue affects bare plaster and freshly skimmed walls.
Contamination is equally damaging. Dust, grease from cooking areas, and residual paint sheen all create a barrier between the adhesive and the wall. Walls must be smooth, clean, and dry before any wallpaper goes up. Residual wall moisture must stay below 4%, and any mold must be treated with a mildew-inhibiting product before installation begins.
Texture and unevenness reduce the contact area between the wallpaper and the wall. Air pockets form behind the paper wherever the surface dips or rises, and those pockets become bubbles or lifting edges over time.
Common surface problems that cause wallpaper adhesion issues:
- Unprimed or bare drywall absorbing adhesive before it bonds
- Grease, dust, or soap residue blocking adhesive contact
- Textured or bumpy walls creating air pockets behind the paper
- Residual moisture above 4% weakening the adhesive cure
- High humidity above 65% causing plasticization of pressure-sensitive adhesive polymers
That last point matters more than most homeowners realize. Plasticized adhesive loses its grip strength, and no amount of pressing will restore it once the damage is done.
Pro Tip: Run a dehumidifier in the room for 24 hours before installation if you live in a humid climate. Bringing humidity below 65% before you start gives the adhesive the best chance to cure correctly.
Why walls need priming before wallpaper
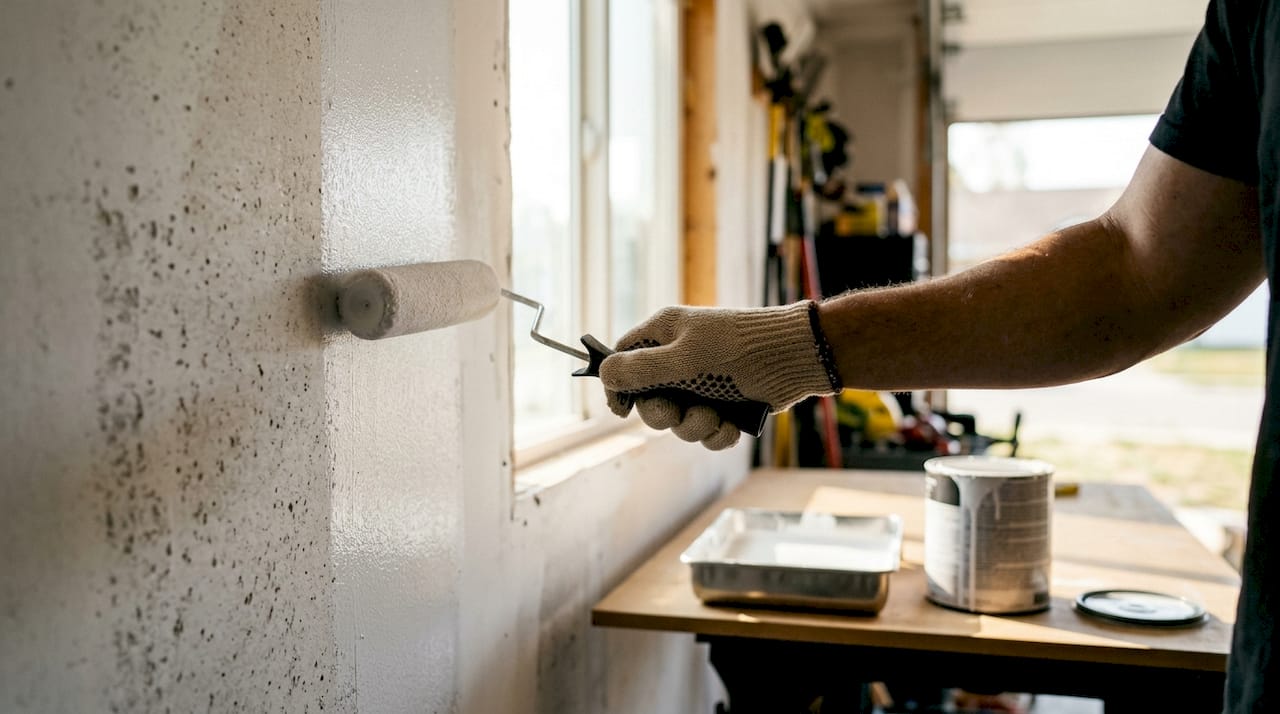
Priming is not optional on bare or porous surfaces. A dedicated wallpaper primer seals the wall, creating a uniform surface that holds adhesive evenly and allows the wallpaper to be repositioned during installation without tearing.
Primers typically cover 400–450 sq. ft per gallon and require a full 24-hour curing period before wallpaper is applied. Skipping that curing window is a common mistake. Applying wallpaper over a primer that has not fully dried traps moisture between the wall and the paper, which causes bubbling and edge lift.
Flat paint is not a substitute for primer. Using flat paint instead of a dedicated wallpaper primer causes the adhesive to dry too quickly, creating loose seams and making future removal destructive to the drywall beneath. This is one of the most common wallpaper installation problems homeowners encounter.
How to prime correctly before wallpaper installation:
- Clean the wall with a damp cloth and let it dry completely. Remove any grease with a mild detergent.
- Fill holes and cracks with spackle and sand smooth once dry. Uneven surfaces create air pockets.
- Apply a dedicated wallpaper primer, not flat paint. Choose a product labeled for wallcovering use.
- Allow 24 hours of curing time before hanging any wallpaper. Do not rush this step.
- Check for sheen uniformity across the wall. Dull patches indicate areas that absorbed more primer and may need a second coat.
Pro Tip: Sizing, a diluted adhesive solution applied before hanging, is an older technique that still works well on plaster walls. It reduces porosity and gives the adhesive a consistent surface to grip.
How does adhesive choice affect wallpaper bonding?
Adhesive selection is where many DIY installations go wrong. Different wallpaper types require different adhesive formulas, and using the wrong one is a direct cause of wallpaper failure.
Peel-and-stick wallpaper uses a factory-applied pressure-sensitive adhesive. No additional paste is needed. Traditional paste-the-wall and paste-the-paper products require a separate adhesive, and the formula must match the wallpaper weight and material. Heavy vinyl wallpaper needs a stronger, heavier-body adhesive than lightweight paper-based products.
Paste quantity is just as critical as paste type. Excessive or uneven paste application prevents a continuous adhesive surface from forming. Edges dry faster than the center, which causes them to curl and peel. Too little paste produces the same result from the opposite direction: the adhesive runs out before the bond cures. For a full breakdown of which adhesive works for which product, the wallpaper adhesive guide from Wallsneedlove covers each type in detail.
Following the manufacturer’s mixing instructions is not a suggestion. Adhesive that is too thin loses body and runs. Adhesive that is too thick does not spread evenly and creates ridges under the paper. Both lead to bond failure.
Key adhesive application rules:
- Match the adhesive formula to the wallpaper material and weight
- Mix adhesive exactly to the manufacturer’s specified ratio
- Apply paste evenly across the full surface, including edges
- Allow paste-the-paper products to soak for the time specified on the label before hanging
- Press edges firmly into corners and cut precisely to prevent lifting
Overapplying paste is a common homeowner mistake that prevents adhesive surfaces from forming correctly. The excess paste has nowhere to go and creates an uneven layer that dries at different rates across the strip.
What environmental factors cause wallpaper to peel?
Room conditions during and after installation directly affect how well wallpaper bonds and how long it stays up. Temperature and humidity are the two variables that matter most.
Pressure-sensitive adhesives, the type used in peel-and-stick products, are particularly sensitive to moisture cycles. Humidity and temperature swings cause these adhesives to bubble and peel within 6–12 months. Bathrooms with showers are the most challenging environment. Steam from daily showers repeatedly wets and dries the adhesive, accelerating its breakdown. Peel-and-stick wallpaper in a shower-adjacent bathroom will fail faster than the same product in a bedroom.
Installation errors compound environmental problems:
- Rushing the installation without allowing adequate paste soak time
- Not smoothing out bubbles during hanging, leaving trapped air behind the paper
- Mishandling seams by stretching the paper to match, which causes it to contract and pull away when dry
- Installing in a cold room where adhesive becomes too viscous to bond properly
- Ignoring bubbles after one week, which indicate adhesive or preparation failures rather than simple trapped air
That last point is worth noting. Bubbles that appear immediately after installation are usually trapped air and can often be smoothed out. Bubbles that appear days later are a sign of a deeper adhesion problem, typically inadequate priming or incorrect paste application.
Controlling the room environment during installation is straightforward. Keep the room between 60°F and 80°F, maintain humidity below 65%, and avoid direct sunlight on freshly hung wallpaper for at least 48 hours. These conditions give the adhesive the time and stability it needs to cure fully.
Key Takeaways
Wallpaper adhesion fails when surface preparation, primer application, adhesive selection, or environmental conditions are not properly controlled before and during installation.
| Point | Details |
|---|---|
| Surface prep is the top cause | Dust, grease, and moisture above 4% prevent adhesive from bonding to the wall. |
| Primer is mandatory on bare walls | Dedicated wallpaper primer covers 400–450 sq. ft per gallon and needs 24 hours to cure before hanging. |
| Flat paint is not a primer substitute | Using flat paint causes adhesive to dry too fast and damages drywall during future removal. |
| Adhesive type must match wallpaper | Peel-and-stick needs no paste; traditional wallpaper requires a formula matched to its weight and material. |
| Environment affects cure quality | Keep humidity below 65% and temperature between 60°F and 80°F during and after installation. |
Wallsneedlove’s take on wallpaper adhesion mistakes
The most consistent pattern seen across failed DIY installations is not a lack of skill. It is a lack of patience at the preparation stage. Homeowners spend time choosing the right pattern and then rush the wall prep, treating it as a formality rather than the foundation of the whole project.
Priming is the step that gets skipped most often. The logic seems reasonable: the wall looks fine, so why add another step? But unprimed drywall will pull moisture from the adhesive in minutes, and no amount of pressing or re-gluing fixes a bond that never formed correctly in the first place.
Overapplying paste is the second most common error. More paste does not mean a stronger bond. It means uneven drying, edge curl, and a surface that stays tacky long after it should have cured. Following the adhesive manufacturer’s instructions exactly, including soak times and mixing ratios, produces better results than any shortcut.
Environment control during installation is frequently underestimated. A cold garage in winter or a humid bathroom in summer creates conditions that work against the adhesive. Spending 30 minutes stabilizing the room temperature and humidity before starting pays off in a result that lasts for years.
— Wallsneedlove
Wallsneedlove removable wallpaper for confident DIY installs
Wallsneedlove designs removable wallpaper and wall murals built for smooth, primed surfaces, making the installation process straightforward for homeowners who want reliable results without permanent commitment.
The Monkeying Around removable wallpaper is a strong starting point for first-time installers. It uses a pressure-sensitive adhesive that performs well on properly primed walls and repositions cleanly during hanging. For larger statement walls, the Java Mountain wall mural delivers a high-impact result with the same easy-removal backing. Wallsneedlove carries peel-and-stick and traditional paste options across hundreds of patterns, all Greenguard Gold certified and custom made within 1–3 days.
FAQ
Why does wallpaper peel off walls after installation?
Wallpaper peels off walls primarily because the surface was not properly cleaned, primed, or dried before installation. Adhesive applied to dusty, greasy, or porous walls cannot form a lasting bond.
Does peel-and-stick wallpaper work in bathrooms?
Peel-and-stick wallpaper can fail in bathrooms within 6–12 months due to humidity and temperature cycles that break down pressure-sensitive adhesives. It performs better in low-moisture rooms on smooth, primed walls.
What primer should be used before hanging wallpaper?
Use a dedicated wallpaper primer, not flat paint. Flat paint causes adhesive to dry too quickly and can damage drywall when the wallpaper is removed later.
How do I fix wallpaper that is bubbling after installation?
Bubbles that appear immediately are usually trapped air and can be smoothed toward the edges with a wallpaper brush. Bubbles appearing after one week indicate an adhesive or surface preparation failure that requires rehanging the affected section.
Can I hang wallpaper without priming the wall first?
Hanging wallpaper on unprimed drywall or bare plaster causes the wall to absorb adhesive before it bonds, leading to weak seams and peeling. Priming is required on all porous or bare surfaces for reliable adhesion.


Leave a comment