

Wallpaper Bubbling: Causes, Fixes, and Prevention
Most wallpaper bubbles trace back to one of three causes: trapped air, adhesive failure, or moisture. Identify which one you’re dealing with, and a DIY fix is usually within reach. The common wallpaper bubbling causes and solutions covered here follow a simple logic: diagnose first, then act.
Quick diagnostic checklist:
- Bubble appeared within 48 hours of hanging? Likely trapped air. Try smoothing first.
- Bubble appeared after a week or more? Points to adhesive failure or poor surface prep.
- Located at a seam or edge? Poor smoothing during installation.
- Near a fixture, floor, kitchen, or bathroom? Moisture or ventilation problem.
- Soft when pressed? Air pocket. Firm or damp? Adhesive failure or moisture behind the wall.
Quick actions to try right now (under 15 minutes):
- Fresh installation, soft bubble: use a plastic smoother and work from the center outward toward the edges.
- Leave the area undisturbed for 24–48 hours. Many air pockets self-correct as paste dries.
- Mark any suspect areas with painter’s tape so you can reassess after drying.
Tools and products worth having on hand: Roman Decorating Products paste and smoothing tools, Zinsser Gardz primer/sizing for porous drywall, and Wallsneedlove peel-and-stick wallpaper as a paste-free alternative where moisture is a recurring concern.
Table of Contents
- How to tell which kind of bubble you’re seeing
- Step-by-step repair for small trapped-air bubbles
- How to handle large blisters and when replacement is the right call
- What tools and materials you actually need
- How to prevent wallpaper bubbling before it starts
- When to call a professional and what to expect in cost and time
- What the research and pro techniques confirm
- Key Takeaways
- The practical case for starting with the right paper
- Peel-and-stick wallpaper: a paste-free path to bubble-free walls
- Useful sources
How to tell which kind of bubble you’re seeing
Correct diagnosis saves time. The wrong repair on the wrong bubble type can tear the paper or leave the underlying problem untouched.
Time-based clues:
- Bubbles within 48 hours: almost always trapped air from installation. Smoothing or light syringe injection usually resolves them.
- Bubbles after one week or more: adhesive failure or surface porosity is the likely cause. Smoothing alone will not fix these.
Location clues:
- Along seams or edges: insufficient smoothing during hanging, or seam adhesive not applied.
- Near the floor, windows, or plumbing fixtures: moisture infiltration or condensation.
- Kitchens and bathrooms: humidity fluctuation weakening adhesive over time.
- Scattered across a full panel: porous wall absorbed paste unevenly before the paper could bond.
Sensory checks:
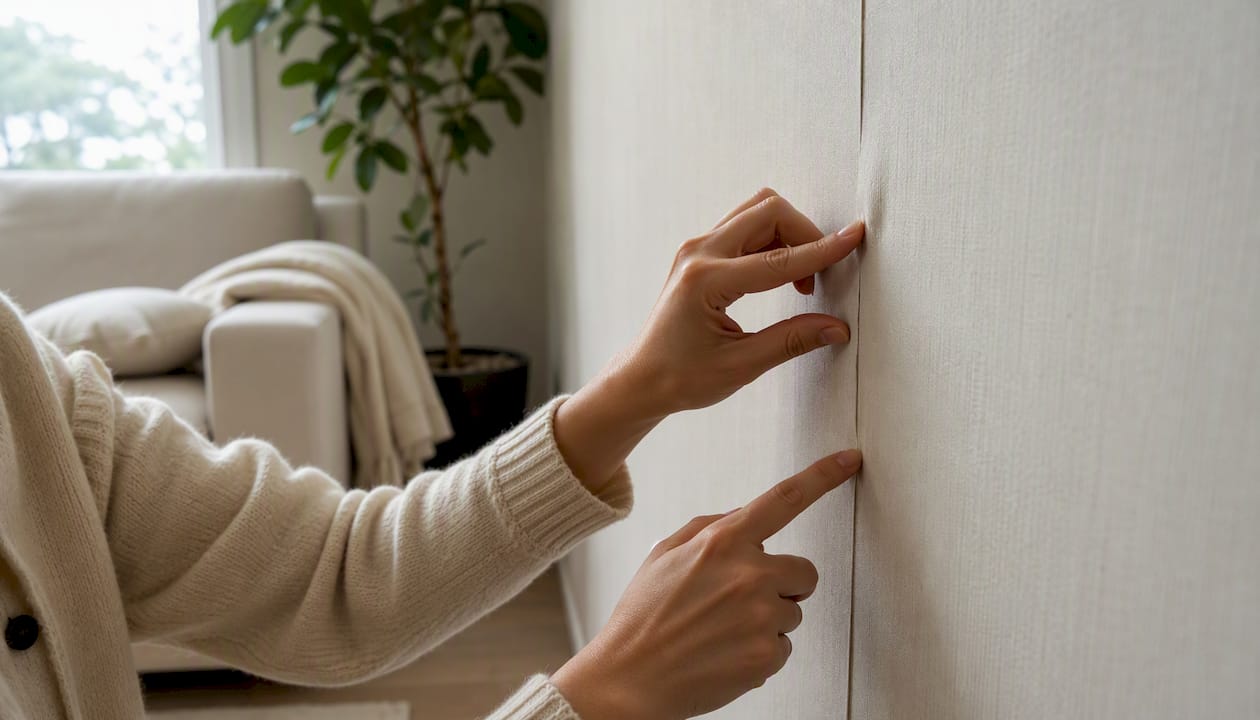
- Press gently. A soft, springy bubble is air. A firm, slightly raised area suggests delamination.
- Check for dampness or discoloration behind the paper at the bubble’s edge. Staining means moisture, not just air.
- If debris is visible under the paper at the bubble’s edge, that foreign object is preventing adhesion.
Knowing the cause before picking up a knife prevents unnecessary cuts in good paper. Check common installation mistakes if the pattern of bubbles suggests a systemic error during hanging.
Step-by-step repair for small trapped-air bubbles
Small, fresh bubbles are usually trapped air. Smoothing often fixes them without any cutting.
Tool list:
- Plastic wallpaper smoother or broad putty knife
- Seam roller
- Adhesive syringe (or small craft syringe)
- Seam adhesive (Roman Decorating Products seam repair adhesive works well)
- Damp sponge or cloth
- Utility or razor knife (only if smoothing fails)
Steps:
- Confirm the bubble is air: press it gently. If it deflates slightly or feels soft, proceed.
- Place the smoother at the bubble’s center and push outward in firm, even strokes toward the nearest edge.
- Wait 24 hours. Many small bubbles disappear as the paste finishes drying.
- If the bubble remains, make a tiny slit at the edge of the bubble with a razor knife. For bubbles larger than about 1 inch, use an X-cut instead.
- Insert the syringe tip and inject a small amount of seam adhesive.
- Press the paper flat with the smoother, then roll the seam roller over the area.
- Wipe away any adhesive that squeezes out with a damp cloth before it dries.
- Let cure for at least two hours before touching the area again.
Pro Tip: Cut along a pattern line whenever possible. The incision hides inside the design, making the repair nearly invisible. Reserve the X-cut for bubbles larger than 1 inch, where a single slit won’t give enough access to inject adhesive evenly.
This method is likely to succeed when:
- The bubble is soft and contains no moisture.
- It is not located along a long seam (which may indicate wider adhesive failure).
- The installation is recent (within the first week).
If debris is trapped under the paper, use tweezers to remove the foreign object through the X-cut before injecting adhesive.
How to handle large blisters and when replacement is the right call
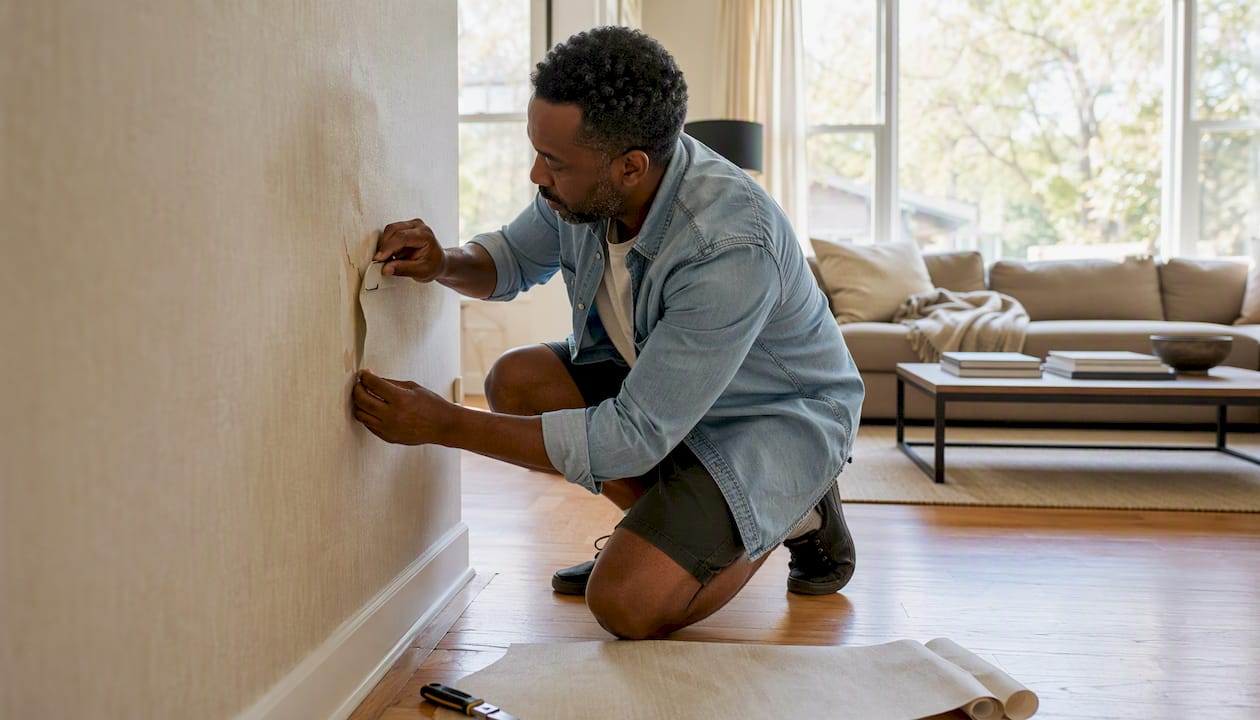
Large blisters or recurring bubbles usually point to adhesive failure, surface porosity, or moisture behind the wall. Repair is possible in many cases, but replacement is sometimes the correct choice.
Steps for adhesive failure repair:
- Score an X-cut through the blister with a sharp utility knife, keeping cuts as short as possible.
- Gently peel back the four flaps. Check for debris, mold, or dampness.
- If the wall surface is dry and clean, scrape away any dried adhesive residue with a putty knife.
- Apply fresh seam adhesive to the wall and the underside of the paper flaps using a syringe or small brush.
- Press the flaps back into position, starting from the center of the X outward.
- Roll firmly with a seam roller and wipe excess adhesive immediately.
- For very large or badly damaged areas, remove the full strip and replace it.
Pro Tip: For patterned or custom-printed wallpaper, the double-cut patch method produces the cleanest result. Align a new piece of wallpaper over the damaged area so the pattern matches. Tape it in place. Cut through both layers simultaneously with a sharp blade, following a pattern line. Remove the waste pieces from both layers, then apply adhesive and press the new patch into the recess. The seam is nearly invisible because both edges were cut at the same time.
| Severity | Likely cause | Recommended fix | Tools needed | Difficulty/time |
|---|---|---|---|---|
| Pinpoint or small (under 1 inch) | Trapped air | Syringe + seam adhesive | Syringe, smoother, seam roller | Easy / under 1 hour |
| Medium blister (1–3 inches) | Adhesive failure or debris | X-cut, clean, re-adhere | Utility knife, syringe, roller | Moderate / 1–2 hours |
| Large blister or full seam | Adhesive failure or porosity | Strip removal and replacement | Putty knife, new paper, paste | Moderate / 2–4 hours |
| Recurring bubbles after repair | Moisture or ventilation issue | Moisture remediation first, then replace | Dehumidifier, primer, new paper | Difficult / varies |
| Mold or wet wall | Water intrusion | Professional remediation | N/A | Call a pro |
Replace rather than repair when:
- Mold is visible or the wall feels damp behind the paper.
- The same area has bubbled more than once after repair.
- The paper is torn, aged, or brittle.
- Replacement paper does not match the original batch (color or pattern shift).
For custom-printed murals, color and print batch variation make full-strip replacement or double-cut patching the preferred professional fix to avoid visible mismatch.
What tools and materials you actually need
Having the right supplies before starting prevents mid-repair improvisation that damages paper.
Essential tools:
- Plastic wallpaper smoother: pushes air out without scratching the surface.
- Seam roller: applies even pressure along edges and repaired seams.
- Adhesive syringe: delivers adhesive precisely under the paper without over-saturating.
- Utility or razor knife: for X-cuts and double-cut patches; replace blades frequently.
- Putty knife: removes dried adhesive residue from the wall surface.
- Damp sponge: cleans adhesive squeeze-out before it sets.
- Measuring tape and level: useful when replacing full strips to align pattern repeats.
Adhesives and primers:
Different wallpaper types need different adhesives. Using the wrong adhesive for a paper type is one of the most common causes of failure that requires full removal and reinstallation. Non-woven papers generally use paste-to-wall application. Traditional papers require paste-to-paper and a soaking period. Pre-pasted papers need water activation. Peel-and-stick papers need no paste at all.
Zinsser Gardz is a widely available primer and sizing product that seals porous drywall before hanging. It creates a consistent surface that prevents uneven paste absorption, which is a primary driver of expansion bubbles.
Pro Tip: Buy quality blades and replace them after every few cuts. A dull blade drags and tears paper instead of cutting cleanly, which makes repairs visible.
Quick shopping checklist (US availability):
- Roman Decorating Products seam repair adhesive
- Zinsser Gardz primer/sizing (available at Home Depot and Lowe’s)
- Plastic wallpaper smoother
- Seam roller (4-inch)
- Adhesive syringe (craft or wallpaper-specific)
- Sharp utility knife with extra blades
- Putty knife (3-inch)
How to prevent wallpaper bubbling before it starts
Sealing porous drywall with a wallpaper primer or sizing is the single most effective prevention step. Porous surfaces absorb paste unevenly, which causes expansion bubbles and weak adhesion across the panel.
Surface prep checklist:
- Remove all old wallpaper and adhesive residue completely.
- Repair holes, cracks, and uneven areas with joint compound; sand smooth when dry.
- Wipe walls clean of dust and grease.
- Apply Zinsser Gardz or a comparable wallpaper primer/sizing product and allow full dry time per label instructions.
- For highly porous substrates such as older plaster, a pigmented sealer applied before sizing provides additional protection.
Paste and paper handling:
- Match adhesive type to paper type: paste-to-wall for non-woven, paste-to-paper for traditional.
- Follow the manufacturer’s specified soaking or “booking” time for traditional papers. Skipping this step causes expansion bubbles after hanging because the paper continues to expand on the wall.
- Mix adhesive gently. Whipping the mixture introduces air pockets into the glue that can later release and form bubbles.
- Avoid over-pasting: excess adhesive has nowhere to go and pools under the paper.
Environment controls:
- Maintain indoor humidity around 40–50% during and after installation. Humidity swings weaken adhesive bonds over time.
- Ventilate kitchens and bathrooms actively. Use an exhaust fan during and after cooking or showering.
- Avoid hanging wallpaper in very cold or very hot conditions; temperature extremes affect paste open time and drying.
- Allow newly hung wallpaper to dry undisturbed for at least 24–48 hours before running HVAC systems at full capacity.
For ongoing wallpaper maintenance in humid rooms, check seams and edges seasonally and re-adhere any lifting areas before they become full blisters.
When to call a professional and what to expect in cost and time
Some situations are beyond what a syringe and seam roller can fix.
Call a professional when:
- Mold is visible on the wall or paper. Mold remediation must happen before any new wallpaper goes up. A water damage and mold specialist can assess the extent of the problem.
- The wall substrate is damaged (soft drywall, crumbling plaster, or water-stained framing).
- Multiple strips have failed after repair attempts.
- The paper is a delicate historic or textured material that cannot tolerate cutting.
- Pattern-sensitive custom murals require replacement and the pattern match is complex.
Typical timelines and ballpark costs:
- Small syringe repair (one or two bubbles): under one hour; DIY materials run roughly $5–$30 depending on what you already own.
- Medium repair with X-cut and re-adhesion: one to two hours; materials $20–$75.
- Full strip replacement: two to four hours for a DIYer, including wall prep; add the cost of replacement paper and adhesive.
- Whole-wall or whole-room replacement with professional labor: several hours to a full day; costs vary by region, paper type, and wall condition.
Wallsneedlove provides installation guidance and support resources for both peel-and-stick and traditional paste products, which can help homeowners decide whether a repair or a fresh installation is the more practical path forward.
What the research and pro techniques confirm
The repair and prevention steps above align with documented professional practice. A few key findings are worth highlighting directly.
“Applying a primer seals the surface, creates a consistent bond, and facilitates future removal without damaging the drywall.” — Joseph Assise III
This principle underpins the entire prevention approach. Skipping primer is the most common installation error that leads to recurring bubbles, and no amount of syringe repair fixes a fundamentally porous wall.
Pro technique summary: double-cut patch method
- Cut a piece of replacement wallpaper larger than the damaged area, aligning the pattern carefully.
- Tape or hold it over the damage.
- Using a sharp blade, cut through both the patch and the existing paper simultaneously, following a pattern line.
- Remove the waste piece of new paper and the damaged piece of old paper from the wall.
- Apply adhesive to the wall and the back of the patch.
- Press the patch into position. The edges meet perfectly because both were cut at the same time.
Additional pro-level cues:
- Bubbles within 48 hours are almost always air; bubbles after a week point to adhesive or substrate failure.
- Cut along pattern lines to hide incisions; use X-cuts for bubbles larger than about 1 inch.
- Even a successful repair will fail again if the environmental cause (humidity, poor ventilation) is not corrected first.
- For debris-caused bubbles, remove the foreign object with tweezers through the X-cut before injecting adhesive.
Key Takeaways
Wallpaper bubbles almost always trace back to trapped air, adhesive failure, or moisture, and the correct fix depends entirely on which cause is present.
| Point | Details |
|---|---|
| Diagnose before cutting | Press and check timing: soft bubbles within 48 hours are air; firm or late-appearing bubbles indicate adhesive or moisture issues. |
| Primer prevents most failures | Seal porous drywall with Zinsser Gardz before hanging to prevent uneven paste absorption and expansion bubbles. |
| Syringe repair for small bubbles | Inject seam adhesive through a small slit or X-cut, smooth, and roll; works best on dry, non-seam bubbles found early. |
| Replace when moisture or mold is present | Recurring bubbles after repair, mold, or wet walls require remediation and full strip replacement, not patching. |
| Wallsneedlove peel-and-stick avoids paste issues | Peel-and-stick wallpaper from Wallsneedlove eliminates paste-related bubbling and suits moisture-prone rooms with good ventilation. |
The practical case for starting with the right paper
The most common mistake in wallpaper repair is treating the symptom without addressing the cause. A syringe repair on a moisture-driven bubble will fail within weeks if the ventilation problem remains. Similarly, patching a bubble caused by an unprimed wall will produce another bubble nearby, because the underlying surface is still absorbing paste unevenly.
The repair steps in this guide work when applied to the correct cause. But prevention is a more reliable strategy than repair. Choosing the right paper type for the room, priming the wall properly, and matching adhesive to paper material eliminates the majority of bubbling problems before they start.
For rooms where moisture is a persistent variable, such as bathrooms or kitchens, peel-and-stick wallpaper removes paste from the equation entirely. There is no booking time to miscalculate, no adhesive to over-apply, and no paste to absorb unevenly into a porous wall. That is not a workaround. It is the appropriate material choice for the environment.
Peel-and-stick wallpaper: a paste-free path to bubble-free walls
Paste-related bubbling is avoidable. Wallsneedlove’s peel-and-stick wallpaper skips the adhesive mixing, booking time, and surface porosity problems that cause most installation failures.

Peel-and-stick is a practical choice for renters, feature walls, and rooms with moderate humidity and good ventilation. Wallsneedlove prints each order to order in 1–3 days, with Greenguard Gold certification and a range of styles from geometric patterns to scenic murals. For readers replacing a damaged strip or starting fresh after a moisture repair, testing a sample first is a straightforward way to confirm the surface is ready before committing to a full installation.
Peel-and-stick is not the right choice for long-term high-moisture environments without ventilation, historic plaster that needs sealing, or surfaces that require a paintable finish. For those situations, traditional paste options are available at wallsneedlove.com, along with detailed installation guides.
Browse the full collection and request samples at Wallsneedlove.
Useful sources
- Wallpaper Repair: How To Fix Common Issues — This Old House: Step-by-step procedural guide including the double-cut patch method.
- Wallpaper Peeling? How to Fix Loose Seams and Air Bubbles — Bob Vila: Practical repair steps for debris removal and seam re-adhesion.
- Wallsneedlove Installation and Maintenance Guides: Ongoing care, humidity control, and small repair guidance.
- DIY Wallpaper Removal Best Practices — Wallsneedlove: Safe strip removal steps for homeowners preparing walls for re-hanging.
Always read primer and paste product labels before applying. Dry times, coverage rates, and compatibility vary by product and substrate.


Leave a comment