

How to Use Wallpaper on Furniture: Ideas and Tips
Yes — wallpaper works on most flat, smooth furniture surfaces, and the results are faster and more pattern-rich than painting. According to The Homes I Have Made, peel-and-stick is the easiest option for quick, low-mess makeovers on dressers, bookshelves, cabinet doors, and drawer fronts. Traditional non-woven or vinyl wallpaper is the better pick when durability matters more than convenience.
The short rule: Use peel-and-stick for temporary, renter-friendly, or seasonal updates. Use vinyl or non-woven paste wallpaper for high-traffic doors, cabinet fronts, and any surface that gets regular handling. Avoid applying any wallpaper to bare tabletops or seating surfaces unless you seal them with polyurethane or add a glass top.
The three most common starting points:
- Peel-and-stick: No paste, no mess, fully removable. Best for drawer fronts, bookshelf backs, and low-contact panels.
- Traditional/non-woven or vinyl: Stronger adhesion, longer lifespan. Best for cabinet doors, entryway door panels, and any surface that gets touched daily.
- Paintable textured wallpaper: Ideal for recessed panels and decorative furniture faces where you want dimension, not just pattern.
Key Takeaways
Wallpaper is a practical, fast, and pattern-rich way to update furniture, and peel-and-stick makes most projects accessible without paste or professional tools.
| Point | Details |
|---|---|
| Peel-and-stick for quick projects | Use self-adhesive wallpaper on drawer fronts, shelf backs, and low-contact panels for fast, reversible results. |
| Vinyl or non-woven for durability | High-contact surfaces like cabinet doors and entryway panels need vinyl or non-woven paste wallpaper that wipes clean and resists scuffs. |
| Prep and edge sealing determine longevity | Clean surfaces, scuff-sand glossy finishes, and seal all raw edges with clear matte varnish or Mod Podge to prevent peeling. |
| Cost ranges from $10 to $300 | A peel-and-stick dresser project runs $10–$60; larger custom-printed or vinyl projects run $100–$300 depending on coverage and material. |
| Wallsneedlove for custom peel-and-stick | Wallsneedlove offers Greenguard Gold-certified peel-and-stick and paste options in geometric, faux texture, and mural styles, with 1–3 day turnaround. |
Table of Contents
- Why choose wallpaper over paint for furniture makeovers?
- Which wallpaper types work best on furniture?
- What tools and materials do you need?
- How to wallpaper a dresser, cabinet doors, and drawer fronts
- Which furniture surfaces work well and which need caution?
- Common mistakes and how to avoid them
- How long do furniture wallpaper projects take and what do they cost?
- How to protect and clean wallpapered furniture
- Creative project ideas for wallpaper on furniture
- Designer-level advice on pattern scale and finishes
- Where to buy wallpaper for furniture projects
- A practical perspective on furniture wallpaper projects
- Wallsneedlove patterns ready for your next furniture project
- Sources
Why choose wallpaper over paint for furniture makeovers?
Paint is reliable, but it has a ceiling. Wallpaper clears that ceiling in three specific ways.
Speed and less mess. A single dresser drawer front can be wallpapered relatively quickly. Painting the same surface means priming, two coats, drying time between each coat, and cleanup. Wallpaper, especially peel-and-stick, skips most of that. You can finish a full dresser in an afternoon.
Pattern access. Wallpaper gives you murals, complex geometric repeats, watercolor florals, and faux textures that are nearly impossible to replicate with a brush or roller. If you want a bookshelf back that looks like aged marble or a cabinet door covered in a botanical print, wallpaper is the practical path. Paint simply cannot do that.
Temporary vs. permanent flexibility. Renters and frequent movers benefit most from peel-and-stick because it leaves no residue and requires no heavy prep. Homeowners staging a property can update a piece in hours and reverse it just as fast. For permanent installs, traditional paste wallpaper bonds more firmly and holds up to years of use.
The cases where paint still wins:
- Curved or heavily carved furniture where flat wallpaper won’t conform
- Outdoor or high-humidity pieces where paper degrades faster than a sealed paint finish
- Surfaces that need a single solid color with no visible seams
Pro Tip: Test a small section of your furniture with the wallpaper type you plan to use before committing to the full piece. Adhesion varies by surface finish, and a quick test saves a lot of rework. Check out the wallpaper vs. painted walls comparison for a side-by-side breakdown.
Which wallpaper types work best on furniture?
Choosing the right material is the decision that most affects how long your project lasts. Here is how the four main types compare for furniture use.
Peel-and-stick
Self-adhesive wallpaper is the most popular choice for furniture projects. It requires no paste, no drying time, and repositions during application. It works well on smooth, clean surfaces like MDF, laminate, and painted wood. The main limitation is adhesion strength over time on high-contact surfaces. On a drawer front that gets pulled open dozens of times a day, edges can lift within months without sealing.
Traditional pasted and non-woven wallpaper
Non-woven wallpaper with paste or a craft adhesive like Mod Podge bonds more firmly than peel-and-stick. Do Dodson Designs recommends applying adhesive to both the wood surface and the paper back for small furniture pieces, which improves contact and reduces bubbling. This approach is better for cabinet doors and any panel that will be handled regularly.
Paintable textured wallpaper
This type adds physical dimension to a surface. It works especially well in recessed furniture panels, where the texture reads as architectural detail rather than flat decoration. Apply it, let it dry, then paint over it in any color. The result looks more like custom millwork than a DIY project.
Vinyl and washable wallpaper
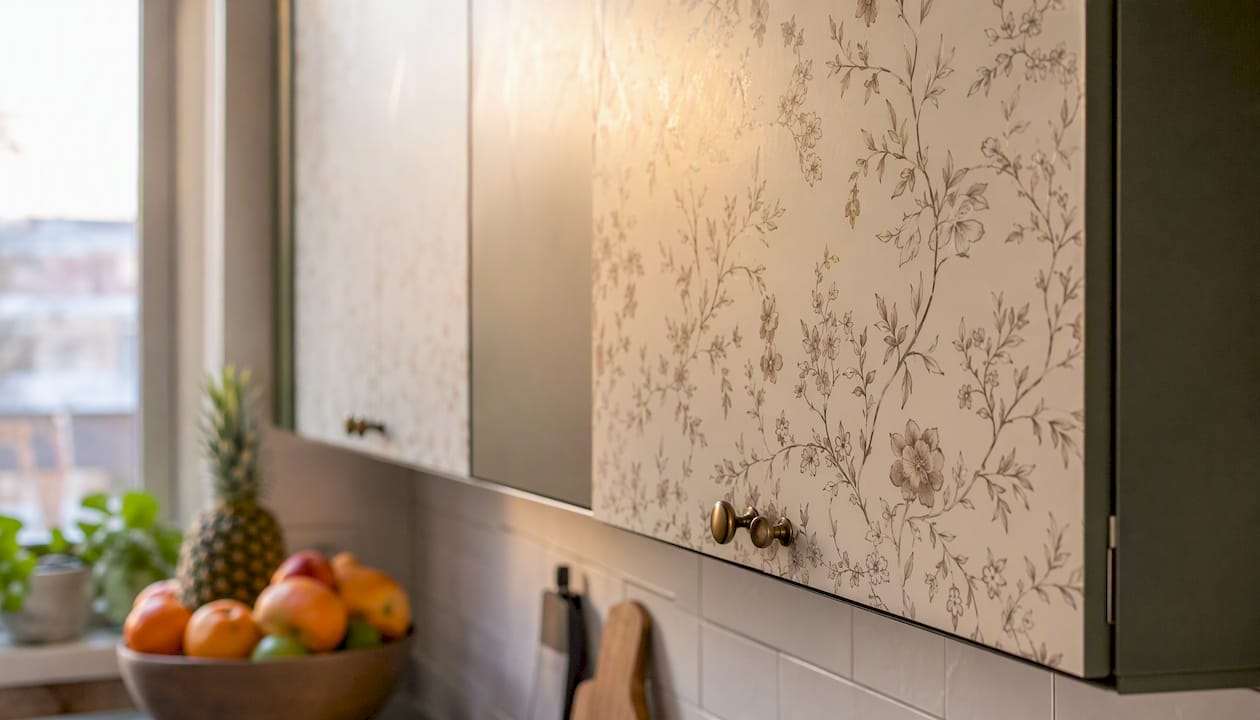
Vinyl and non-woven wallpapers are easier to clean and more resistant to scuffs, making them the right choice for kitchen cabinet doors, bathroom vanities, and entryway door panels. They wipe down without damage and hold up to repeated contact far better than standard paper-backed options.
| Type | Durability | Removability | Best Uses |
|---|---|---|---|
| Peel-and-stick | Moderate | High | Drawer fronts, shelf backs, low-contact panels |
| Traditional/non-woven | High | Low | Cabinet doors, door panels, high-traffic surfaces |
| Paintable textured | Moderate | Low | Recessed panels, decorative furniture faces |
| Vinyl/washable | High | Low-moderate | Kitchen cabinets, bathroom vanities, entryway doors |
What tools and materials do you need?
Gathering everything before you start prevents mid-project stops. Here is the full checklist.
Cutting tools:
- Craft knife with fresh blades (dull blades tear paper and ruin edges)
- Sharp scissors for rough cuts
- Metal straightedge or ruler for guided cuts
Measuring and smoothing:
- Tape measure
- Pencil for marking cut lines
- Smoothing tool or old credit card for pressing out bubbles
- 220-grit sanding block for scuffing glossy surfaces before application
Adhesives and sealers:
- Mod Podge or wallpaper paste (for traditional paper on furniture)
- Clear matte varnish for edge sealing
- Water-based polyurethane for tabletops and high-contact surfaces
Support items:
- Drop cloth or craft paper to protect your work surface
- Painter’s tape to hold paper in position while you align
- Fine sandpaper (220-grit) for surface prep
- Replacement hardware if you are updating pulls or knobs at the same time
For a full breakdown of installation tools, the wallpaper installation tools guide covers each item in detail.
Pro Tip: Sealer choice depends on wallpaper type. For peel-and-stick, a water-based polyurethane applied over the top works without dissolving the adhesive. For traditional paper, Mod Podge or a clear matte varnish seals edges without lifting the paper. Never use oil-based finishes on peel-and-stick — they can soften the adhesive backing.
How to wallpaper a dresser, cabinet doors, and drawer fronts
This sequence works for most flat furniture projects. Adjust for your specific piece as needed.
Step 1: Choose your wallpaper type. Decide based on use and surface. Peel-and-stick for low-contact panels, vinyl or non-woven paste for doors and drawer fronts that get daily handling.
Step 2: Remove hardware and disassemble. Take off all knobs, pulls, and hinges. Remove drawers from the dresser. Working on flat, detached panels is far easier than working on an assembled piece.
Step 3: Clean and prep the surface. Wipe down every surface with a damp cloth and let it dry completely. If the surface has a glossy finish, scuff it lightly with 220-grit sandpaper so the adhesive has something to grip. Dust off any sanding residue before applying wallpaper.
Step 4: Measure and cut. Measure each panel and add 1–2 inches of overlap on every side. Cut your wallpaper pieces. If you are using a pattern with a repeat, lay all panels out first and plan your cuts so the repeat aligns across adjacent drawers or doors.
Step 5: Apply the wallpaper. For peel-and-stick, peel back a few inches of backing, align the top edge, and press down from the center outward. Peel more backing as you go. For traditional paper, apply paste to the furniture surface and the paper back, then position and smooth. Work from the center toward the edges to push air out.
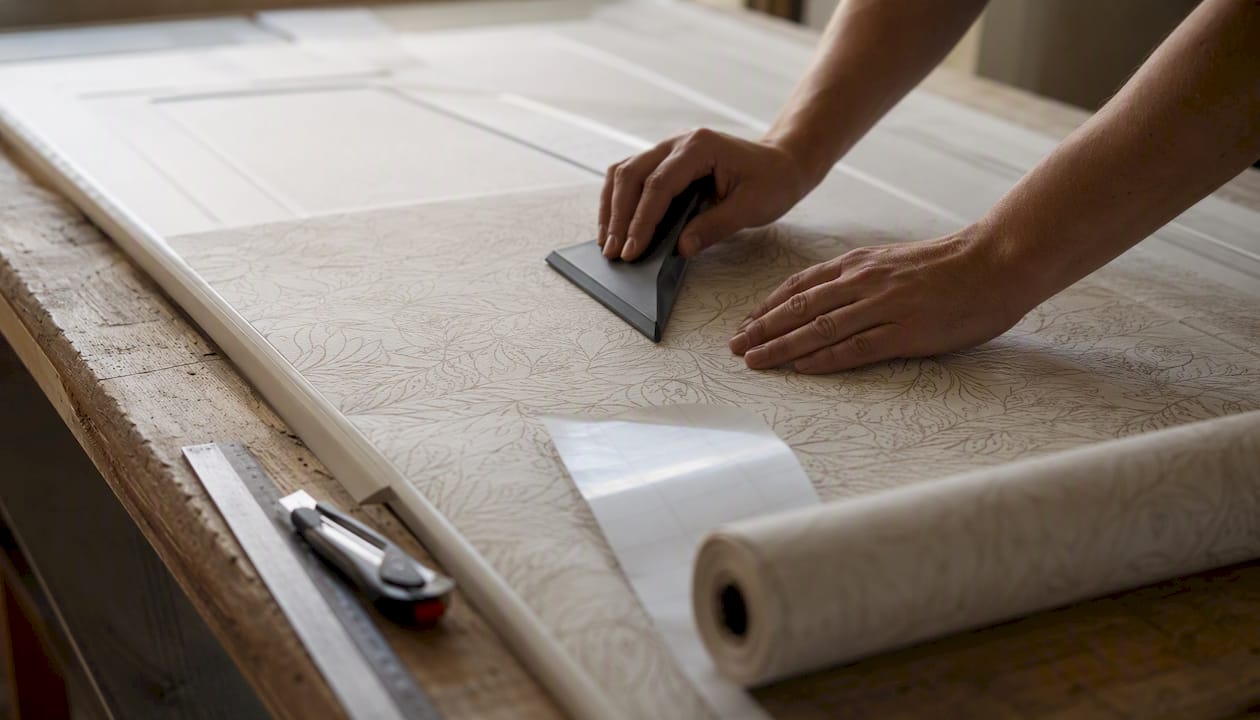
Step 6: Smooth and press. Use a smoothing tool or credit card to press firmly across the entire surface. Work in overlapping strokes from center to edge. Pay extra attention to corners and edges.
Step 7: Trim. Use a sharp craft knife and metal straightedge to trim excess paper flush with the panel edge. Change blades frequently. A dull blade drags and tears rather than cutting cleanly.
Step 8: Seal edges and reassemble. Wrap paper around the back of the panel where possible. Where you cannot wrap, seal raw edges with a thin coat of clear matte varnish or Mod Podge. Let dry fully before reattaching hardware and reassembling the piece.
Special cases:
- Recessed panels: Use textured paintable wallpaper and press firmly into the recess with a soft brush or your fingertip before smoothing.
- Rounded edges: Score the paper lightly with a knife and fold in small sections rather than trying to wrap in one piece.
- Matching drawer-to-drawer repeats: Number each drawer and cut all pieces from the same section of the roll before applying any of them.
Pro Tip: Keep a damp cloth nearby while applying traditional paste wallpaper. Wipe paste off the surface immediately if it squeezes out from under the paper. Dried paste on a finished surface is much harder to remove cleanly.
Which furniture surfaces work well and which need caution?
Not every surface is equally suited to wallpaper. Knowing where it performs well prevents wasted material and failed projects.
Good candidates:
- Drawer fronts and interiors
- Cabinet doors (flat panel)
- Bookshelf backs
- Door panels (interior entryway or closet doors)
- Interior shelf liners
- Headboard panels
- Bar cabinet fronts
Use with caution:
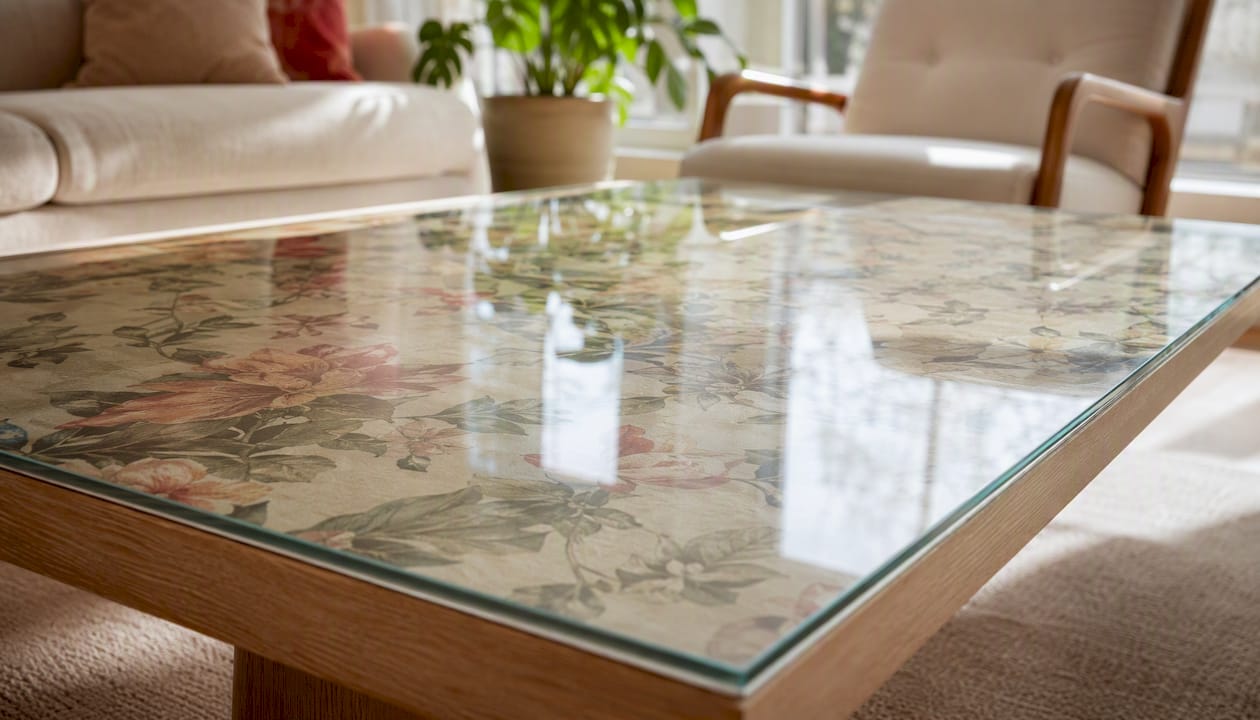
- Tabletops: wallpaper on a tabletop requires a full seal with water-based polyurethane or a glass top to protect it from spills and scratches. Without protection, it degrades quickly.
- High-traffic drawer faces: wrap the paper around the back edge and seal all edges with varnish.
- Bench seats or seating surfaces: paper compresses and creases under weight. A protective layer is mandatory.
Avoid or modify your approach for:
- Heavily carved or detailed surfaces where flat paper cannot conform
- Curved legs and rounded forms (paper will wrinkle and lift)
- Exterior furniture exposed to moisture
Wallpapered doors are a growing design trend for exactly this reason: flat door panels are one of the most forgiving surfaces for wallpaper application, and the visual payoff is significant. Matching the wallpaper across a door and adjacent wall panels creates a cohesive, immersive look that paint alone cannot achieve.
Pro Tip: For tabletops you want to cover, consider adding a custom-cut piece of tempered glass or plexiglass over the wallpapered surface. It protects the paper completely and makes cleaning trivial. This approach works especially well on coffee tables and nightstands.
Common mistakes and how to avoid them
Most furniture wallpaper projects fail at the same predictable points. Here is what to watch for.
Common mistakes:
- Measuring too tightly with no overlap, leaving gaps at edges
- Applying peel-and-stick to a dusty or slightly damp surface, causing adhesion failure
- Using a dull craft knife, which tears paper instead of cutting it
- Ignoring pattern repeat when cutting multiple panels, resulting in mismatched drawers
- Skipping edge sealing on high-contact surfaces, leading to fraying within weeks
How to fix problems after application:
- Air bubbles: Pierce with a pin, press flat, and smooth. For larger bubbles, lift the paper carefully from the nearest edge, reposition, and re-smooth.
- Small tears: Apply a thin layer of Mod Podge under the tear, press flat, and let dry. For peel-and-stick, a small patch cut from a scrap piece works well.
- Mismatched seams: If the seam is visible, cut a thin strip of matching paper and lay it over the seam, blending the pattern as closely as possible.
Pro Tip: Change craft knife blades every 3–4 cuts on wallpaper projects. Fresh blades make a measurable difference in edge quality. Keep smoothing tools clean between panels — adhesive buildup on the tool transfers to the paper surface and creates streaks.
How long do furniture wallpaper projects take and what do they cost?
Time estimates:
- Single drawer front or shelf liner: 30–90 minutes
- Full dresser with 4–6 drawers: 2–5 hours
- Set of cabinet doors with pattern matching: half a day to a full day
- Allow additional drying time of 24 hours when using paste adhesive or sealer
Cost breakdown:
- Peel-and-stick wallpaper: Typically $10–$60 for a small project covering a dresser or a few drawer fronts, depending on pattern and roll size.
- Traditional or vinyl wallpaper with paste: $30–$100+ for the same coverage, depending on material quality.
- Adhesive and sealer: Mod Podge runs around $8–$12 per bottle; water-based polyurethane is $15–$30 per quart.
- Tools (one-time cost): A basic kit with a craft knife, smoothing tool, and straightedge runs $15–$30.
- Custom-printed or mural-style wallpaper for larger pieces: $100–$300 for a full cabinet or wardrobe front, depending on print size and material.
For peel-and-stick longevity, surface prep and edge sealing are the two factors that most affect how long the project holds up. The peel-and-stick lifespan guide covers the variables in detail.
Cost note: A dresser makeover with wallpaper typically costs $10–$60 in materials for a peel-and-stick project, compared to $30–$80+ for paint supplies when you factor in primer, multiple coats, and brushes. Wallpaper is often a faster and cost-competitive option for pattern-forward results.
How to protect and clean wallpapered furniture
Protection determines how long the project lasts. The right finish depends on the wallpaper type and how much contact the surface gets.
Finish options by surface:
- Drawer fronts and low-contact panels: A thin coat of clear matte varnish over the edges is usually enough. Apply with a small brush and let dry fully before use.
- Cabinet doors and high-contact surfaces: Water-based polyurethane provides a harder, more durable finish. Apply two thin coats, sanding lightly between them with 220-grit paper.
- Edges and seams: Wrap paper around the back of the panel where possible; where you cannot wrap, seal raw edges with a thin coat of clear varnish or Mod Podge to prevent fraying and peeling.
Cleaning by wallpaper type:
- Vinyl and washable wallpaper: Wipe with a damp cloth. Mild soap is fine. Avoid abrasive cleaners.
- Standard paper-backed wallpaper: Spot clean only with a barely damp cloth. Excess moisture will damage the paper.
- Peel-and-stick with polyurethane topcoat: Wipe clean as you would any sealed surface. The topcoat protects the paper from moisture.
Always test any cleaner in a hidden area first. Some cleaning products react with varnish or adhesive and cause discoloration.
For antique or delicate furniture pieces that need thorough cleaning before wallpapering, a professional furniture cleaning service can prep the surface without damaging existing finishes.
Pro Tip: For tabletops and bench surfaces you have covered with wallpaper, a piece of tempered glass cut to size is the most reliable protection. It eliminates the need for repeated varnish applications and makes the surface fully wipeable.
Creative project ideas for wallpaper on furniture
These are specific, copy-ready ideas with clear visual payoff.
- Dresser drawer fronts: Apply a geometric or floral peel-and-stick pattern to each drawer front. Match the repeat across all drawers for a cohesive look, or use alternating patterns for a playful effect.
- Bookshelf backs: Line the back panel of an open bookshelf with a bold botanical or scenic wallpaper. The pattern shows through the shelved items and adds depth without overwhelming the room.
- Kitchen cabinet doors: Use vinyl wallpaper on flat-panel cabinet doors for a durable, wipeable finish. A faux tile or geometric pattern reads as a full kitchen refresh at a fraction of the cost.
- Entryway door panels: Wallpaper can convert doors into focal points and unify sightlines in an entryway. A single bold pattern on an interior door changes the entire feel of a hallway.
- Desk drawers: Line the interior of desk drawers with a small-scale pattern. It is a low-commitment project that adds a custom detail visible every time the drawer opens.
- Bar cabinet fronts: A dark scenic mural or faux marble pattern on a bar cabinet front creates a statement piece without custom cabinetry costs.
- Headboard panels: Apply wallpaper to the wall panel directly behind a bed frame or to a plywood headboard for a custom upholstered look without fabric.
Small-scale ideas with high visual impact: lining just the back of a single bookshelf shelf, wallpapering only the top surface of a side table (with glass protection), or covering just the drawer interiors of a nightstand.
Designer-level advice on pattern scale and finishes
Pattern scale is an important detail that affects whether a finished piece looks intentional or accidental.
Designers recommend medium-scale patterns for doors and larger furniture panels because they maintain proportion without overwhelming the surface. A large-scale pattern on a narrow cabinet door tends to show only a fragment of the repeat, which reads as incomplete. A small-scale repeat on a wide door can look busy and visually noisy.
For drawer fronts and narrow recessed panels, small-scale patterns work better. They repeat cleanly within a tight space and align more easily across multiple drawers. The wallpaper scale design guide covers proportion rules in detail for both walls and furniture applications.
Sightline continuity matters when wallpaper crosses multiple surfaces. Carrying the same pattern from a door panel to an adjacent wall, or across a set of cabinet doors, requires careful repeat alignment. Matching repeats across doors and surrounding wall panels creates the immersive, cohesive look designers use to make openings recede and rooms feel larger. For guidance on carrying patterns across openings, the open-plan wallpaper guide applies directly to multi-door and multi-panel furniture projects.
Textured and vinyl papers add tactile depth that flat printed murals do not. On a furniture piece you touch every day, that physical texture changes how the piece reads in a room. Flat murals work better on surfaces viewed from a distance, like bookshelf backs and headboard panels.
On edge treatment: Wrapping paper around the back edge of a panel is always preferable to a cut edge. Where wrapping is not possible, two thin coats of clear matte varnish on the raw edge prevent fraying for years. Skip this step and the edge will start lifting within months on any surface that gets regular contact.
Pro Tip: When matching a pattern repeat across multiple cabinet doors, number each door and cut all panels before applying any of them. Lay the cut panels on the floor in order to verify alignment before committing to adhesive.
Where to buy wallpaper for furniture projects
What to look for when buying:
- Removable backing option (for temporary or renter-friendly projects)
- Vinyl or non-woven construction for high-contact surfaces
- Pattern repeat dimensions listed clearly so you can calculate waste
- Sample ordering available before committing to full rolls
- Return or exchange policy for unused rolls
Wallsneedlove offers peel-and-stick and traditional paste options across a wide range of styles, including geometric, floral, faux texture, and custom murals, all with Greenguard Gold certification. Orders are typically custom-made within 1–3 days. For furniture projects specifically, the peel-and-stick surface compatibility guide helps identify which furniture substrates work best with self-adhesive wallpaper.
Shopping checklist:
- Order a sample before buying full rolls, especially for pattern-heavy designs
- Verify the recommended sealer is compatible with the wallpaper material
- Check the pattern repeat measurement and calculate how many rolls you need with overlap factored in
- Confirm the return policy for unopened rolls in case your project requires less than expected
A practical perspective on furniture wallpaper projects
Peel-and-stick wins for quick makeovers. The ability to reposition during application, skip paste cleanup, and reverse the project entirely if the result is not right makes it the practical default for most furniture projects. For anything that gets daily handling, vinyl or non-woven paste wallpaper is worth the extra prep time.
Starting small is the right call for first-time projects. A single drawer front or a bookshelf back panel is a low-stakes way to practice measuring, cutting, and smoothing before committing to a full dresser or set of cabinet doors. Order a sample first, apply it to a scrap piece of the same material as your furniture, and test both adhesion and your chosen sealer before the real project begins.
The projects that fail most often are the ones that skip surface prep or edge sealing. Clean surfaces, sharp blades, and sealed edges are what separate a project that lasts two years from one that starts peeling in two months.
Wallsneedlove patterns ready for your next furniture project
Wallsneedlove prints custom wallpaper in peel-and-stick and traditional paste formats, with Greenguard Gold certification and typical turnaround of 1–3 days. For furniture projects, the most useful options are geometric and seamless patterns that align cleanly across multiple panels, faux textures that read as material finishes, and botanical or scenic prints for bookshelf backs and headboard panels.

Specific patterns worth considering for furniture use:
- Geometric Dot Pattern (Pixel Diamonds): a clean geometric peel-and-stick that aligns well across drawer fronts and shelf backs.
- Faux Wood Grain (White Wood Grain): a durable faux-finish option for cabinet doors where you want a wood look without re-staining.
- Seamless Geometric Pattern: seamless repeat construction reduces visible seams across multi-panel furniture or door sets.
- Abstract Hand Drawn (Geometric Textures): textured peel-and-stick that adds tactile interest to recessed panels and drawer fronts.
Order samples before committing to full rolls. Browse the full peel-and-stick and mural collection at Wallsneedlove to find the right pattern for your piece.
Sources
- A Complete Guide to Updating Furniture with Wallpaper - The Homes I Have Made
- “Wallpapered Doors” Are Trending for Beautiful Home Storage | Livingetc
- How To Update Furniture With Wallpaper - Do Dodson Designs
- Designers love the wallpaper door trend | Good Housekeeping
- Covering a door with wallpaper | Ermetika


Leave a comment