

Avoid Wallpaper Failure: 3 Prep Checks Before You Cover Paneling
Yes, you can wallpaper over paneling if three things check out: the panels are structurally sound, completely dry with no mold history, and either smooth already or can be made smooth with filler and a liner. If a panel is rotted, warped, loose, or shows a pattern of recurring moisture, removal beats covering it every time. When those three boxes are checked, the path runs through cleaning, filling grooves, priming, lining, and then hanging the paper.
TL;DR:
- Proper filling of grooves over 1/4 inch deep with paintable caulk or lightweight wood filler is critical for smooth wallpaper application on paneling.
- Applying a stain-blocking latex or acrylic wallcovering primer ensures good adhesion, especially on glossy or sealed wood surfaces.
- Using a heavy-duty wallpaper liner applied horizontally helps keep seams from telegraphing through the decorative paper above.
- Removing moisture behind panels due to rot or persistent stains makes painting or wallpapering unfeasible, requiring panel removal instead.
- Selecting the right wallpaper style, such as busy patterns or textured faux wood grain, can effectively conceal paneling flaws once properly prepped.
Table of Contents
- What Materials and Tools Do You Need?
- How Do You Prepare Paneling for Wallpaper?
- Do You Need to Prime and Line Paneling Before Wallpapering?
- How Do You Hang Wallpaper Over Prepped Paneling?
- How Do You Fix Bubbles and Lifting Seams?
- What Walls Need Love Brings to a Paneling Project
- Our Take: Prep Beats Panic
- Which Wallpaper Styles Work Best Once Panels Are Prepped
- Sources
- FAQ
What Materials and Tools Do You Need?
Paneling is sealed wood, so ordinary drywall primer will not grip well. A stain-blocking latex primer works for most jobs, while an acrylic wallcovering primer with residual tack gives extra insurance on glossy, factory-finished panels. Both outperform standard wall primer here.
A heavy-duty wallpaper liner is the material most guides treat as non-negotiable for this project, since it bridges grooves and gives adhesive a paper-to-paper bond instead of paper-to-wood. Peel-and-stick wallpaper can skip the liner in some cases, but check the primer guidance for peel-and-stick papers first. For unpasted paper, use a clay-based wallpaper adhesive; for pre-pasted rolls, plain water activates the paste, but a light clear adhesive coat adds security over sealed wood.
Gather these before you start:
- Stain-blocking latex primer or acrylic wallcovering primer for sealing the wood
- Paintable caulk and lightweight wood filler for grooves and seams
- 120 to 150 grit sandpaper for scuffing glossy finishes
- Heavy-duty wallpaper liner, sold in rolls, applied before the decorative paper
- Wallpaper adhesive matched to your paper type (clay based for unpasted, water or light adhesive for pre-pasted)
- Smoothing brush, seam roller, sharp utility blade, and a level or plumb line
How Do You Prepare Paneling for Wallpaper?
Prep is where most wallpaper-over-paneling projects succeed or fail, and it deserves more time than the hanging itself.
- Inspect every panel. Press along seams and corners for soft or spongy spots, check behind outlets for staining, and look for panels that flex or separate from the wall. Any panel showing rot or persistent water staining should come out, not get covered.
- Check for mold. A musty smell or dark speckling near baseboards or ceiling lines points to moisture behind the panel, and that means removal and a source check before any wallpaper goes up.
- Clean thoroughly. Wash panels with mild detergent or a TSP substitute to strip wax, grease, and dust. Let the wall dry fully, ideally overnight, with a window cracked or a fan running.
- Fill or caulk grooves. If a groove is 1/4 inch deep or deeper, fill it with paintable caulk; shallower grooves can often be smoothed with a thin layer of lightweight wood filler instead.
- Sand glossy surfaces. A light scuff with 120 to 150 grit sandpaper helps primer bite into factory-sealed panels. Wipe away all dust with a tack cloth before moving on.
- Let everything cure. Caulk and filler need full dry time, usually a few hours to overnight depending on the product, before sanding or priming.
Pro Tip: Run a flashlight sideways across the wall after filling. Raking light shows every unfilled dip and ridge that a straight-on glance will miss.
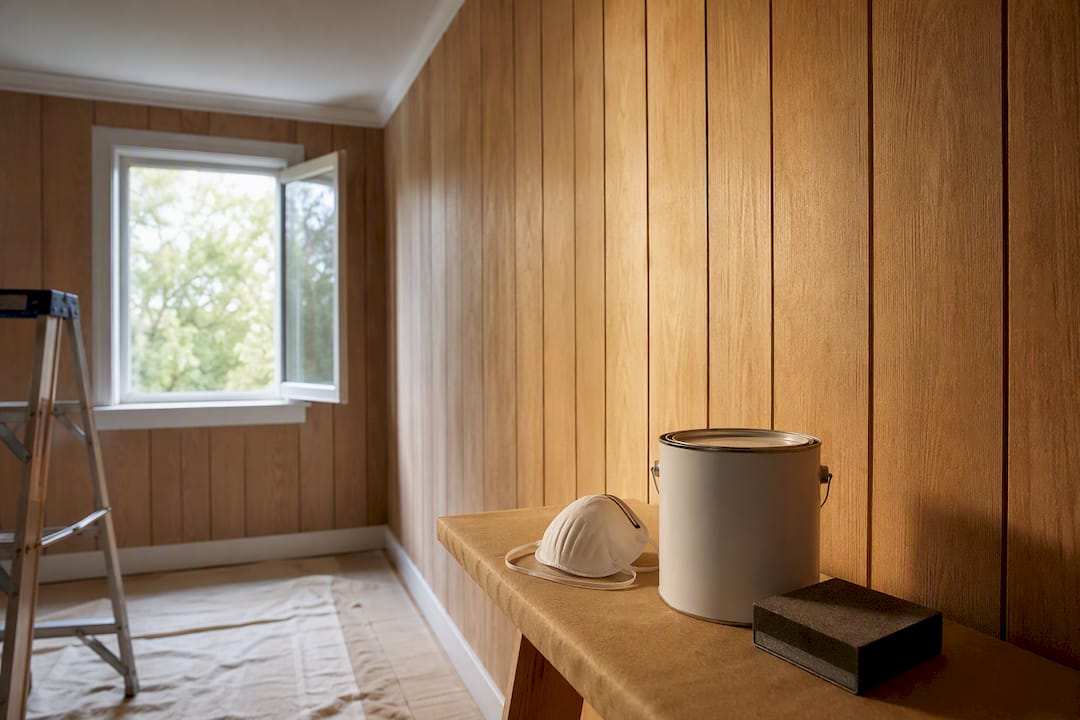
Wear a dust mask when sanding, and keep the room ventilated once caulk, filler, or primer are open. These aren’t optional extras; sanded wood dust and wet primer fumes both build up fast in a closed room.
Do You Need to Prime and Line Paneling Before Wallpapering?
Yes, and this step is where wallpaper over paneling either sticks for years or peels within months. Ordinary wall primer sits on top of sealed wood without gripping it, which is why a stain-blocking latex primer or an acrylic wallcovering primer with residual tack matters. Both are formulated to bond to slick, painted, or varnished surfaces in a way general-purpose primer isn’t.
Apply one full coat and let it dry, overnight if the label recommends it. Once dry, many liner manufacturers recommend an acrylic-emulsion sizing coat, which changes how adhesive behaves on the wall, giving it more time to reposition and a stronger final grip.
Next comes the liner, and the orientation matters:
- Hang the heavy-duty wallpaper liner horizontally, running strips across the wall rather than up and down.
- Overlap or butt seams according to the liner’s instructions, and caulk any remaining gaps at grooves before trimming.
- Trim excess at the ceiling and baseboard with a sharp blade for a clean edge.
This detail isn’t cosmetic. Industry installation guides consistently recommend hanging liner horizontally and the finished wallpaper vertically, because stacking the two seam patterns at right angles keeps liner seams from telegraphing through the decorative paper above them. Painted paneling generally takes primer and liner the same way; peel-and-stick papers are the exception, since their backing often calls for a different primer approach or none at all.
How Do You Hang Wallpaper Over Prepped Paneling?
With prep done, hanging follows the same logic as any wallpaper job, just with extra attention to alignment against panel seams underneath.
- Measure and cut with extra length. Add 2 to 4 inches per strip beyond ceiling height to allow for pattern matching and trimming. Dry-fit the first strip against a level line rather than trusting the old panel seams, which are rarely plumb.
- Paste or activate. Roll adhesive evenly on unpasted paper, or wet pre-pasted rolls per the label. Booking time (folding the pasted strip onto itself to let adhesive activate) often runs a few minutes longer over a liner than over bare drywall, since the liner absorbs moisture differently.
- Hang and smooth. Start at your plumb line, then smooth outward with a brush to push out air, working top to bottom.
- Seam and trim. Roll seams firmly once the strip is set, cut cleanly around outlets and switches, and shave excess at the ceiling and baseboard with a fresh blade.
- Handle corners carefully. Inside corners rarely run perfectly straight over paneling; wrap paper slightly around the corner and overlap the next strip rather than forcing one piece to turn the corner, and use a scarf joint instead of a butt seam where pattern repeat allows for a cleaner blend.
How Do You Fix Bubbles and Lifting Seams?
Small problems are normal even on a well-prepped wall, and most fix in minutes.
- Lifting seams: Slide a thin brush or applicator under the seam, add a bit of adhesive, press flat, and roll with a seam roller. Weight the area with a book or clean cloth-covered object while it sets.
- Small tears or punctures: Patch with a scrap of the same paper cut slightly larger than the damage, or use an adhesive-backed patch on peel-and-stick styles.
- Recurring bubbling or mold smell: This usually points to trapped moisture behind the panel rather than a hanging mistake, and it means pulling the affected section rather than repatching it again.
- Routine care: Wipe vinyl-coated and non-woven papers with a barely damp cloth; avoid soaking seams on any wallpaper type, and do a quick visual check near baseboards every few months for early lifting.
What Walls Need Love Brings to a Paneling Project
The company offers both peel-and-stick and traditional paste wallpaper, which covers various installation approaches depending on how much prep a given wall needs.
Before starting, it helps to read the primer guidance for peel-and-stick wallpaper and the notes on removing wallpaper the right way, useful if inspection turns up a panel that needs to come down instead of getting covered.
A short pre-project checklist worth following:
- Confirm panels are dry, sound, and mold-free before buying paper
- Order a sample panel to test adhesive grip on your primed wall
- Choose heavier-weight or textured paper if groove lines are still faintly visible after lining
- Reach out to support for custom sizing on murals or oversized rooms
Our Take: Prep Beats Panic
Most advice about wallpapering over paneling spends too much energy debating whether it can be done and not nearly enough on the two steps that actually determine success: groove filling and primer choice. Skip either one, and even premium wallpaper lifts within a year. Get both right, and the liner does the rest of the work.
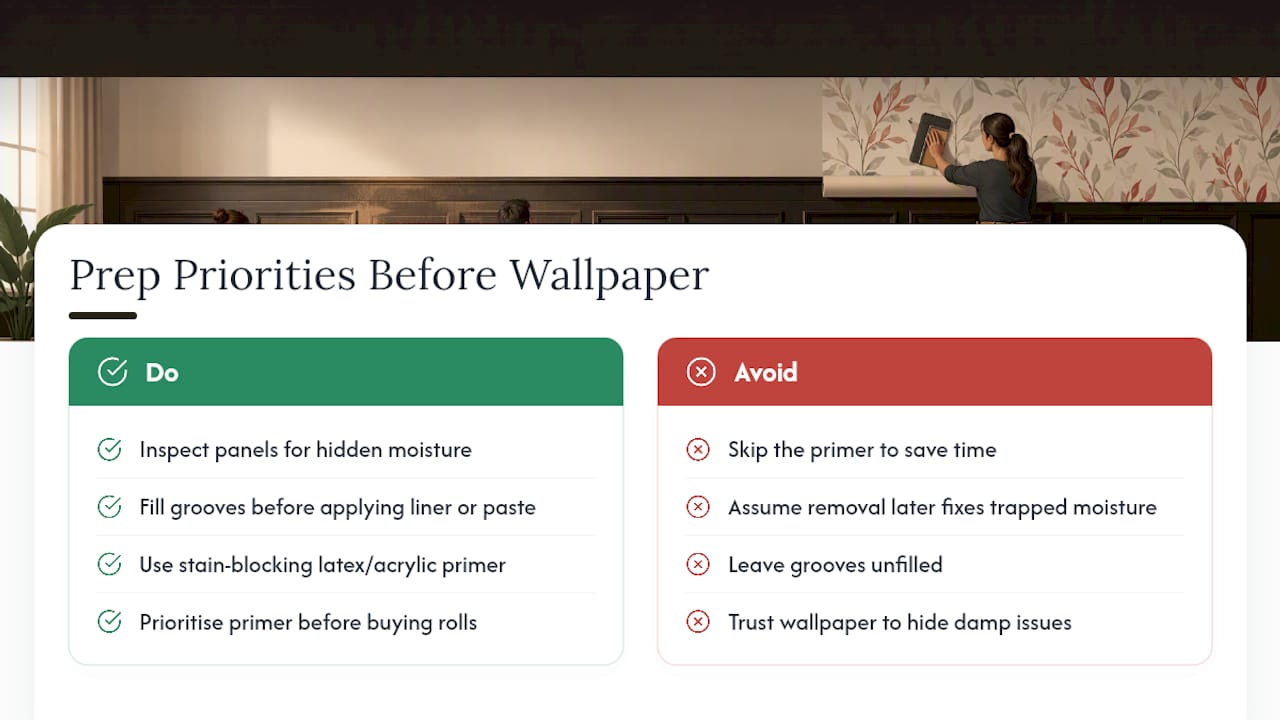
The overlooked point in most guides is that removal isn’t the fallback plan for lazy preppers. It’s the correct plan whenever moisture has already been behind a panel, because wallpaper and liner will trap that problem rather than fix it. Readers should treat the inspection step as the real decision point, not a formality before the fun part.
What we’d prioritize first, before buying a single roll, is the primer. A stain-blocking latex or acrylic wallcovering primer with residual tack is the cheapest part of this project and the piece most likely to be skipped under time pressure. That’s backward. Get the wall to hold primer well, and everything after it, liner, paste, seams, gets easier.
— WallsNeedLove
Which Wallpaper Styles Work Best Once Panels Are Prepped
Once a panel wall is primed and lined, removable and traditional paste wallpaper both become real options, but removable styles carry a specific advantage for renters and first-time DIYers: if the install goes wrong, or you simply want a change in a year, peel-and-stick comes down clean without disturbing the prep work underneath.

If your paneling still shows a wood grain texture through a lighter liner, a faux wood grain wallpaper can lean into that texture instead of fighting it. For a cleaner break from the paneled look, a geometric pattern in Pixel Diamonds or a hand-drawn abstract print hides seam lines well thanks to busy, repeating detail. Order a sample panel first to check how your primed wall takes the adhesive, then browse the full wallpaper and mural collection or contact support for a custom print sized to your room.
Sources
Key how-to references: Roman Decorating Products, Brewster Wallcovering, and Apex Wallpaper.
FAQ
Can I put wallpaper on wood paneling?
Yes, as long as the panels are dry, sound, and free of mold. Fill grooves over 1/4 inch deep, prime with a stain-blocking or acrylic wallcovering primer, and hang a heavy-duty liner first.
What can I put over paneling walls?
Wallpaper, paint, or a liner-and-skim-coat combination all work over sound paneling. Wallpaper with a heavy-duty liner tends to hide grooves better than paint alone.
How do you cover paneling without removing it?
Clean and fill the grooves, prime with an adhesion-promoting primer, hang a heavy-duty liner horizontally, then apply wallpaper vertically over the liner.
Is painting over paneling a good idea?
Painting over paneling can work with the same primer step, but grooves stay visible under paint in a way a liner and wallpaper can hide.


Leave a comment