

Why Bleed Margins Matter for Mural Design
Bleed and margins are the most critical file-prep settings for any mural job. Get them wrong and the result is white slivers at panel edges, misaligned seams, and costly reprints. The standard for most print jobs is 0.125 in (3 mm) per side. For large-format mural panels, fabricators commonly request 0.5–3 in of bleed or overlap depending on the installation method. Before finalizing any art file, confirm the exact bleed amount and panel overlap with your fabricator and installer.
- Standard print bleed: 0.125 in (3 mm) per side
- Large-format mural panel bleed: 0.5–3 in per side, depending on installation method
- Wall wrap overlap: up to 3 in for some flexible panel methods
- Safe area/margin: keep critical content at least 0.25 in inside the trim line
The single next action: Contact your fabricator and installer with the wall dimensions and installation method before exporting any files. Bleed and overlap specs vary by substrate, panel count, and installation approach.
Key Takeaways
Bleed and panel overlap are essential production settings for mural design; typically, use about 0.125 in (3 mm) for standard print and 0.5–3 in for large-format panels, but always confirm specifications with your fabricator and installer before export.
| Point | Details |
|---|---|
| Standard vs. mural bleed | Standard print needs 0.125 in (3 mm); mural panels need 0.5–3 in depending on method and installer preference. |
| Artwork must fill the bleed zone | Declaring a bleed box without extending artwork into it leaves substrate exposed at the cut. |
| Confirm overlap with the installer | Panel overlap of 0.5–1 in per seam is typical; flexible wall wraps may need up to 3 in. |
| Save production files as uncompressed TIFFs | Export at 100% scale to avoid raster artifacts; keep a layered working copy separate. |
| Proof before full production | A single panel proof with crop marks catches color, resolution, and seam issues early. |
Table of Contents
- Why do bleed margins matter for mural design?
- How printing tolerances and panel seams create real installation risk
- What bleed and overlap numbers should you use for murals?
- How do you create bleed in Illustrator, Photoshop, and InDesign?
- What belongs in a mural production file checklist?
- How do site conditions affect bleed and margin decisions?
- What are the most common bleed and margin mistakes on murals?
- How does Wallsneedlove handle bleed, panels, and production specs?
- A practitioner’s perspective on bleed decisions
- Sources
Why do bleed margins matter for mural design?
Bleed, trim, safe area, crop marks, and panel overlap are distinct terms. Mixing them up during file handoff causes production errors.
- Bleed: Artwork that extends beyond the final trim edge. Bleed exists so that mechanical trimming tolerances do not expose unprinted substrate at the edge of a finished piece. The standard recommendation for most print jobs is 3 mm (0.125 in) per side.
- Trim line (cut line): The intended final edge of the printed piece after cutting. Everything outside this line is removed.
- Safe area (safety margin): A zone set inside the trim line, typically 0.125–0.25 in, where all critical content (text, logos, focal imagery) must stay. Content placed outside the safe area risks being trimmed off.
- Crop marks: Small lines printed outside the bleed area that communicate the trim location to the press operator or cutter. Exporting PDFs with crop marks and bleed enabled is standard production practice.
- Panel overlap: On multi-panel murals, the amount of artwork that extends past one panel’s trim edge onto the adjacent panel. This is separate from bleed and is negotiated with the installer.
Visually, picture three concentric rectangles. The outermost is the bleed boundary. The middle is the trim line. The innermost is the safe area. Crop marks sit just outside the bleed boundary at each corner. Units in U.S. print production are typically inches; international specs often use millimeters. Both are acceptable as long as the spec sheet states which system is in use.
How printing tolerances and panel seams create real installation risk
Trimming tolerance is mechanical.) Cutters drift slightly between impressions, and even a well-maintained guillotine can vary by ±0.3–0.5 mm per cut. On a standard poster, that variance is invisible. On a 12-panel wall mural, it compounds across every seam.
The practical failure modes on murals are specific:
- White slivers at panel edges: No bleed means the substrate shows through at the cut line. On a dark or patterned mural, this is immediately visible.
- Misaligned seams: Panels printed without adequate overlap leave no room for the installer to adjust. A wall that is 0.25 in out of plumb across 10 feet will pull every seam out of alignment if panels have zero tolerance built in.
- Lost imagery at edges: Artwork placed outside the safe area gets trimmed. On a scenic mural, this can cut a horizon line or a face in half.
- Cumulative error: Each panel adds its own trim variance. By panel 6 or 8, a 0.5 mm error per panel becomes a visible gap or overlap in the pattern.
- Wasted material and rework: A reprint on large-format substrate is expensive. An on-site fix is more expensive still.
Site conditions compound these risks. Sunlight, moisture, and substrate permanence all affect how panels behave after installation. A mural designed with tight margins on a wall that turns out to be slightly bowed will show every tolerance error.
Pro Tip: Pair every bleed decision with a site measurement. A wall that measures 144 in at the floor may measure 143.5 in at the ceiling. Build that variance into your panel overlap before the file goes to production.
What bleed and overlap numbers should you use for murals?
The right number depends on the output type and installation method. Printers commonly request 3 mm on each side for standard print jobs and require artwork to fill that zone. Mural panel work operates on a different scale.
| Flexible wall wrap | 1–3 in per side | Up to 3 in | Dry-fit and trim on site; confirm with installer
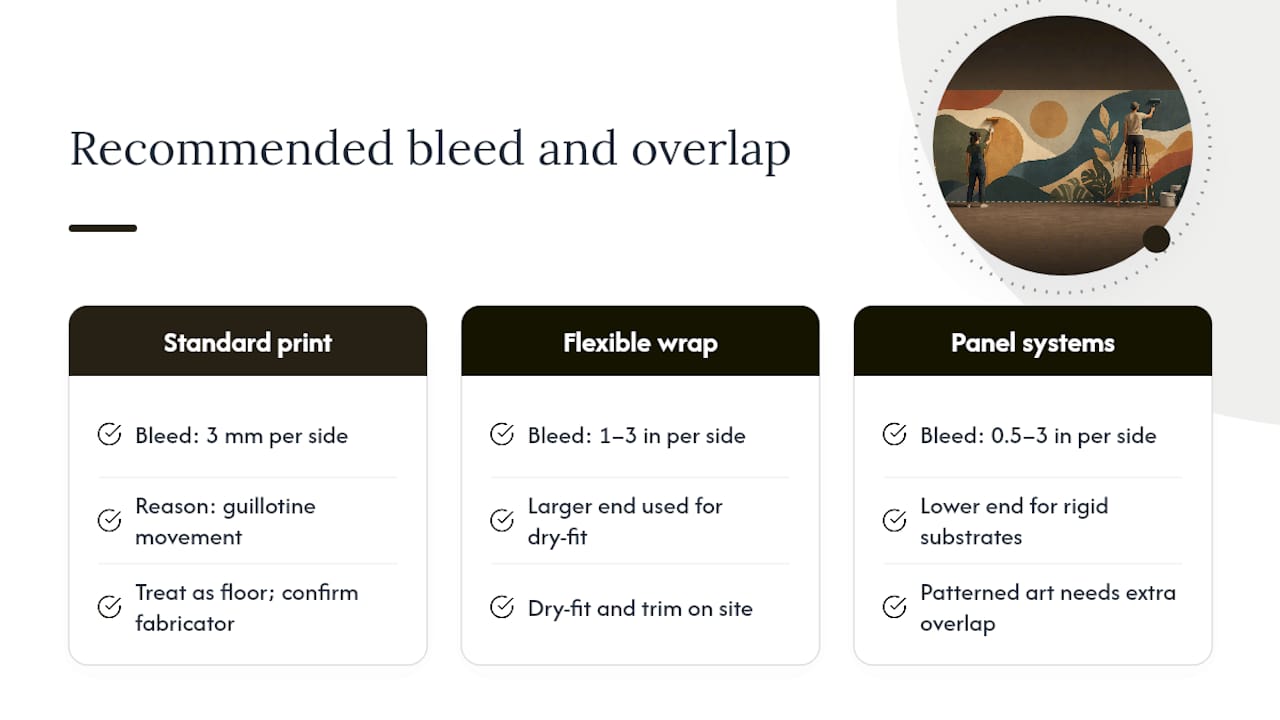
For mural panel work, fabricators and installers often ask for generous bleed and overlap, commonly 0.5–3 in depending on the panel method. The larger end of that range applies to flexible wall wraps where installers dry-fit and trim on site. Rigid panel systems with precise substrate edges can use the lower end.
Many printers advise adding 3 mm on each side to accommodate guillotine movement. For murals, treat that as a floor, not a ceiling. Always confirm the exact spec with your fabricator before export.
Heavily patterned artwork, like a geometric dot pattern or a seamless repeat, needs extra overlap to maintain pattern continuity across seams. Surface irregularities require the same.
How do you create bleed in Illustrator, Photoshop, and InDesign?
Each application handles bleed differently. The steps below cover the most direct production path in each tool.
Adobe Illustrator
- Open Document Setup (File > Document Setup) and set the bleed values for all four sides.
- Extend all artwork, fills, and background elements to the bleed boundary. Use the artboard edge as a visual guide.
- For solid background fills, draw a rectangle with no stroke that covers the full bleed area.
- For complex imagery, use the Direct Selection tool to extend vector paths beyond the artboard edge.
- Export as PDF: File > Save As > Adobe PDF. In the PDF export dialog, check Marks and Bleeds, enable Crop Marks, and confirm the bleed values match the document setup.
Adobe InDesign
- Set bleed at document creation (File > New > Document) or adjust later via File > Document Setup.
- Place all linked images so they extend to or past the bleed boundary. An image that stops at the trim line will show a white gap after cutting.
- Export: File > Export > Adobe PDF (Print). Under Marks and Bleeds, enable Crop Marks and check Use Document Bleed Settings.
- Verify the bleed values in the export preview before sending.
Adobe Photoshop
The reliable Photoshop workflow is to increase canvas size by the bleed amount on each side, then add bleed content on a new layer. This keeps the live area unchanged and prevents accidental scaling of the original raster art.
- Image > Canvas Size. Add the bleed amount (e.g., 0.25 in) to each side.
- Create a new layer below your artwork layer.
- Use the Clone Stamp tool or a filled layer to extend edge content into the new canvas area.
- Save as uncompressed TIFF for production. Keep the layered PSD as the working file.
What not to do: Declaring a bleed box without extending artwork into it is insufficient. An empty bleed box tells the cutter where to cut but leaves substrate exposed at the edge. Stretching a raster image to fill bleed distorts it. Clone or fill instead.
Pro Tip: Keep bleed artwork on a separate named layer (“BLEED EXTENSION”) in every file. Save two versions: a production-ready flattened file and a layered working copy. Never flatten the only copy.
What belongs in a mural production file checklist?
A complete spec sheet prevents miscommunication at every handoff point. Use this checklist for every mural job before sending files to a fabricator.
- Final trimmed size: Width × height in inches, per panel
- Bleed amount: Stated per side (e.g., 0.5 in all sides)
- Panel count and numbering: Sequential numbering with orientation noted (Panel 1 = left/top)
- Panel overlap amount: Per seam, confirmed with installer
- Crop marks: Included in export, positioned outside bleed boundary
- Color profile: CMYK or the fabricator’s preferred profile (confirm before export)
- Resolution at production scale: See table below
- File format: Uncompressed TIFF or flattened PDF/X with crop marks
- Fonts: Outlined or embedded; no live type in production files
- Installation notes: Panel start point, substrate, adhesive type, dry-fit requirements
Resolution for murals scales with viewing distance. A file viewed from 3 feet needs more apparent detail than one viewed from 20 feet.
Save production files at 100% scale as uncompressed TIFFs to avoid raster artifacts when the fabricator processes the file. Sending a 50% scale file and asking the RIP to double it introduces compression artifacts and reduces effective resolution.
For a full client-facing spec template, the custom mural specification guide from Wallsneedlove covers handoff fields in detail.
How do site conditions affect bleed and margin decisions?
File prep does not end at export. Installation conditions directly affect whether the bleed and overlap built into the file are sufficient.
Site measurement checklist:
- Measure wall width and height at three points each (top, middle, bottom for width; left, center, right for height)
- Note any deviation greater than 0.25 in and flag it to the installer
- Assess whether the wall is plumb and square; record any bow or lean
- Document substrate material (drywall, concrete, painted surface, existing wallpaper)
- Mark obstructions: pipes, vents, outlets, corners, and trim
Questions to confirm with the installer before production:
- Which panel is the start panel, and which edge is flush?
- What overlap does the installer prefer per seam?
- Will panels be dry-fit and trimmed on site, or installed directly?
- What is the trimming approach at corners and edges?
Panel 1 is often intentionally left flush on one edge. Miscommunication about which edge is flush can misalign every subsequent panel. Confirm this in writing before the job goes to print.
Mural longevity also depends on site conditions. UV exposure, moisture, and substrate permanence affect how panels behave over time. These factors should inform both material selection and bleed decisions.
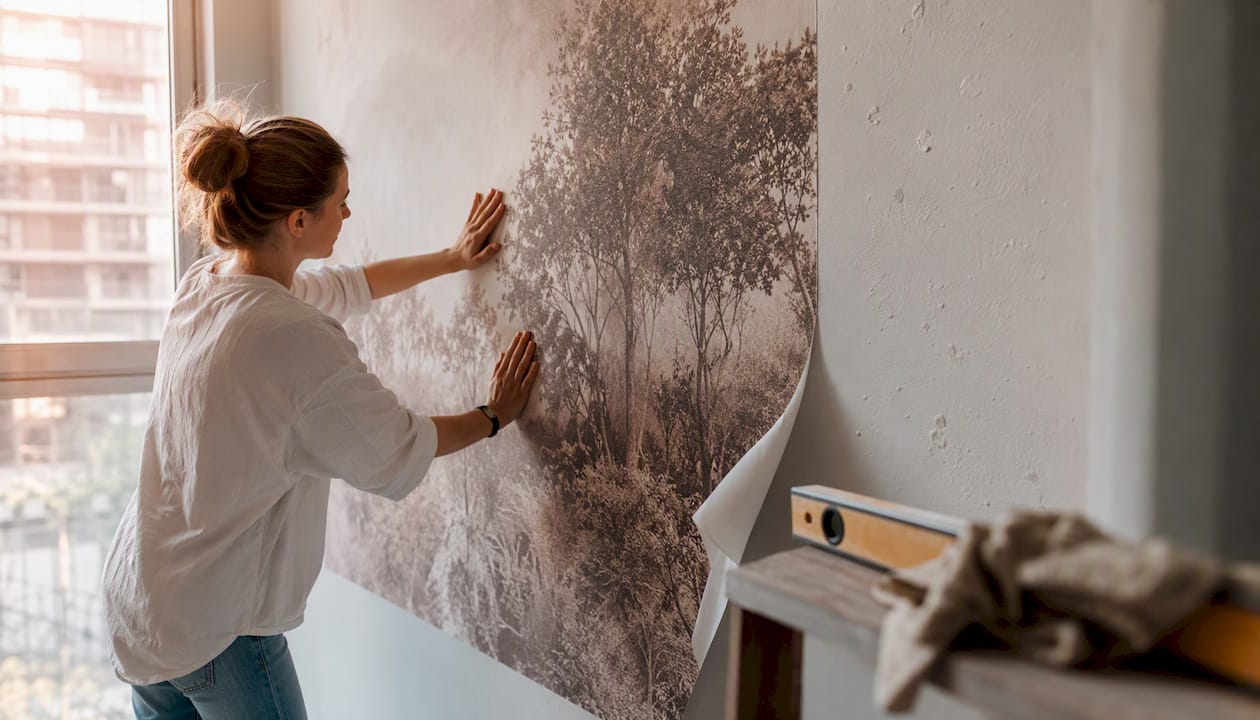
Pro Tip: Create a full-scale paper or print template of Panel 1 and dry-fit it on site before committing to full production. This catches plumb issues, obstructions, and seam alignment problems before they cost a reprint.
For venue-specific installation considerations, the wall mural venue guide from Wallsneedlove covers site prep for commercial spaces.
What are the most common bleed and margin mistakes on murals?
Most production failures trace back to a short list of errors. Each one has a direct fix.
- No bleed declared: The file has no bleed zone at all. Fix: reopen the source file, set bleed in document setup, and extend all artwork to the bleed boundary before re-exporting.
- Declared bleed, no artwork in it: The bleed box exists but the canvas is white or empty beyond the trim line. Fix: extend vector fills or use Clone Stamp to fill the bleed zone with actual artwork content.
- Insufficient panel overlap: Panels are designed edge-to-edge with no overlap. Fix: add the installer’s required overlap (typically 0.5–1 in) to each panel edge and re-export with updated crop marks.
- Critical content outside the safe area: Text, logos, or key imagery placed within 0.25 in of the trim line. Fix: move all critical elements inside the safe area boundary and proof against the trim line before export.
- Low-resolution raster scaled up: A 72 DPI image stretched to fill a 10-foot panel. Fix: request a higher-resolution asset from the client or photographer. If unavailable, discuss a design approach that uses vector elements or large flat color fields where the raster asset cannot fill the space.
What these errors look like on the wall:
- White sliver: A thin unprinted strip at one or more panel edges, visible against any colored artwork.
- Misaligned seam: A pattern or line that does not match across two adjacent panels, often by 0.25–0.5 in.
- Pixelation: Visible pixel blocks in raster areas, most obvious in gradients and photographic content.
For a broader list of installation errors to avoid, the wallpaper installation mistakes guide from Wallsneedlove covers common on-site failures.
| Common Error | Quick Fix |
|---|---|
| No bleed declared | Set bleed in document setup; extend artwork to boundary |
| Empty bleed box | Clone or fill artwork into bleed zone |
| No panel overlap | Add 0.5–1 in overlap per seam; re-export with crop marks |
| Content outside safe area | Move critical elements 0.25 in inside trim line |
| Low-res raster scaled up | Request higher-res asset or redesign with vector elements |
How does Wallsneedlove handle bleed, panels, and production specs?
Wallsneedlove produces custom murals with panel layouts, bleed, and overlap built into the production workflow. Custom orders are typically produced within 1–3 days, and the process is designed to minimize handoff errors between design, production, and installation.
When submitting a custom mural request, include:
- Wall dimensions: Width and height in inches, measured at multiple points
- Preferred substrate: Peel-and-stick or traditional paste
- Panel count preference: Or request a recommended panel layout based on dimensions
- Installation method: DIY or professional installer
- Overlap preference: Confirm with your installer before submitting
Wallsneedlove’s paneling layout guide covers panel numbering, sequencing, and overlap strategies for oversized murals. The panoramic mural guide addresses cross-wall continuity and tolerance planning for multi-wall installations.

Products like the Java Mountain wall mural illustrate how panel presentation and bleed are handled across a finished large-format piece. For designers working on client projects, Wallsneedlove’s production team can review spec sheets and confirm bleed and overlap requirements before files go to print.
Pro Tip: Request a panel proof with crop marks before approving full production. A single printed panel at scale confirms color, resolution, and seam alignment before the full run.
A practitioner’s perspective on bleed decisions
The most consistent source of mural reprints is not bad artwork. It is a gap in communication between the designer and the installer, usually about which panel starts flush and what overlap the installer actually needs on site.
A few observations from working through these problems:
- Always get the installer’s overlap spec in writing. “Standard overlap” means different things to different crews. One installer’s 0.5 in is another’s 1 in.
- Measure the wall yourself if you can. Client-supplied dimensions are frequently rounded or taken at only one point. A 0.5 in discrepancy across a 12-foot wall changes the panel layout.
- Proof Panel 1 before full production. A printed panel proof with crop marks catches color shifts, resolution issues, and seam alignment problems before they multiply across a full set.
- Do not stretch raster edges to fill bleed. Clone or fill. Stretched raster content distorts at the seam and is visible after installation.
- Keep the layered working file separate from the production export. Once a file is flattened and sent, changes require rebuilding from scratch.
A common on-site scenario: the installer starts Panel 1 and finds the wall is 0.375 in narrower at the ceiling than at the floor. With 0.5 in of overlap built into each panel, there is room to adjust. Without it, the last panel either overlaps the corner or leaves a gap. The fix at the design stage takes minutes. The fix on the wall takes hours.
Sources
- What is Bleed in Printing? How Much You Need and Why | Preflight
- Dos & Don’ts of Designing Murals
- Bleed basics — Prepressure
- I bleed for you | CreativePro
- Bleed Printing 101: What It Is and How It’s Used - Binders, Inc
- Walls That Work — Oklahoma Arts (Public Art guidance)
- The importance of bleed for print explained - DistroPrint


Leave a comment