

Panoramic Mural Design Across Multiple Walls: A Full Guide
Panoramic mural design across multiple walls is the practice of printing one continuous image that wraps around two or more walls to create an immersive interior environment. Unlike a single accent wall, this approach treats the entire room as one canvas. The result is a space where the eye travels naturally from wall to wall without interruption. Wallsneedlove offers a wide range of scenic and panoramic murals suited to this technique, from forest canopies to urban skylines. Two core design principles apply here: visual continuity across panels and scale accuracy across the full room perimeter.
What makes panoramic mural design different from standard wall murals?
A standard wall mural is a self-contained image on one wall. Panoramic mural design across multiple walls is fundamentally different because the image has no natural stopping point. It continues around corners, across doorways, and onto adjacent surfaces as one unified composition.
The key distinction is perspective. A single-wall mural can ignore the viewer’s position in the room. A multi-wall mural must account for how the image reads from every angle inside the space. Depth, horizon lines, and focal points all need to be placed with the room’s geometry in mind.
Scale and alignment are the two biggest technical challenges. Multi-wall murals require precise coordination of image continuity and panel sequencing so that no visual break appears at seams or corners. A misaligned panel by even a quarter inch becomes obvious when the eye follows a continuous horizon line across three walls.
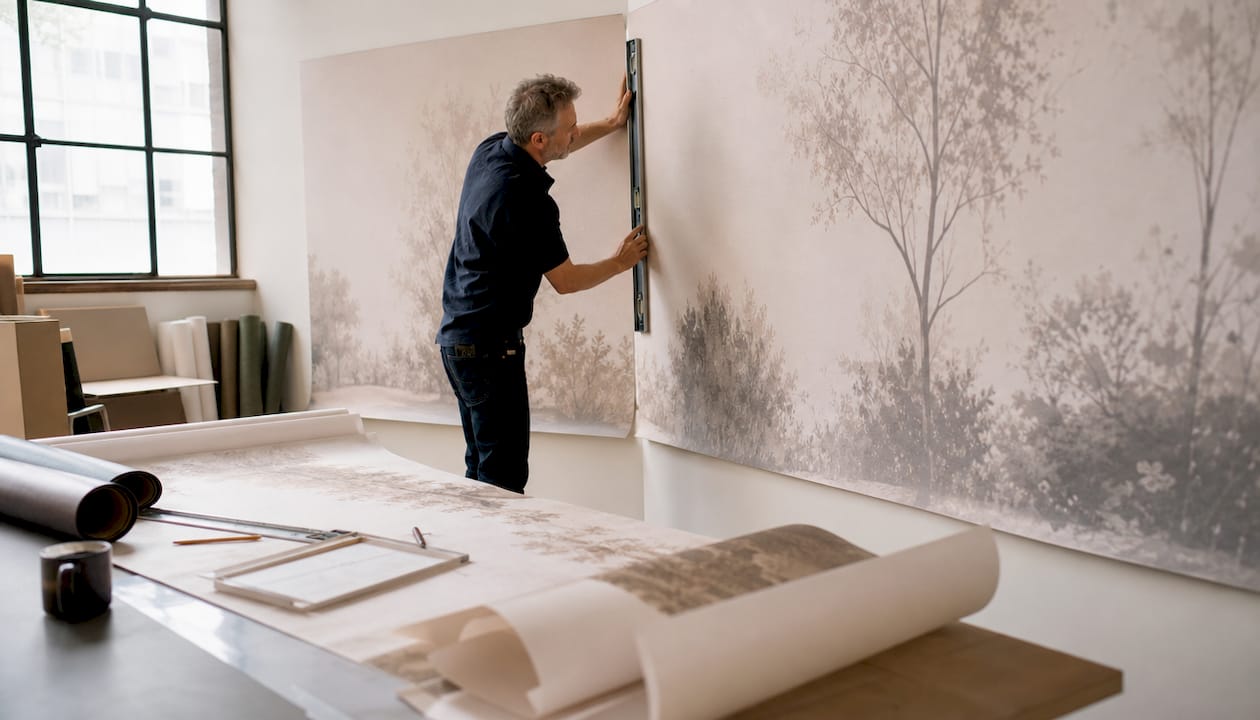
The design also carries more narrative weight. Where a single mural decorates, a panoramic composition tells a story as the viewer moves through the space. Panoramic murals create immersive experiences that connect people to their environment in a way that a framed print or accent wall simply cannot replicate.
Key differences at a glance:
- Image scope: One continuous composition vs. a contained single-wall image
- Perspective planning: Must account for multiple viewing angles and corner transitions
- Measurement complexity: Requires combined wall measurements, not individual wall dimensions
- Narrative function: Creates a spatial story rather than a decorative focal point
- Installation precision: Panel alignment across corners demands higher accuracy
Pro Tip: Photograph all four walls of your room together in one wide shot before ordering. This gives you a real sense of how the panorama will read as a unified composition.
How to plan and prepare for a panoramic mural covering multiple walls
Accurate measurement is the single most important step. Ordering mural wallpaper by the combined width of all target walls prevents design breaks and keeps patterns continuous. Measure each wall’s width and height, then add the widths together to get your total mural width. Account for doors and windows by noting their positions within the overall span.
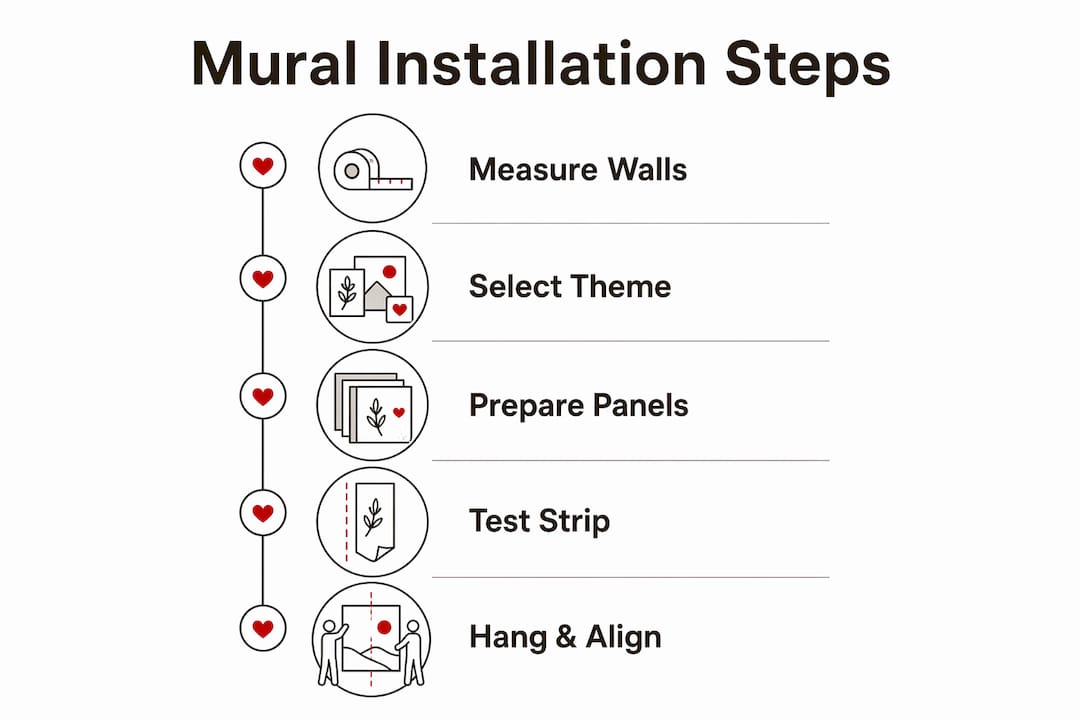
Theme selection follows measurement. The best panoramic themes share one quality: they have a natural sense of movement or depth that rewards the eye as it travels. Nature scenes work well because trees, mountains, and water already suggest distance and direction. Urban skylines and geometric patterns also translate well because they carry strong horizontal lines that anchor the composition across corners.
Lighting and furniture placement directly affect which mural themes succeed in a given room. A dark forest mural in a north-facing room with limited natural light can feel heavy. The same mural in a bright, south-facing space reads as lush and grounding. Assess your room’s light levels at different times of day before committing to a color palette.
| Tool or Material | Purpose |
|---|---|
| Laser level | Ensures horizontal alignment across multiple walls |
| Steel measuring tape | Accurate combined wall measurements |
| Seam roller | Presses panel edges flat without damaging print |
| Smoothing brush or squeegee | Removes air bubbles during installation |
| Plumb line or chalk line | Establishes a true vertical starting point |
| Sponge and clean water | Activates paste or cleans peel-and-stick backing |
Before ordering, also consider:
- Ceiling height: Taller rooms need more vertical image resolution to avoid pixelation
- Corner type: Inside corners are easier to wrap than outside corners
- Wall texture: Smooth walls produce the sharpest print results
- Existing trim and molding: These can interrupt image flow and need to be factored into the design layout
How do you install a panoramic mural across multiple walls?
The installation process follows a clear sequence. Skipping steps or rushing alignment is the most common cause of visible seams and distorted images. Digital design tools and professional installers both significantly improve outcome quality, especially on projects spanning three or more walls.
- Finalize your image file. Use a high-resolution panoramic photograph or a digitally stitched composite. The file must be sized to your combined wall dimensions at a minimum of 150 DPI at print size.
- Order panels in sequence. Panels should be labeled and numbered from left to right before shipping. Confirm the panel order with your printer before production begins.
- Prepare your walls. Fill any holes, sand rough patches, and apply a primer coat. Clean walls free of dust and grease. Smooth surfaces produce the cleanest seams.
- Establish your starting line. Use a plumb line to mark a true vertical on the first wall. This line is your anchor for every subsequent panel.
- Hang the first panel. Apply paste to the wall or activate the peel-and-stick backing. Align the panel’s edge to your plumb line. Smooth from center outward to remove bubbles.
- Align each subsequent panel. Butt edges together without overlapping. Use a laser level to confirm the horizon line stays consistent across panels.
- Wrap corners carefully. Overlap the panel slightly around an inside corner, then start the next panel flush against the corner on the adjacent wall. This prevents a visible gap if the corner is not perfectly square.
- Trim excess material. Use a sharp utility knife and a metal straightedge to trim at ceiling, baseboard, and door frame edges.
- Inspect seams under raking light. Hold a flashlight at a low angle to reveal any lifted edges or bubbles. Press down with a seam roller while the adhesive is still workable.
Pro Tip: Always hang a test strip in the most visible section of the room first. This lets you check color accuracy and alignment before committing all panels.
The table below compares the two main installation methods:
| Method | Best for | Key consideration |
|---|---|---|
| Peel-and-stick | Renters, DIY installers, smooth walls | Repositionable but less forgiving on textured surfaces |
| Traditional paste | Permanent installs, commercial spaces | Stronger bond, requires more prep and drying time |
What are the best panoramic mural design examples for multi-wall spaces?
The most cited example of large-scale mural design is a 566-inch redwood tree image divided across six floors of an elevator lobby. The image runs from forest floor to canopy, creating a vertical panorama that unfolds as riders move between floors. This project demonstrates that panoramic mural design does not need to be horizontal to be effective.
For residential spaces, the most popular themes fall into three categories:
- Nature immersion: Forest canopies, mountain ranges, and coastal scenes. A deep green tree panorama installed across a living room’s three interior walls, as designer Jennifer Hunter demonstrated, adds grandeur and warmth without feeling heavy.
- Urban and architectural: City skylines, downtown streetscapes, and geometric cityscapes. These work especially well in home offices and dining rooms where a strong graphic presence suits the function of the space.
- Abstract and geometric: Repeating patterns that shift in color or scale across walls. These are lower-risk for beginners because minor alignment variations are less visible.
Corridor and hallway applications deserve special attention. A 10-meter corridor mural inspired by Japanese folding screens uses landscapes and cranes to enhance the perceived length of the space. The horizontal flow of the image makes a narrow hallway feel wider and more purposeful. This technique applies directly to residential entryways and long dining rooms.
Vertical panoramas work best in stairwells and double-height spaces. Horizontal panoramas suit open-plan living areas and connected kitchen-dining rooms. The choice between the two depends entirely on the room’s proportions and the direction the eye naturally travels through the space. Art can transform spaces in ways that furniture and paint alone cannot achieve, and panoramic murals are one of the most direct ways to apply that principle.
Common mistakes to avoid and maintenance tips for panoramic murals
Poor measurement is the most frequent error. Treating each wall as a separate order rather than one combined measurement breaks the image at every corner. Always calculate the total perimeter width before placing an order.
Other common mistakes include:
- Ignoring perspective flow: Placing a horizon line too high or too low for the room’s scale makes the image feel disconnected from the architecture
- Mismatched lighting and theme: A high-contrast graphic mural in a dimly lit room loses detail and reads as flat
- Skipping wall prep: Hanging panels on unpainted or unprimed walls causes adhesion failure and visible texture through the print
- Rushing corner wraps: Corners need extra time and care. Pulling the panel too tight around a corner causes tearing and misalignment on the adjacent wall
For maintenance, wipe mural surfaces with a damp cloth and mild soap. Avoid abrasive cleaners, which damage the print layer. Peel-and-stick panels can be removed and replaced individually if one section is damaged, which makes panel-by-panel repair straightforward. Store any leftover panels flat in a cool, dry location in case a section needs replacement later.
Key Takeaways
Panoramic mural design across multiple walls succeeds when measurement, theme selection, and installation technique work together as one coordinated process.
| Point | Details |
|---|---|
| Measure walls as one unit | Combine all wall widths into a single measurement before ordering to maintain image continuity. |
| Match theme to room conditions | Assess light levels and furniture placement before selecting a color palette or subject matter. |
| Align panels with a plumb line | Establish a true vertical starting point to keep every subsequent panel straight and consistent. |
| Wrap corners with overlap | Extend panels slightly around inside corners to prevent visible gaps caused by out-of-square walls. |
| Maintain with damp cloth only | Use mild soap and water for cleaning. Avoid abrasive products that damage the print surface. |
Why panoramic murals are more than decoration
At Wallsneedlove, we see a clear pattern in how panoramic murals perform compared to single-wall applications. Homeowners who install a continuous image across three or four walls consistently report that the room feels larger and more purposeful. That is not a coincidence. A panoramic composition gives a room a reason to exist beyond its function.
The projects that work best are the ones where the mural theme connects to how the room is actually used. A dining room with a coastal panorama creates a different kind of meal than one with bare walls. A home office wrapped in a mountain landscape shifts the mental state of the person working in it. These are not decorative choices. They are spatial decisions.
The advice we give most often is this: do not choose a theme because it looks good in a product photo. Choose it because it matches the feeling you want the room to produce. Bold themes like dense forests or dramatic cityscapes work in rooms with strong natural light and minimal furniture. Subtle themes like soft watercolor landscapes or abstract geometric patterns work in rooms where the mural needs to support rather than dominate. The open-plan design guide from Wallsneedlove covers this balance in detail for connected living spaces.
— Wallsneedlove
Wallsneedlove’s panoramic wall mural collection
Wallsneedlove carries a wide selection of wall murals built for multi-wall applications, from nature scenes to geometric patterns and urban landscapes.

The Out Wall Mural is a strong starting point for homeowners who want an immersive outdoor scene without a complex installation. For a scenic landscape option, the Java Mountain Wall Mural delivers depth and atmosphere across a wide format. All murals are available in peel-and-stick or traditional paste options, custom made within 1–3 days, and certified Greenguard Gold for indoor air quality. The full mural and wallpaper catalog includes detailed sizing guides and installation support to help you get the measurement and ordering process right the first time.
FAQ
What is a panoramic wall mural?
A panoramic wall mural is a single continuous image printed across two or more walls to create an uninterrupted visual composition. It differs from a standard mural by treating multiple walls as one canvas rather than separate surfaces.
Why does panoramic mural design differ from standard wall murals?
Panoramic mural design requires combined wall measurements, perspective planning across corners, and precise panel alignment. Standard single-wall murals do not require any of these multi-surface considerations.
How do I measure walls for a panoramic mural?
Add the widths of all target walls together to get one combined measurement. Order the mural to that total width so the image flows continuously without breaks at corners or seams.
What themes work best for multi-wall panoramic murals?
Nature scenes, urban skylines, and abstract geometric patterns all translate well across multiple walls. The best theme matches the room’s light levels, furniture scale, and the atmosphere the space needs to create.
Can I replace one panel if it gets damaged?
Peel-and-stick panels can be removed and replaced individually without disturbing adjacent sections. Keep leftover panels stored flat in a cool, dry location for this purpose.


Leave a comment