

Fix Lifting Wallpaper Seams in Hours Without Rehanging
The fastest reliable fix is to clean the seam, inject a thin bead of seam adhesive under the lifted edge, press and roll it flat, wipe away the excess, and let it cure. This solves most local seam lifts in a few hours. It won’t fix torn paper, mold, or a wall with several failing strips. Solvent adhesives call for open windows and a mask while you work.
TL;DR:
- Seams often lift due to humidity, inadequate adhesive, poor wall preparation, or damaged substrate, requiring targeted repairs to hold long-term.
- Using a thin bead of seam adhesive with a precision nozzle and pressing with a seam roller ensures a durable fix, especially in high-traffic areas.
- Large peeling, torn paper, mold, or compromised drywall indicate repair is ineffective, and replacement or professional help is necessary.
- Proper sealing, extra adhesive application, and controlling indoor humidity during installation prevent future seam failures.
- Replacing with removable wallpaper may be more practical than patching repeated or extensive seam damage.
Table of Contents
- What Causes Repairing Wallpaper Seams to Become Necessary?
- Tools and Materials You Need for Seam Repair
- How Do You Repair a Lifting Wallpaper Seam Step by Step?
- When Should You Rehang Instead of Repair the Seam?
- How Do You Prevent Wallpaper Seams From Lifting Again?
- Walls Need Love’s Take on Repair Versus Replacement
- When to Hire a Professional for Seam Repair
- A Practical Alternative: Replace With Removable Wallpaper
- Sources
- FAQ
What Causes Repairing Wallpaper Seams to Become Necessary?
Seams don’t lift for no reason. Something in the wall, the air, or the original install let go, and knowing which one you’re dealing with decides whether a repair will actually hold.
-
Humidity and temperature swings. Adhesive bonds soften and re-harden as moisture levels shift, and repeated cycles eventually break the grip, especially near bathrooms, kitchens, and windows.
-
Not enough adhesive at the edge. Installers sometimes skimp on paste right at the seam, the one spot that takes the most stress from foot traffic, doors, and furniture bumps.
-
Poor wall preparation. Dust, grease, or unsealed plaster under the paper stops adhesive from ever forming a real bond, so the seam was doomed before it dried.
-
Damaged substrate. A nicked, scored, or crumbling patch of drywall beneath the seam gives adhesive nothing solid to grab.
-
Aging paste. Factory-applied adhesive on older pre-pasted rolls can simply give out over time, particularly in humid climates.
Tools and Materials You Need for Seam Repair
Skip the all-purpose craft glue. Wallpaper seams need adhesive built for the job, and a few specific tools make the difference between a clean fix and a visible patch.
- Seam repair adhesive with a precision nozzle or syringe-style tip, which lets you insert glue under a tight edge without peeling back the whole strip.
- Seam roller to set the bond evenly once the edge is pressed down. A 1.5 inch polymer seam roller works well for both flat walls and the tighter curves around trim.
- Small putty knife or plastic smoothing tool for lifting the loose edge and pressing it back without creasing the paper.
- Fine artist’s brush, damp sponge, lint-free cloth, and painter’s tape for application, cleanup, and temporary holds.
- Hairdryer or heat gun on low for stiff vinyl seams that won’t lie flat cold.
Ventilate the room and wear a mask when handling solvent-based adhesives. For a broader rundown of what belongs in a wallpaper toolkit, the complete DIY installation tools guide covers gear beyond just seam repair.
How Do You Repair a Lifting Wallpaper Seam Step by Step?
This is the core fix, and it works the same way whether you’re patching one bubble near the ceiling or three feet of a curling edge.
- Clean and test the area. Wipe dust and grime from the seam with a damp cloth. If the paper feels stiff or brittle, warm it gently, or dab it with hot water, to make it pliable enough to lie flat again.
- Lift carefully, just enough. Use the putty knife to raise only the loose portion, not the whole strip. Check what’s underneath: dried paste chunks, debris, or a damaged patch of drywall all need attention before you glue anything back down.
- Apply a thin, even bead of seam adhesive under the lifted edge with the brush or precision nozzle. This step is where most DIY repairs go wrong. Over-applying adhesive can stain the paper, cause it to swell, or shift the pattern out of alignment, so less is genuinely more here.
- Press the seam into place, working from the center outward toward the edges, then run the seam roller over it firmly. Immediately wipe any adhesive that squeezes out with a damp sponge before it dries on the surface.
- Hold it down if it springs back. A strip of painter’s tape across the seam for a few hours keeps stubborn edges flat while the glue sets. Avoid heavy-duty tapes; they can pull the paper’s finish off when removed.
- Let it cure. Most seam adhesives set within a few hours, though full cure time depends on humidity in the room. Keep the space dry and avoid running a humidifier nearby until the bond is fully set.
Pro Tip: Dedicated seam adhesives tack faster than standard wallpaper paste, which is why a five-minute hold with a roller often beats propping tape for an hour.
A few trouble spots come up often enough to call out. Tiny tears usually respond well to a dab of adhesive worked in from behind with the brush tip, pressed flat, and rolled once dry. Bubbles away from the seam itself sometimes need a small slit with a hobby knife so trapped air can escape before you reglue. Stubborn vinyl that keeps curling back up responds to careful, moving heat from the hairdryer, never a heat gun held stationary, which can scorch or warp the surface. If a patterned strip is involved, take an extra beat to align the design before rolling; a mismatch of even an eighth of an inch becomes obvious once everything dries.
When Should You Rehang Instead of Repair the Seam?
Not every lifted seam is worth chasing with a syringe of adhesive. Certain damage signals that repair is the wrong tool for the job:
- Large-area peeling or multiple seams failing across the same strip, which usually points to a bonding problem bigger than one edge.
- Torn, creased, or water-damaged paper that won’t lie flat no matter how much heat or adhesive you apply.
- Mold behind the wallpaper, which needs remediation before any new material goes up, not a glue patch over the top.
- Compromised drywall, cut, nicked, or crumbling, that needs its own repair before wallpaper can bond to it at all.
- Repeated failures at the same seam, a sign the underlying cause was never actually fixed the first time.
How Do You Prevent Wallpaper Seams From Lifting Again?
Most seam failures trace back to something skipped during installation, not bad luck. A little extra effort up front saves a lot of touch-up work later.
- Prime and seal new walls before hanging anything, and match your adhesive to the wallpaper type you’re using, since vinyl, grasscloth, and traditional paper all bond differently.
- Run extra adhesive along every seam during installation rather than relying on the paper’s factory paste alone.
- Consider the double-cut overlap method for a tighter, more durable seam, particularly in high-traffic rooms or humid spaces.
- Control indoor humidity with air conditioning or a dehumidifier, and keep the room ventilated during and after hanging.
- Check seams periodically. A small lift caught early takes five minutes to fix. Left alone, it becomes a curling edge that needs the full repair process.
Walls Need Love’s Take on Repair Versus Replacement
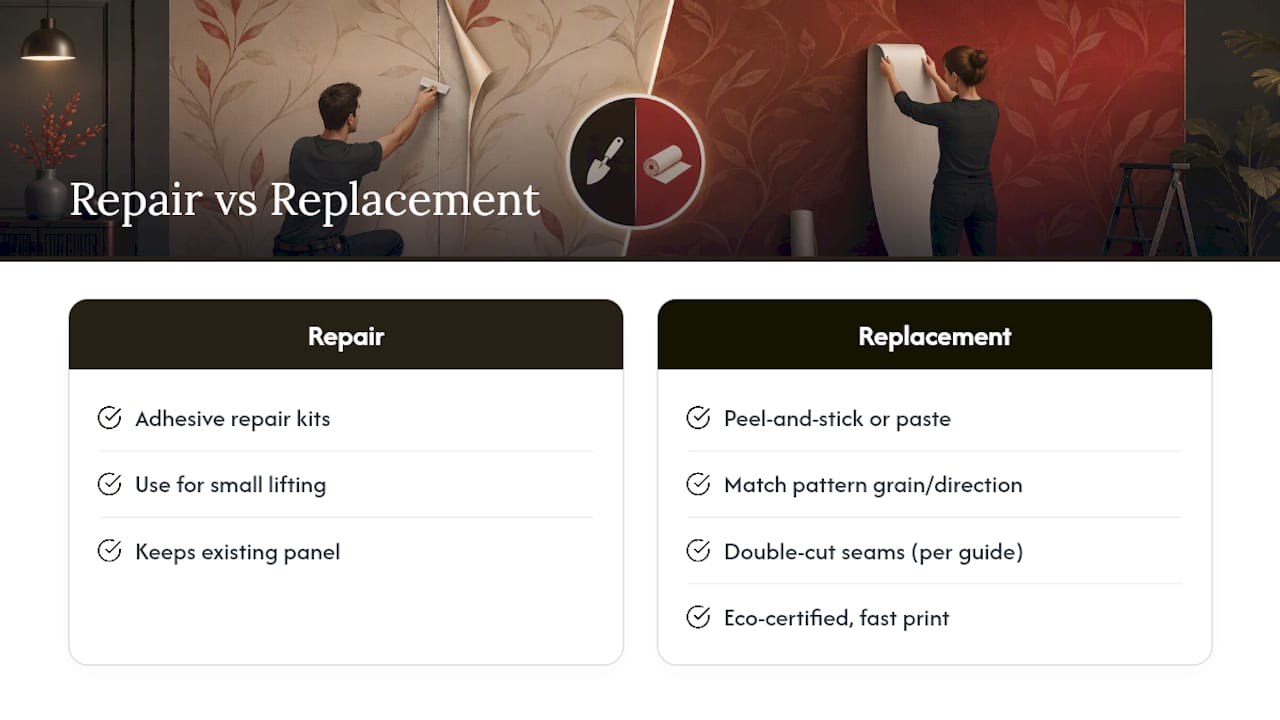
Sometimes the smarter move isn’t a repair kit, it’s a fresh strip. Walls Need Love makes both removable peel-and-stick and traditional paste wallpaper, and its installation guides walk through the double-cut overlap technique that helps new seams resist the lifting described above. Orders may have environmental certifications and timely printing, so replacing a damaged section may not mean a long wait. For DIYers going that route, matching the new panel’s grain or pattern direction to the old one, and double-cutting fresh seams from the start, sets the new install up to outlast the one it’s replacing.
When to Hire a Professional for Seam Repair
Extensive substrate damage, pattern matching across a full rehang, or any sign of mold behind the paper are worth calling a pro for. Professionals check drywall integrity and adhesive compatibility before they even open a tube, details homeowners often miss. Expect a service call to cost more than a DIY tube of seam adhesive, but far less than living with a wall that keeps failing.
— WallsNeedLove
A Practical Alternative: Replace With Removable Wallpaper
Torn paper, a seam that keeps reopening no matter how carefully you patch it, or simple boredom with the pattern all point to the same answer: replace instead of repair. Some providers make that route straightforward with removable and traditional paste wallpaper, timely custom production, and installation guides built for people who haven’t hung a strip before.

If a damaged accent wall needs a full refresh rather than another glue touch-up, browse a pattern like Monkeying Around or the large-format Java Mountain mural to see how the removable and paste options compare side by side. Order a sample first, check the finish and color against your wall’s lighting, then move to a full roll once you’re confident it’s the right fit. Start browsing the full wallpaper and mural collection to compare styles before you commit to a size.
Sources
These references back the steps and safety notes covered above, and they’re worth bookmarking for deeper troubleshooting:
- Wallpaper Repair: How To Fix Common Issues - This Old House
- How to Fix Loose Wallpaper Seams - ROMAN Products
- How to Repair Loose Wallpaper Seams - iFixit Repair Guide
FAQ
What is the best way to fix wallpaper seams?
Clean the area, apply a thin bead of seam adhesive under the lifted edge, press it flat starting from the center, roll the seam, and wipe off any excess before it dries.
How can I hide the seams on my wallpaper?
Careful pattern alignment during repair or installation is the main tool. Using the double-cut overlap method when hanging new panels also creates a tighter, less visible seam than a simple butt joint.
Why are my wallpaper seams showing?
Usually it’s a mix of humidity swings, thin adhesive application at the edges during installation, or a damaged patch of drywall underneath that never let the paste bond properly.
Are you supposed to overlap wallpaper seams?
A slight overlap followed by a double cut through both layers, rather than a plain edge-to-edge butt seam, tends to produce a stronger, more seamless join, particularly with vinyl or textured papers.


Leave a comment