

Double Cut Seams: Pro Shortcuts With 1–2 Inch Overlap for DIY & Pros
Double cutting means overlapping two wallpaper panels by a small amount, then slicing through both layers in a single pass so the edges meet in a perfect, nearly invisible seam. The technique matters most on thicker, textured, or patterned wallcoverings, where a simple butt seam tends to gap or shadow. Get the overlap and blade work right, and the seam disappears at normal viewing distance.
TL;DR:
- The double-cut method is essential for thicker or patterned wallpapers, as it ensures seamless edges by slicing both layers simultaneously in one clean pass.
- Using a scrap backing or metal shield behind the overlap is crucial to protect drywall and help align patterns accurately during the cut.
- Proper preparation, such as a sharp blade, a straightedge, and correct overlap width, is more important than cutting speed to achieve a professional, invisible seam.
- Pattern-matched panels that include bleed and built-in repeats make double cutting more straightforward and reduce the risk of misalignment.
- Adjusting for common mistakes involves re-adhesive application for lifted edges and swapping dull blades, emphasizing that setup and patience outweigh speed in quality wallpaper seaming.
Table of Contents
- What Is the Double-Cut Method and When Should You Use It?
- Tools and Prep: What to Have on Hand Before You Cut
- Step-by-Step: How to Double Cut a Wallpaper Seam
- Protecting the Wall While You Cut Through Two Layers
- Finishing the Seam and Fixing Common Mistakes
- Installer Resources Worth Bookmarking
- What Actually Separates a Clean Seam From a Sloppy One
- Get Pattern-Matched Panels That Make Double Cutting Easier
- Sources
What Is the Double-Cut Method and When Should You Use It?
Double cutting isn’t a new fold or a different adhesive. It’s a cutting order: overlap first, then cut through both sheets at once so the top and bottom edges match exactly when the excess strips peel away. The overlap typically runs about 1 to 2 inches, which gives you enough margin to align a pattern before committing to the cut.
Not every wallpaper needs this. Thin, lightweight papers can sometimes get away with a standard overlap seam with no visible ridge. But once you’re working with thicker or heavily textured wallcoverings, overlap seams start to show a shadow line or a raised edge. That’s your signal to double cut.
Reasons to reach for the double-cut method:
- Thicker vinyl, grasscloth, or textured commercial-grade papers
- Large-scale murals or patterned goods where the design has to line up panel to panel
- Any project where the seam will sit at eye level in direct light
- Peel-and-stick materials with visible texture that would telegraph a simple overlap
Murals often build in a little extra bleed at the panel edges so installers have room to overlap and match the graphic before making the cut, a detail worth checking on any patterned order.
Tools and Prep: What to Have on Hand Before You Cut
A clean double cut depends more on your prep than your speed. Rushing this step is where most seams go wrong.
Gather these before you start:
- A sharp utility knife with fresh snap-off blades, or a single-edge blade holder
- A metal straightedge or a dedicated wallpaper edge trimmer
- A seam-cutting tool or thin metal shield to protect the wall
- Scrap wallpaper backing, roughly 2 to 3 inches wide, to slide behind the seam
- A hand seam roller, plus a heavier roller for final compression
- Seam adhesive or wallpaper paste for re-sealing edges after the cut
The scrap backing does double duty. Sliding a strip behind the seam before you cut protects your blade tip from the wall surface and creates a slight fullness that helps the seam seat flush once you roll it. Walls Need Love’s own installation tools guide breaks down which blades and trimmers work best for peel-and-stick versus traditional paste applications, and the seam roller guide covers roller weight and technique for the final pass.
Pro Tip: Swap your blade every two or three seams, not when it starts dragging. A dull blade needs more downward pressure, and that extra force is exactly what scores drywall or tears paper mid-cut.
Step-by-Step: How to Double Cut a Wallpaper Seam
Follow this sequence in order. Skipping steps, especially the backing strip, is where most amateur seams fail.
- Hang the second panel so it overlaps the first by 1 to 2 inches, matching the pattern before you commit to any adhesive pressure.
- Slide scrap backing or a metal shield behind the overlap area, right where your cut line will run.
- Set your straightedge directly on the seam line where the two layers meet, holding it flat with even pressure.
- Cut in one steady vertical pass through both layers with a fresh blade, using light, consistent pressure rather than sawing back and forth.
- Peel back the top panel and pull out both trimmed strips, top and bottom.
- Brush the edges down flat, checking that they now sit edge to edge with no gap or overlap.
- Apply adhesive under the seam if the edges lifted at all during trimming, then press the seam closed.
- Hand-roll the seam first, then follow with a heavier roller to compress the joint into the adhesive.
- Step back and check the seam at normal viewing distance, not two inches from your face. Seams that look fine up close sometimes show a hairline shadow from three feet away.
A professional paperhanger demonstrated in Fine Homebuilding’s double-cut walkthrough exactly why the straightedge placement and hand position matter as much as blade sharpness. Watching that steady, single pass on video clears up more confusion than any written description, particularly the angle of the wrist as the blade travels top to bottom.
One detail worth calling out: the entire method hinges on cutting both layers in the same motion. Cut them separately, even a few minutes apart, and the two edges almost never line up again. That’s the whole reason double cutting produces a tighter seam than trimming each sheet on its own.
Protecting the Wall While You Cut Through Two Layers
Cutting two layers of wallpaper means your blade is traveling closer to drywall than it would on a single sheet, and that’s where amateur installs pick up scored gouges under the seam. Shield the wall every time you cut.
Slide a metal plate, putty knife, or dedicated seam-cutting tool behind the overlap before the blade ever touches the paper. Keep the knife vertical, and resist any downward pressure into the wall itself. The blade should glide through the two layers of paper, not press into the substrate underneath.
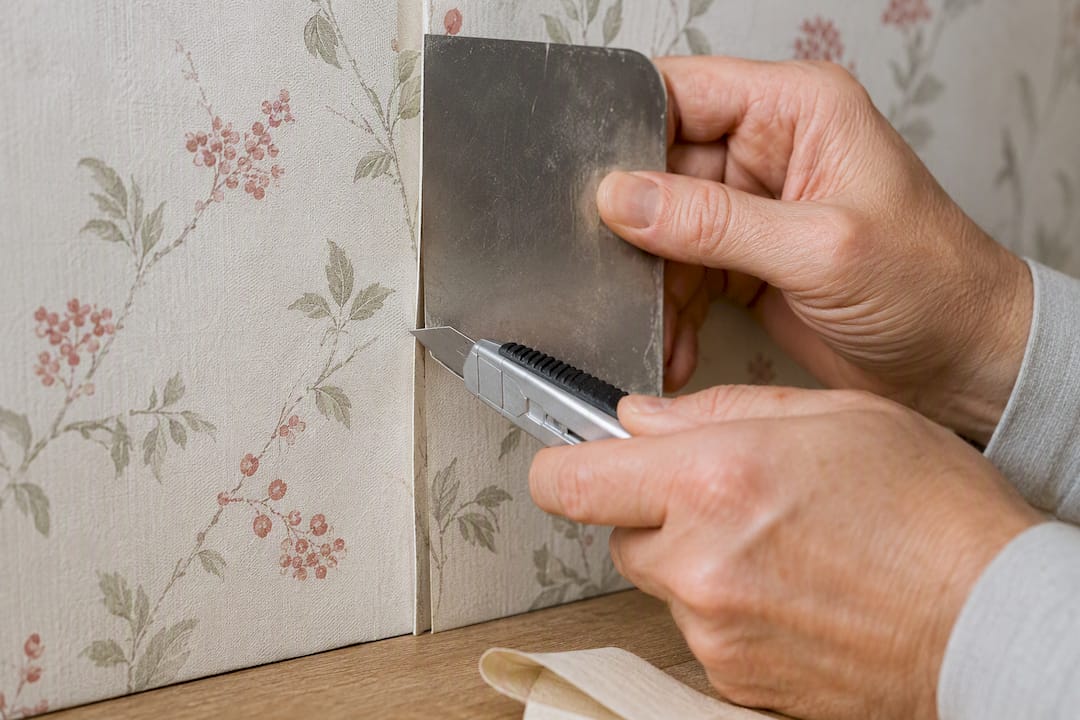
Scrap backing works fine for most residential jobs. On fragile or previously patched drywall, a rigid metal shield gives more reliable protection than a folded paper strip. If you’re unsure how much pressure your blade needs, practice the pass on an offcut first. A blade that glides easily needs almost no force, and low force means low risk to the wall behind it.
Finishing the Seam and Fixing Common Mistakes
Once the excess strips are out, spread a thin line of seam adhesive under the joint if the edges separated at all during cutting. Press the seam flat, then run your hand roller along the full length before switching to the heavier roller for final compression. That two-step rolling sequence, hand roller then heavier roller, seats the seam into the adhesive more evenly than one pass with either tool alone.
Common problems and how to fix them:
- Peaking or lifting seam: gently release the edge, add a touch more adhesive, and re-seat before it dries.
- Slight pattern misalignment: correct it immediately, before the paste sets. Once it dries, you’re stuck with it.
- Visible ridge along the seam: usually means the overlap was too narrow. Note it for the next seam rather than trying to fix a dried one.
- Rough or torn edge: almost always a dull blade. Swap it before the next cut, not after.
Wipe away any paste residue with a clean, damp sponge before it dries on the surface, then do a final walk-past inspection under normal room lighting.
Installer Resources Worth Bookmarking
Walls Need Love’s overlap method guide walks through the double-cut workflow with diagrams for readers who want a visual reference alongside these steps, and the seam roller resource covers which roller weight suits peel-and-stick versus paste applications.
Every Walls Need Love order ships Greenguard Gold certified, with custom panels typically produced within one to three days, whether you’re ordering peel-and-stick or traditional paste. For patterned or scenic designs specifically, check the pattern repeat guide before you order. Knowing your repeat length ahead of time makes the overlap-and-match step at the wall far less guesswork.
What Actually Separates a Clean Seam From a Sloppy One
Most tutorials treat double cutting as a blade skill. It isn’t, not primarily. The blade matters, but the overlap width and the scrap backing behind it do more work than the cut itself. A dull blade forgives a wide, well-placed overlap. A razor-sharp blade can’t save a seam where the panels were never lined up correctly in the first place.
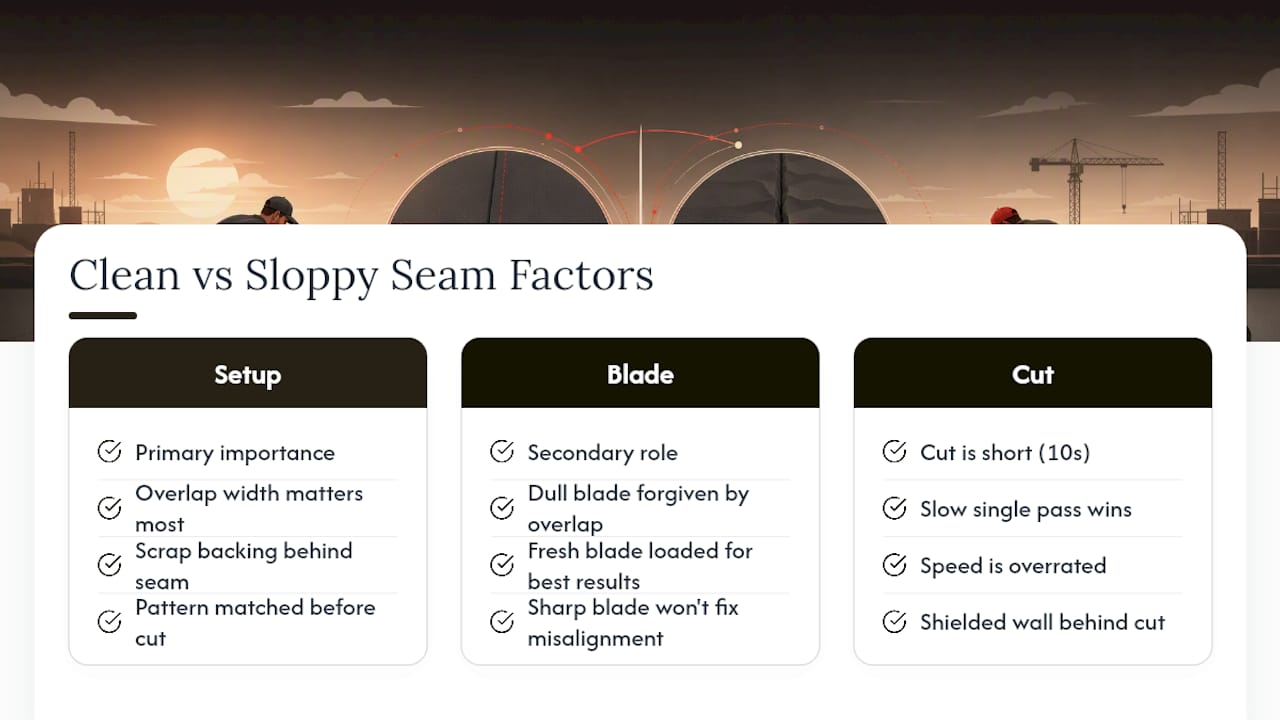
The conventional advice tells beginners to focus on cutting speed and steady hands. Speed is overrated here. A slow, single pass through both layers with a shielded wall behind it beats a fast cut every time, because you can’t undo a gouge in drywall or a torn edge halfway through a panel.
If you’re new to this, prioritize the setup over the cut: correct overlap, pattern matched, backing in place, fresh blade loaded. By the time you’re actually slicing through the paper, the hard decisions are already made. The cut itself takes ten seconds. Getting to that ten seconds correctly is the entire skill.
— WallsNeedLove
Get Pattern-Matched Panels That Make Double Cutting Easier
A double-cut seam is only as good as the panels you’re cutting. Walls Need Love prints every order to match, with built-in bleed for pattern alignment across both peel-and-stick and traditional paste wallpaper, so your overlap lines up before the blade ever touches the wall.

Browse patterns that reward a careful seam, like the repeat-heavy Pixel Diamonds geometric wallpaper or the scenic Java Mountain wall mural, both printed with the panel-to-panel accuracy that makes double cutting straightforward instead of stressful. For homeowners weighing pattern placement on furniture as well as walls, the partner guide on combining fabric patterns covers similar alignment principles worth knowing before you order. Pick a design, check the repeat, and place your order. Custom panels are typically ready in one to three days.
Sources
- Double Cut install technique - Dreamscape Support
- Double-Cut Wallpaper for Perfect Overlap Seams — Fine Homebuilding
- Seam cutting methods for sheet flooring — Floorexpert
- How to double cut wallpaper — WallpaperBuddy


Leave a comment