

3 Checks to Make Photo Mural Printing Order Ready
Yes, you can print a photo as a wall mural, provided your image and wall pass three quick checks: resolution, measurements, and material. Measure the wall before you do anything else, then confirm your photo’s pixel dimensions match the print size you want. If you’re not sure the numbers add up, request a proof or digital mockup from your provider before committing to full production.
TL;DR:
- A photo mural requires high resolution, accurate measurements, and suitable material to ensure quality and durability; request proofs before confirming an order.
- Vinyl materials, especially peel-and-stick or permanent adhesive types, offer the best color vibrancy and long-lasting performance, with fabric options softening glare for intimate rooms.
- Effective DPI depends on wall size and viewing distance, with 150-300 DPI ideal for close-up views and lower DPI acceptable for murals viewed from afar.
- Wall measurements should include obstacles like outlets and trims, and large murals are often split into panels with seams carefully aligned and masked for a seamless look.
- Professional installation is recommended for textured or wide murals to prevent crooked seams and bubbles, although DIY is feasible on smooth, primed walls with proper tools.
Table of Contents
- Which Materials and Finishes Work Best for Photo Mural Printing?
- How Do You Calculate DPI for a Photo Mural?
- How Do You Measure a Wall for a Custom Mural?
- What Happens After You Place a Mural Order?
- Should You Install a Photo Mural Yourself or Hire a Pro?
- Why Do Photo Murals Fail, and How Do You Fix It?
- What Makes Wallsneedlove a Reliable Choice for Custom Murals?
- Ready to Turn Your Photo Into a Mural?
- What We’ve Learned From Years of Custom Mural Orders
- Helpful Resources for Planning Your Mural
- Sources
Which Materials and Finishes Work Best for Photo Mural Printing?
The material decides how your mural looks, wears, and comes down later. Photo mural printing options generally fall into five categories, each suited to a different room, budget, and commitment level.
- Peel-and-stick vinyl: Removable, renter-friendly, and the easiest for DIY installation on smooth, primed walls.
- Permanent adhesive vinyl: Built for high-traffic commercial spaces where the mural needs to survive years of contact and cleaning.
- Non-woven or paste wallpaper: A traditional, seamless-feeling option favored by decorators who want a wallpaper look rather than a printed panel look.
- Dye-sublimated fabric: Reduces glare and reads more like gallery art, which is why it tends to work well in bedrooms and living rooms.
- Canvas-style textures: Adds visible texture for a fine-art finish, often chosen for statement pieces rather than full-wall coverage.
Vinyl generally wins for punchy color and durability, while fabric prints soften glare and suit quieter, more intimate rooms. If you want extra protection against scratches or humidity, ask about a matte or gloss laminate. Renters and frequent redecorators should also know that peel-and-stick and fabric systems cut down on waste compared to permanent wallpaper or framed canvas, since they come off clean when you move.
How Do You Calculate DPI for a Photo Mural?
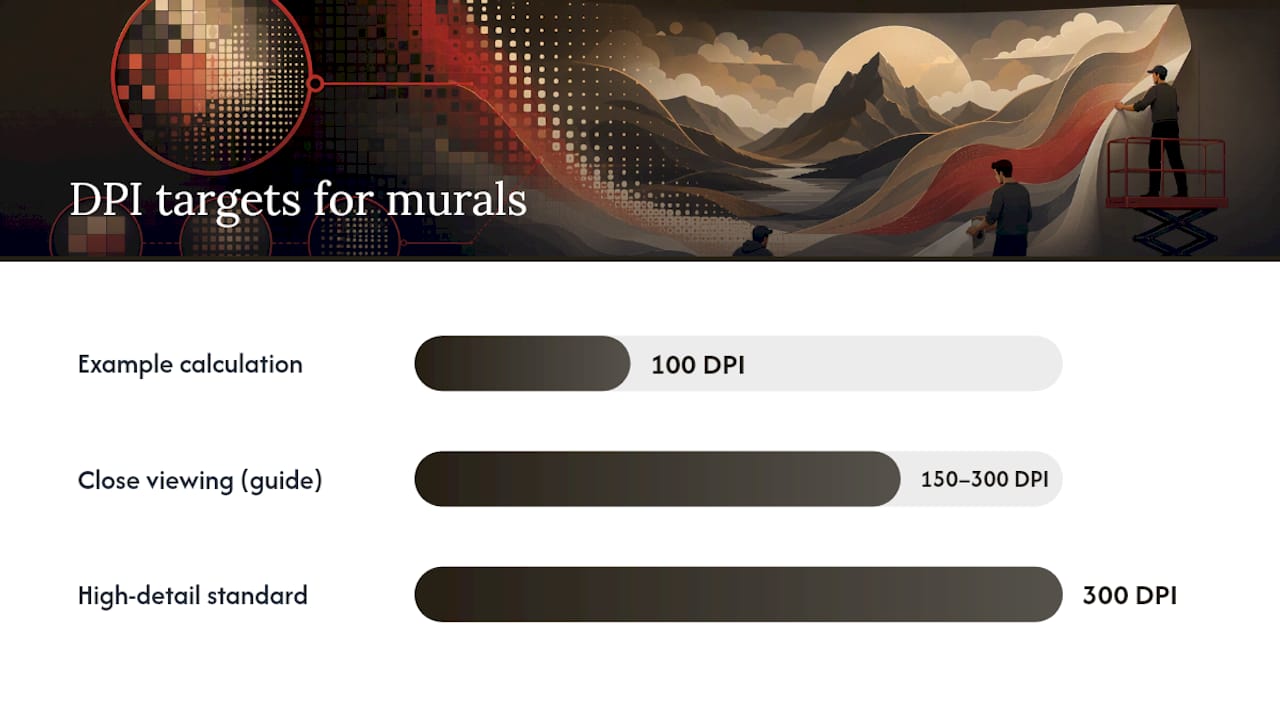
Effective DPI is simple math: divide your image’s pixel width by the mural’s width in inches. A 6,000 pixel wide photo printed at 60 inches wide gives you 100 DPI. That number only tells half the story, because viewing distance changes how sharp an image needs to be to look sharp.
A hallway mural viewed up close needs more resolution than a living room accent wall viewed from across the room. As a working guide:
- Aim for 150 to 300 DPI at final print size for close viewing distances, and know that a 20+ megapixel DSLR photo can produce a sharp mural up to roughly 8 feet wide at 150 DPI.
- Drop your DPI target for distant viewing. A mural viewed from 10 feet away can look excellent at a lower DPI than a piece hung in a narrow entryway.
- Check your smartphone photo’s real limits. Most modern phone cameras shoot 12 to 48 megapixels, but heavy cropping or zoom can shrink that dramatically before it ever reaches the printer.
Pro Tip: If people will mostly glance at the mural from across a room, don’t obsess over hitting 300 DPI. Save that standard for spaces where viewers stand close enough to study the detail.
Supply your provider with a TIFF, PNG, or maximum-quality JPEG, since minimal compression gives the print shop room to color correct and resize without introducing artifacts. If you shoot RAW, send that file too. Wallsneedlove’s printer-ready specs guide walks through exact file requirements before you upload anything.
How Do You Measure a Wall for a Custom Mural?
Get the wall’s exact height and width in inches, then note every obstacle: light switches, outlets, trim, window frames, and vents. Providers use these measurements to figure out cropping and to warn you if a fixture will land awkwardly mid-image.
Large murals rarely print as one sheet. Providers typically split them into vertical panels, usually 48 to 54 inches wide, with a dry fit and seam alignment step during installation. A few things to keep in mind before you finalize your file:
- Bleed and slight overlap at each seam prevent thin white gaps once panels are hung.
- If your wall’s proportions don’t match your photo’s aspect ratio, expect some cropping, so flag which parts of the image matter most.
- Keep faces and key subjects out of the “safe zone” near panel edges, since that’s where alignment is most likely to shift slightly.
Wallsneedlove’s paneling layout guide breaks down seam placement for oversized and nonstandard walls in more detail.
What Happens After You Place a Mural Order?
Most photo mural printing orders follow the same basic path: upload your file, review a digital mockup, approve a color proof, then move to print, ship, and optional installation. Requesting a proof or high-quality digital mockup before full production is the cheapest insurance you’ll buy against a bad color match or an off-center crop.
A few factors drive your final price and timeline:
- Material choice — permanent vinyl and laminated finishes usually cost more than standard peel-and-stick.
- Total square footage — bigger walls mean more panels and more material.
- Lamination or protective coating — adds durability and price for high-traffic or humid rooms.
- Installation and editing add-ons — professional install, background extension, or pattern retouching all extend both cost and lead time.
Rush production and rush installation both push turnaround faster but usually carry a fee. Wallsneedlove’s color accuracy guide explains how soft-proofing works if you want your screen colors to match the finished print.
Should You Install a Photo Mural Yourself or Hire a Pro?
DIY installation makes sense for peel-and-stick murals on smooth, freshly primed walls, especially for a single panel or a small accent wall. It gets riskier fast once you’re dealing with textured plaster, damaged drywall, a multi-panel commercial installation, or a mural where seam alignment has to be perfect.
Here’s roughly what a professional installer does differently:
- Final inspection of the wall surface for texture, moisture, and old paint issues before any panel touches it.
- Dry fit of all panels in position to confirm layout and catch problems before adhesive is involved.
- Panel application using squeegees to press out air and keep the material flat against the wall.
- Seam finishing, trimming excess material at edges, and sealing corners for a clean finish.
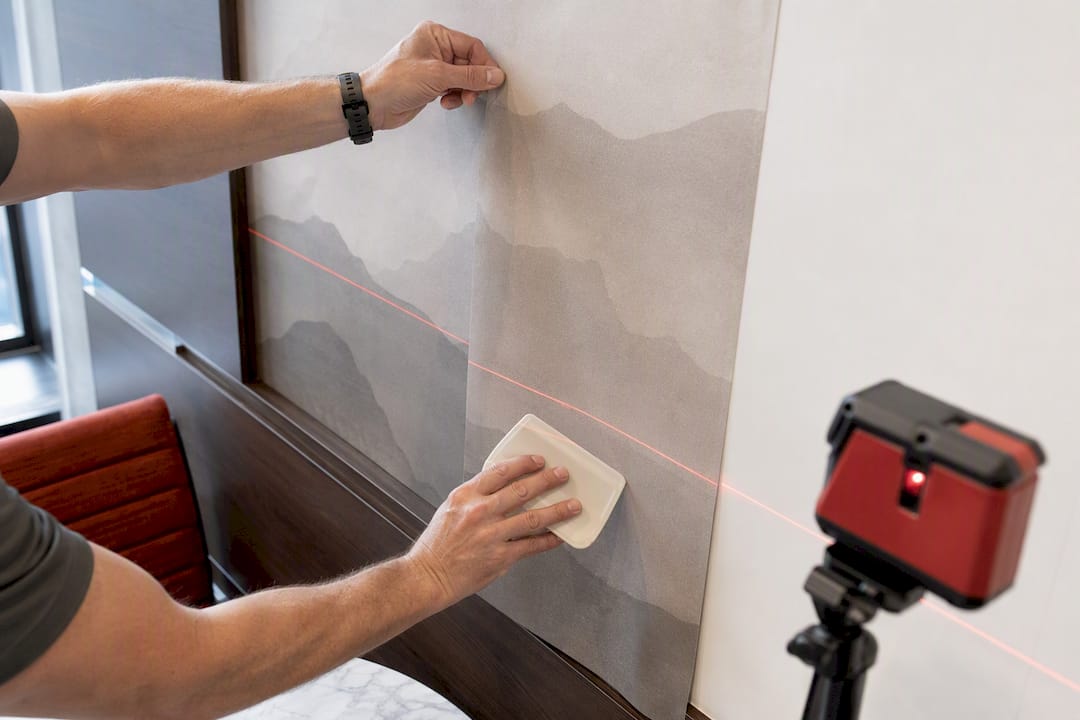
If you’re going the DIY route, start from a laser-level guide line and peel back only a few inches of backing at a time to avoid trapping wrinkles.
Pro Tip: A plastic squeegee, a laser level, and patience matter more than speed. Rushing the first panel is the most common reason DIY murals end up crooked.
For anyone weighing a bigger renovation alongside a mural install, this guide to avoiding interior door replacement mistakes covers similar site-prep lessons worth knowing before contractors show up.
Why Do Photo Murals Fail, and How Do You Fix It?
Most mural problems trace back to one of four causes, and each has a fix.
- Low resolution: crop tighter, extend the background digitally, or accept a lower DPI if the mural will only be viewed from a distance.
- Poor wall prep: walls need to be clean, smooth, primed, and fully cured, often for about two weeks after painting, before you apply anything.
- Bubbles or seam gaps: usually mean the panel wasn’t smoothed from center outward, or the wall wasn’t clean before application.
- Color shifts: often catchable at the proof stage; once printed, a pro’s rework may be worth it rather than living with a mismatch.
Before final approval, ask your provider what proof format they use, how they handle seam overlap, and what their reprint policy looks like if the color is off. Wallsneedlove’s installation mistakes guide covers the wall-prep checklist in more depth.
What Makes Wallsneedlove a Reliable Choice for Custom Murals?
Wallsneedlove prints custom photo murals in both peel-and-stick and traditional paste formats, with most orders custom made within one to three days. Materials are Greenguard Gold certified, which matters if you’re decorating a nursery, bedroom, or office where indoor air quality is a real concern.
The site’s own printer-ready file spec guide and paneling layout guide walk you through the exact checklist covered above, image resolution, seam handling, and wall measurements, before you ever upload a file. If you want a second opinion on your photo before committing to full production, you can request a mockup or proof, or book professional installation directly through the site.
Ready to Turn Your Photo Into a Mural?
Wallsneedlove skips the guesswork of coordinating a separate printer and installer. One order gets you a custom-printed mural made within one to three days, in the material that fits your wall and your patience for DIY.

Browse a finished example like the Java Mountain wall mural to see how a scenic photo translates into a full paneled wall, or explore the full mural and wallpaper collection to start your own custom order. Upload your photo, review your proof, and approve the final mockup before anything prints, so there are no surprises when the panels arrive.
What We’ve Learned From Years of Custom Mural Orders
Ask for the printed proof or high-resolution digital mockup before full production runs, every time, even when a photo looks perfect on your laptop screen. Screens lie about color more often than people expect, and a five-minute proof review catches problems a rushed order never will.
Professional installation is worth the cost more often than DIY forums suggest, particularly on textured walls or anything wider than a single panel. A crooked seam is far more noticeable, and far more annoying, than the installation fee you tried to avoid.
— WallsNeedLove
Helpful Resources for Planning Your Mural
- Wall murals image resolution guide for better print quality
- How to Create Custom Wall Murals From a Photo
- Photo to Mural: Your Guide to Stunning Wall Art
- How to Install Peel and Stick Wallpaper: A Step-by-Step Guide
- What Is Peel and Stick Wallpaper: Renter’s Guide
Sources
- Wall murals image resolution guide for better print quality
- How to Create Custom Wall Murals From a Photo - AP Installations
- Photo to Mural: Your Guide to Stunning Wall Art – FrameStory
- How to Install Peel and Stick Wallpaper: A Step-by-Step Guide


Leave a comment