

Why High Resolution Files Matter for Murals: Printer-Ready Specs
High-resolution source files determine the final sharpness of a printed mural. If the pixel count in your image cannot support the physical size of the wall, no printer, no software, and no production workflow can recover the missing detail. The fix starts before the file reaches production.
Three checks to run right now:
- Measure your wall. Get the exact width and height in inches.
- Calculate required pixels. Multiply each dimension by the PPI appropriate for your closest viewing distance (see the table in the next section).
- Inspect your file. Open it in Photoshop, Preview, or a free metadata viewer and confirm the pixel dimensions match or exceed what the math requires.
For most interior murals viewed from typical indoor viewing distances, a moderate PPI range is practical, rather than relying on the 300 DPI rule inherited from offset brochure printing. A file that clears that threshold at your wall’s dimensions is usable. One that falls short needs remediation before it goes to press.
Table of Contents
- Why does mural resolution work differently from small-format print?
- How do you check whether your image will work at full mural size?
- What does a print-ready preflight checklist look like for murals?
- Can upscaling fix a low-resolution image for a mural?
- How does file resolution affect production time and cost?
- Why does high-resolution imagery matter beyond just sharpness?
- What specs should you send your printer, and when should you redesign?
- Key Takeaways
- A note from the production team at Wallsneedlove
- Wallsneedlove custom murals: from file review to finished wall
- Useful sources and tools
Why does mural resolution work differently from small-format print?
PPI vs. DPI: the distinction that matters. PPI (pixels per inch) describes the density of pixel data in your image file. DPI (dots per inch) describes how many ink dots a printer lays down per inch on the substrate. PPI is the limiting factor for image sharpness because it is fixed at capture or creation. DPI is a printer setting. Sending a low-PPI file to a high-DPI printer does not add detail; it just prints the same sparse pixels more precisely.
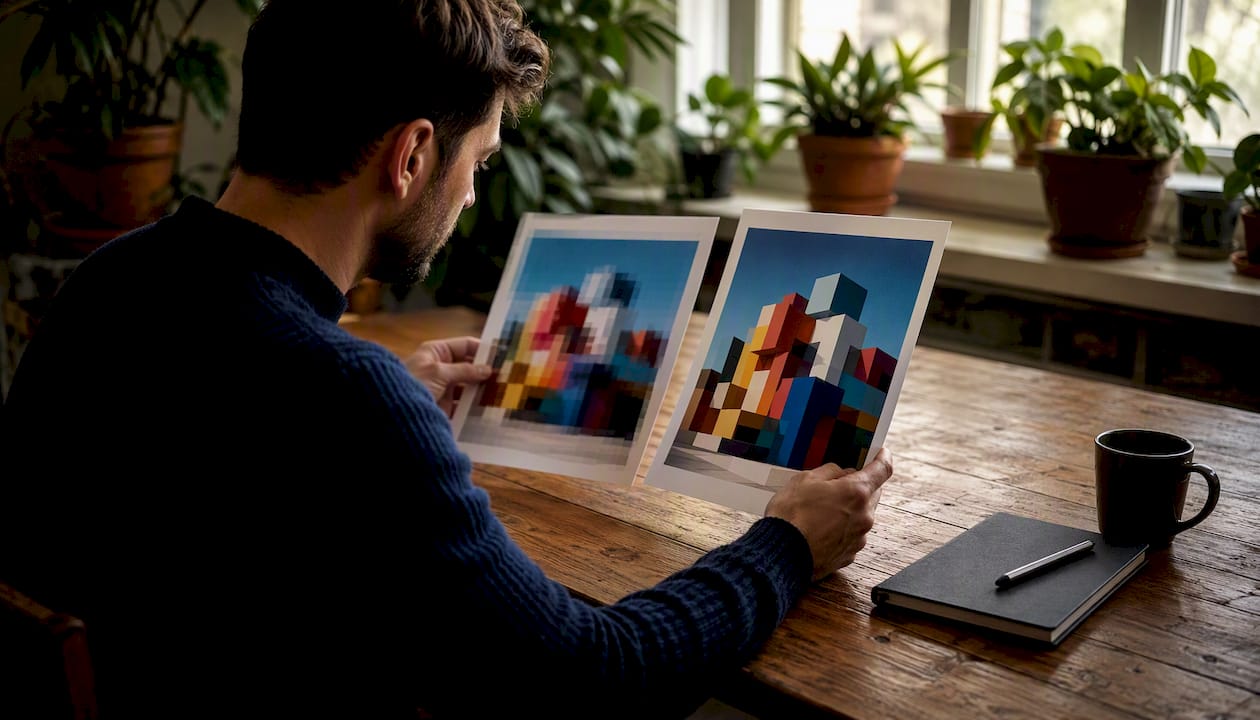
The 300 DPI rule originates from offset printing standards for documents held close to the eye. At that distance, the human eye can resolve fine detail, making pixel density important. A wall mural is never viewed at 10 inches. Viewers stand back, and at greater distances the eye’s resolving ability decreases, so the required PPI drops accordingly.
Viewing distance changes the math. Gigapixel GmbH’s large-format guidance provides the following practical reference points:
| Closest viewing distance | Recommended PPI | Practical notes |
|---|---|---|
| ~1 m (3 ft) | ~137 PPI | Hallways, narrow corridors, close-up feature walls |
| ~2 m (6 ft) | ~72 PPI | Typical living room or office accent wall (see worked example below) |
| ~3 m (10 ft) | ~50 PPI | Open-plan spaces, retail floors |
| 4 m+ (ft+) | 25 PPI | Large lobbies, event spaces, exterior-facing murals |
A worked example. Say you want a mural 120 inches wide × 96 inches tall, and the closest a viewer will stand is about 6 feet (roughly 2 meters). Using 72 PPI as a conservative target for that distance:
- Required width in pixels: 120 × 72 = 8,640 px
- Required height in pixels: 96 × 72 = 6,912 px
If your source image is 6,000 × 4,800 px, it falls short. At 72 PPI the same wall only needs 8,640 × 6,912 px. The viewing distance, not a blanket DPI rule, is what determines whether a file is acceptable.
Pro Tip: Reserve 150% of the minimum required resolution when possible. That buffer gives you cropping flexibility and a safety margin if the final install size shifts slightly during production.
How do you check whether your image will work at full mural size?
A five-step check takes under five minutes and tells you whether to proceed, revise, or redesign.
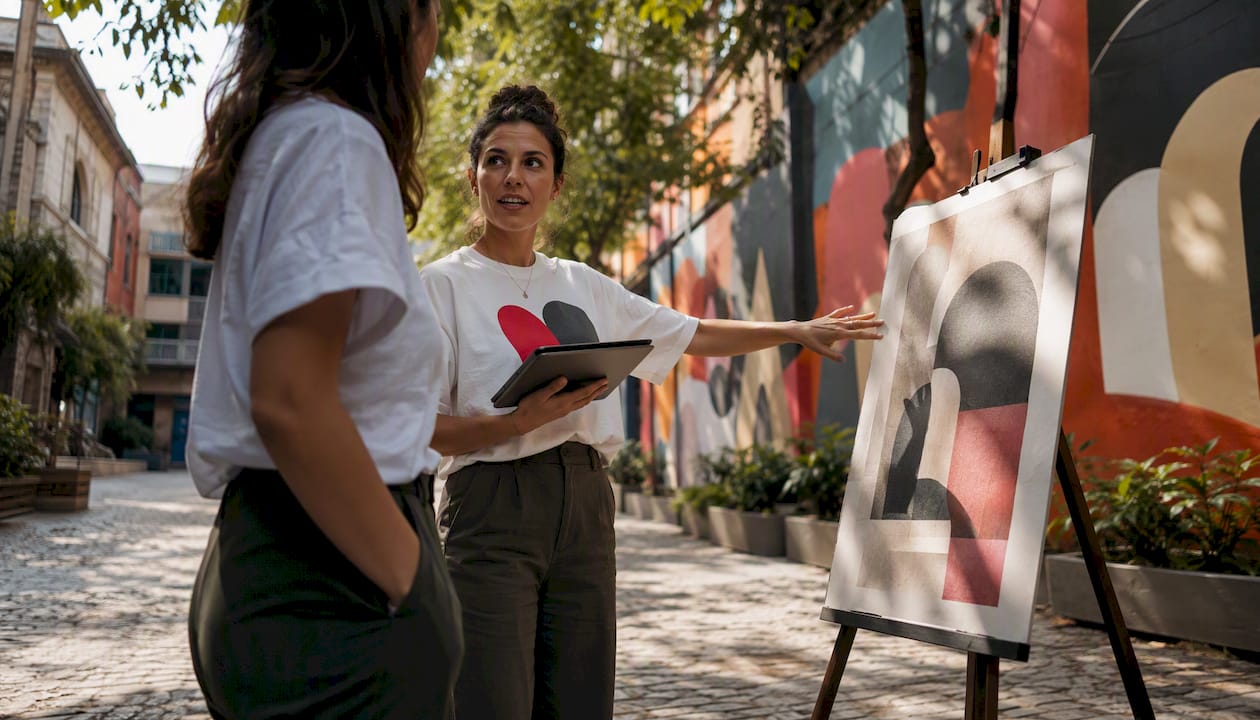
If the file’s pixel dimensions meet or exceed the required numbers, it is usable. If it falls short, see the remediation steps in the upscaling section below.
Tools for checking metadata and pixel dimensions:
- Adobe Photoshop — Image Size dialog shows pixel dimensions, document size, and embedded resolution.
Check file provenance. Compressed web images are the most common cause of failed mural prints. An image that passed through WhatsApp, Instagram, or a messaging app has been recompressed, often to a fraction of its original size. Always request the original file directly from the photographer, designer, or stock library. If someone sends you a file via text or social media, ask for the original again.
What does a print-ready preflight checklist look like for murals?
Getting the pixel count right is only part of the job. The following table covers the full set of checks to complete before submitting a file to production.
| What | Why it matters | What to do before sending |
|---|---|---|
| File format | JPEG compression degrades with each re-save; web PNGs may be 72 PPI screen exports | Use TIFF, PNG (uncompressed), or PDF; avoid re-saved JPEGs |
| Color profile | Mismatched profiles cause color shifts between screen and print | Embed sRGB for standard output; ask your printer if they prefer Adobe RGB or CMYK |
| Pixel dimensions | Insufficient pixels produce visible blur at print size | Confirm dimensions meet the PPI × inches calculation for your viewing distance |
| Logos and text | Raster logos pixelate at large scale | Supply logos and type as vector files (AI, EPS, PDF) or outline all fonts |
| Bleed and safe margins | Content too close to the edge gets trimmed or hidden behind trim | Add 0.25–0.5 inch bleed; keep critical content 0.5 inch from the edge |
| Tiling and panel layout | Seams require precise alignment; misregistered panels break patterns | Review the paneling layout guide and mark panel boundaries in the file |
| Compression artifacts | JPEG artifacts become visible at large scale, especially in smooth gradients | Zoom to 100% and inspect for blocking or banding before sending |
| Test patch request | Color and texture interactions vary by substrate | Request a test patch for any new surface or premium project |
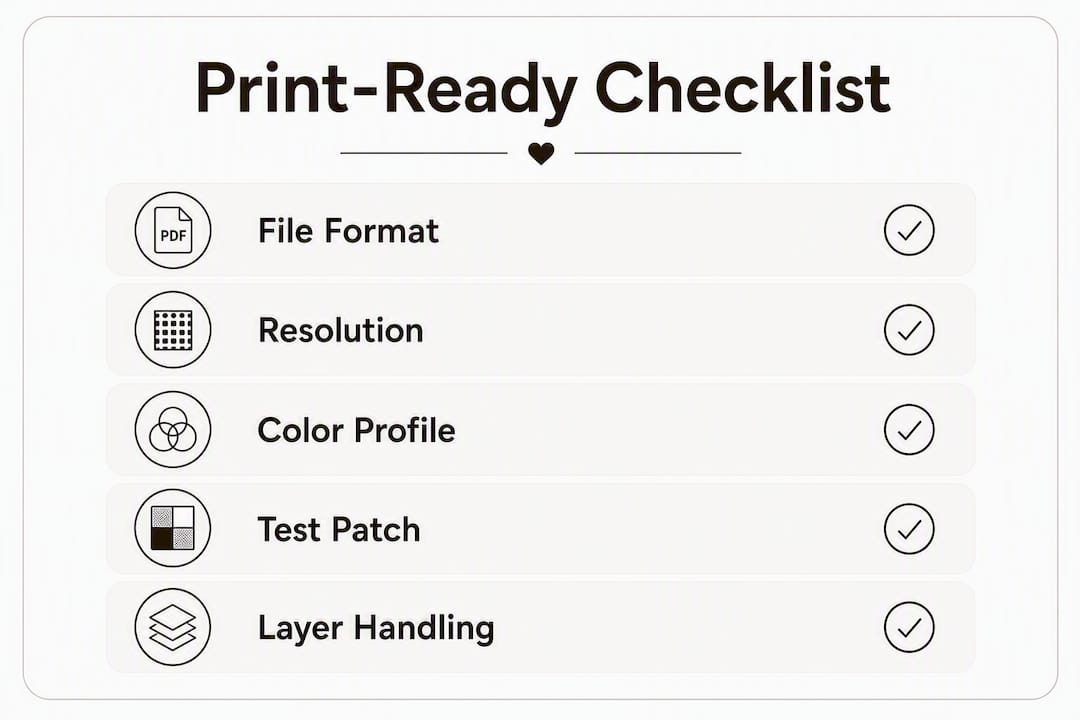
Logos, type, and layered files. Vector formats keep edges razor-sharp at any scale; raster logos will soften and pixelate when printed large. If your mural includes a company logo, a map with labels, or any text element, supply those elements as separate vector files (AI, EPS, or PDF) alongside the main raster image. Outline all fonts before sending to prevent font-substitution errors on the production side. For photographic elements, TIFF or RAW preserves pixel integrity and avoids the compression artifacts that accumulate in repeatedly saved JPEGs.
Test patches are not optional for premium work. Test patches validate color, texture interaction, and perceived sharpness on the actual substrate before full production runs. A file that looks correct on screen can shift in hue or contrast when printed on a textured peel-and-stick material. A small test patch costs little and prevents a costly reprint.
Pro Tip: When preparing files for Wallsneedlove, keep your layers intact and send the flattened export alongside the layered source. If a color correction or crop adjustment is needed during prepress, the layered file makes it fast.
Can upscaling fix a low-resolution image for a mural?
Upscaling reduces visible jaggies and can slightly improve perceived sharpness. It cannot create microdetail that was never captured. You cannot print detail that isn’t in the original file, and AI interpolation tools like Topaz Gigapixel AI or Adobe Photoshop’s Preserve Details 2.0 work by predicting what missing pixels might look like, not by recovering actual image data.
Common mistakes that create visible problems on murals:
- Using images downloaded from social media or websites (typically 72–96 PPI screen exports).
- Re-saving a JPEG multiple times, each pass adding compression artifacts.
- Ignoring compression artifacts in smooth areas like skies, skin tones, or solid-color backgrounds, where blocking becomes obvious at mural scale.
- Sending a file that was resized upward in a photo editor without checking whether the original pixel count was sufficient.
When the source file is too small, work through these steps in order:
- Find the original. Request the RAW or TIFF from the photographer, the original export from the designer, or the high-resolution download from the stock library. This is almost always the fastest fix.
- Replace with vector or redesigned artwork. For logos, typography, and graphic elements, a vector redraw scales to any size with no quality loss.
- Crop and refocus the composition. If only part of the image has sufficient resolution, crop to that area and redesign the layout around it.
- Consider a stylized or graphic approach. Bold shapes, flat color fields, and high-contrast graphic patterns read well at low PPI and can outperform a blurry photograph on a large wall. A graphic pattern mural with clean lines and strong contrast will look intentional and polished; a blurry landscape photograph will not.
A redesign with bold geometric shapes or a flat-color illustration often produces a stronger visual result than forcing a marginal photo through upscaling. The wall reads better, and the production file is cleaner.
How does file resolution affect production time and cost?
File quality has direct downstream effects on schedule and budget. Understanding those effects helps you weigh trade-offs before submitting.
Production cost drivers tied to file size and quality:
- Prepress time. A file that requires color correction, artifact removal, or resolution remediation adds time to prepress. Clean, correctly profiled files go straight to the RIP (raster image processor).
- RIP processing time. Very large files, such as a 5-meter wall submitted at 300 PPI, generate gigapixel-scale data that is expensive to process and store without any visible benefit at normal viewing distances. Right-sizing the file to the appropriate PPI keeps processing fast.
- Storage and transfer. Oversized files slow upload, increase storage costs, and can cause transfer failures. A very high PPI file for a large wall can be very large in file size; reducing PPI for typical viewing distances can significantly lower file size.
- Reprints. A file approved without a test patch that fails on the substrate is the most expensive outcome. One test patch prevents it.
Installation implications. High-detail murals with precise pattern registration require tighter panel alignment during installation. If your mural has fine lines or continuous gradients that cross panel seams, small misregistrations become visible. Reviewing the paneling layout before production and marking panel boundaries in the file reduces this risk.
Timeline notes. Small, clean files with correct color profiles and no artifacts typically move through production in 1–3 days at Wallsneedlove. Files that require prepress remediation, test patches, or format conversion add time. If your project has a deadline, submit the cleanest file possible and request a test patch early.
Ask your printer before submitting: preferred file formats, maximum workable file size, test patch policy, and whether they want layered or flattened files. Knowing those answers before you send avoids back-and-forth that delays production.
Why does high-resolution imagery matter beyond just sharpness?
Sharpness is the most obvious benefit of high-quality source files, but it is not the only one. High-resolution data supports texture, tonal depth, and the kind of visual presence that makes a mural feel immersive rather than flat.
Landscape murals are the clearest example. A high-res photograph of a mountain range or forest captures subtle tonal gradations in the sky, fine texture in bark and rock, and the layered depth of a scene receding into the distance. At mural scale, those details create a sense of space. A low-res version of the same image flattens the scene: gradients become banded, textures disappear, and the wall reads as a large, blurry photograph rather than a window into a place.
The same principle applies in commercial settings. High-resolution imagery preserves artistic intent and supports brand perception in ways that a softened or compressed image cannot. A lobby mural that looks sharp and detailed signals quality and attention to detail. One that looks blurry signals the opposite, regardless of how well the rest of the space is designed.
When high-res photography is not available or not in the budget, a stylized or graphic approach is a legitimate alternative. Bold color fields, geometric patterns, and high-contrast illustration all read well at lower PPI values and can carry strong visual impact at mural scale. The key is choosing the approach deliberately, not defaulting to a blurry photo because it was the only file available. For commercial office murals, a clean vector-based brand graphic often outperforms a marginal photograph.
What specs should you send your printer, and when should you redesign?
Copy-paste spec block for your printer or designer:
- Final dimensions: [width] × [height] inches
- PPI target: 72–137 PPI depending on closest viewing distance (see viewing-distance table)
- Preferred formats: TIFF (photography), PDF or AI/EPS (logos and type), PNG (uncompressed graphics)
- Color profile: sRGB embedded; confirm CMYK preference with printer
- Bleed: 0.25–0.5 inch on all sides
- Fonts: outlined or embedded
- Test patch: requested before full production run
Decision checklist: accept, revise, or redesign?
- Accept: File pixel dimensions meet or exceed (wall inches × target PPI). No visible compression artifacts at 100% zoom. Color profile embedded. Format is TIFF, PDF, or uncompressed PNG.
- Revise: File is 10–20% below required pixel count. Original RAW or TIFF is available. Upscaling or a light crop can close the gap. Artifacts are minor and localized.
- Redesign: File is a web export or social media download. Pixel dimensions fall more than 20% below the minimum. Artifacts are visible across large areas. No original file exists.
For any ambiguous case, contact Wallsneedlove for a file review before committing to production. Catching a resolution problem at the review stage costs nothing. Catching it after printing costs a reprint.
Key Takeaways
High-resolution files matter for murals because pixel count, not printer DPI, sets the ceiling on sharpness, and the right pixel count is determined by viewing distance, not a blanket 300 DPI rule.
| Point | Details |
|---|---|
| Viewing distance sets PPI | Target 72–137 PPI based on how close viewers will stand, not a fixed 300 DPI. |
| Check pixel dimensions first | Multiply wall inches by target PPI to get minimum required pixels; compare with your file. |
| Preflight before submitting | Confirm file format (TIFF/PDF), color profile, bleed, outlined fonts, and request a test patch. |
| Upscaling has real limits | AI upscaling reduces jaggies but cannot recover lost microdetail; find the original file first. |
| Wallsneedlove offers file review | Submit files to Wallsneedlove for a preflight check and test patch before full production. |
A note from the production team at Wallsneedlove
The most common trap seen in mural production is a file that looks fine on screen but falls apart at print size. The usual culprit is a web export or a photo that passed through a messaging app, stripped of most of its pixel data before it ever reached the printer. A quick rule of thumb for ambiguous cases: if you cannot identify where the original file came from, treat it as unusable until you can verify the pixel dimensions against the viewing-distance math.
File review at Wallsneedlove includes checking pixel dimensions against your wall size and viewing distance, flagging compression artifacts, confirming color profile, and recommending format corrections before production starts. If the file needs remediation, the team can advise on the fastest path, whether that is sourcing a higher-resolution original, requesting a vector redraw, or adjusting the composition. Reach out through the Wallsneedlove contact page to submit files for review before placing your order.
Wallsneedlove custom murals: from file review to finished wall
Wallsneedlove produces custom-printed wall murals and wallpaper for residential and commercial interiors, with orders typically custom made within 1–3 days. Every mural is available in peel-and-stick or traditional paste, printed on Greenguard Gold certified materials.

For customers preparing their own artwork, Wallsneedlove’s production team reviews files before printing, flags resolution or format issues, and can arrange test patches for new surfaces or premium projects. Services available at checkout or on request:
- File review before production to catch resolution, format, and color profile issues
- Test patches to validate color and texture on the actual substrate
- Custom sizing to match exact wall dimensions
- Peel-and-stick or paste options for any installation type
- Installation guides and pro support for DIY and professional installs
Browse finished mural examples like the Java Mountain wall mural or the Out Wall Mural to see how high-resolution photography translates to large-format print. To start a custom order or submit a file for review, visit Wallsneedlove.
Useful sources and tools
- Making the Museum: Understanding Wall Mural Image Resolution — Practical PPI ranges by viewing distance for interior murals.
- Gigapixel GmbH: The DPI Myth — Explains why 300 DPI is a brochure-era rule and how to calculate PPI for large-format work.
- Gigapixel GmbH: What Resolution Does a Wall Mural Need? — Viewing-distance formulas and pixel dimension calculations.
- Printava: Wall Printing File Prep — File format recommendations, client request checklists, and test patch guidance.
- Image Square Printing: Avoid Blurry Large Prints — Covers why compressed web images fail at mural scale and how to start with originals.
- Sense Canvas: How to Scale Artwork for Commercial Interiors — Practical guidance on scaling and composition for large interior installations.
- Adobe: What Is a High-Resolution Image? — Clear overview of resolution concepts for designers and photographers.
- Adobe Photoshop — Image Size dialog for pixel dimensions, resolution, and color profile checks.
- ExifTool (free, command-line) — Full metadata inspection including pixel dimensions, color space, and compression type.
-
ImageMagick (free, command-line) —
identifycommand returns pixel dimensions and color space for any image format. - Wallsneedlove: Paneling Layout for Oversized Custom Murals — Panel boundary planning and seam alignment for large-format installs.


Leave a comment