

Can You Wallpaper Over Tile? Yes, With the Right Prep
Yes, you can wallpaper over tile, but only when three conditions line up: the tile is flat, the grout lines are filled or bridged, and you use a bonding primer or lining paper to give the wallpaper something to grip. Skip any of those steps and you’re gambling on peeling edges within weeks. The technique that works best combines a skim coat over grout lines with a high-adhesion primer, paired with peel-and-stick or vinyl-coated wallpaper rather than thin paste-backed paper.
Before you buy a single roll, check these three things:
- Grout depth — anything deeper than a hairline groove needs filling before wallpaper goes on.
- Surface glaze — glossy, nonporous tile needs sanding and primer; unsealed stone often doesn’t hold wallpaper at all.
- Location — dry walls and backsplashes are fair game; the inside of an active shower is not.
Key Takeaways
Wallpapering over tile succeeds when the surface is flat, grout lines are filled or bridged, and a bonding primer or lining paper gives the adhesive something to grip.
| Point | Details |
|---|---|
| Confirm tile is a good candidate | Large-format, glazed, and stable tile works; loose, textured stone, or wet-zone tile does not. |
| Prep is non-negotiable | Clean, sand, fill grout with a skim coat, and prime before hanging anything. |
| Match material to the wall | Peel-and-stick suits renters and repositioning; vinyl-coated suits permanent, high-traffic walls. |
| Respect moisture limits | Dry zones can handle wallpaper with proper sealing; active showers should stay tiled. |
| Wallsneedlove fits both paths | Greenguard Gold certified peel-and-stick and vinyl-coated wallpaper, custom made in one to three days for tile-prepped walls. |
Table of Contents
- When Wallpapering Over Tile Actually Makes Sense
- How to Prep Tile So Wallpaper Actually Sticks
- Which Wallpaper and Adhesive Actually Work on Tile
- Steps for Applying Wallpaper Over a Tiled Wall
- Where Wallpaper Belongs in Kitchens and Bathrooms
- Fixing the Most Common Tile Wallpaper Failures
- WallsNeedLove Products Built for Tile-Backed Walls
- Sources
When Wallpapering Over Tile Actually Makes Sense
Large-format ceramic or porcelain tile with tight grout lines is the easiest candidate. Fewer seams mean less filling, and the smooth glaze sands up quickly once you scuff it. Standard 12x12 or 18x18 wall tile in a kitchen or half bath falls squarely into this category.
Textured natural stone, on the other hand, is a poor match. Travertine, slate, and tumbled marble have irregular surfaces and pitted grout joints that no amount of skim coating fully levels. Loose, cracked, or hollow-sounding tiles are worse. Wallpaper needs a stable substrate, and a tile that’s already lifting will take the wallpaper with it.
If your tile falls into the “bad candidate” pile, you’re not out of options: see these budget-friendly backsplash updates for affordable alternatives to wallpapering over tile.
- Peel-and-stick tile overlays designed for backsplashes
- Tile paint or epoxy refinishing kits
- Removable decorative panels installed over furring strips
Pro Tip: Run a hand across every tile before committing. If you feel movement, hollowness, or a section that flexes, address that tile mechanically first. No primer fixes a loose tile.
How to Prep Tile So Wallpaper Actually Sticks
Preparation is where most tile wallpaper projects succeed or fail. Skimping here is the single biggest reason people end up with bubbling, lifting, or grout lines ghosting through six months later, according to the guidance in Can Wallpaper Go Over Tile?
- Deep clean and degrease. Use a TSP-equivalent cleaner to strip cooking grease, soap film, and mineral deposits. Rinse thoroughly and let the wall dry completely, ideally overnight, since any trapped moisture will undermine the primer.
- Sand or scuff the glaze. A 120 to 150 grit sanding block works for spot-scuffing; an orbital sander with a fine pad speeds up larger walls. You’re not trying to remove the glaze, just break its shine enough for primer to bite.
- Fill and level the grout lines. Lightweight joint compound applied with a wide putty knife fills the recessed grout, then gets feathered out into the surrounding tile so there’s no ridge. This skim-coat approach, confirmed as the most durable fix for hiding grout under wallpaper, usually needs two thin coats rather than one thick one.
- Sand the skim coat smooth, wipe away dust with a tack cloth, and inspect under raking light for missed high or low spots.
If your grout pattern is extensive or a full skim coat feels impractical, lining paper is a legitimate shortcut. It bridges the surface in one step instead of several drying cycles.
Watch for these before moving to primer:
- Dust left in grout crevices attracts moisture and weakens bond.
- Rushed drying times leave the joint compound soft under primer.
- Skipped ventilation during sanding creates a respirable dust hazard.
Pro Tip: Wear an N95 respirator while sanding joint compound and tile glaze. Both produce fine particulate that lingers in bathroom-sized rooms with poor airflow.
Which Wallpaper and Adhesive Actually Work on Tile
Not every wallpaper survives a tile substrate, and the wrong pairing shows up fast as curling seams or a sagging middle. Peel-and-stick wallpaper is the most forgiving option because you can reposition it during hanging and pull it back off without damaging what’s underneath, a real advantage over papers that commit the moment paste touches the wall.
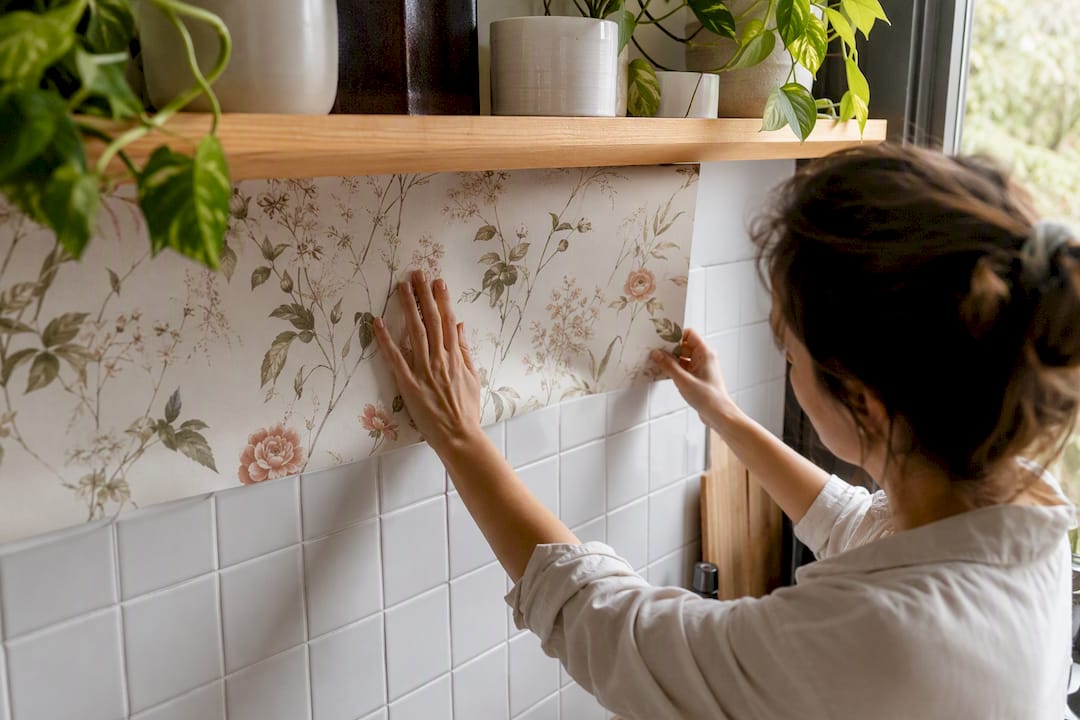
Vinyl-coated and heavier commercial-weight papers bring a second benefit: their thickness physically masks minor grout telegraphing that a thin paper would reveal. If your skim coat isn’t flawless, weight buys forgiveness.
Traditional paste-backed paper is usually the wrong call here. Tile is nonporous by nature, and wet paste has nothing to soak into once it’s up against a primed, glazed surface. It’s engineered for drywall and plaster, not ceramic.
- Choose peel-and-stick for a renter-friendly, fully reversible install.
- Choose vinyl-coated for high-traffic kitchens where durability matters more than removability.
- Skip standard paste papers entirely on tile.
- Use a high-adhesion bonding primer formulated for slick surfaces, since it’s what actually lets the wallpaper’s adhesive grip in the first place.
Steps for Applying Wallpaper Over a Tiled Wall
Once the tile is clean, sanded, filled, and primed, the hanging process resembles a standard wallpaper job with a few tile-specific adjustments.
Run through this checklist before you unroll anything:
- Wall surface feels smooth to the palm, with no visible seams
- Bonding primer has fully cured per its label, typically 24 hours
- Room is at a stable, moderate temperature (wallpaper paste and adhesive backing both perform worse in cold, damp conditions)
Then work through the install itself:
- Measure twice and dry-fit your first strip. Account for pattern repeat and plan seams to land away from inside corners or grout transitions where alignment gets tricky.
- Cut strips with two to three inches of extra length at top and bottom for trimming after hanging.
- Hang from the center of the wall outward if it’s a focal panel, or from a corner if it’s a full wall, smoothing with a plastic smoothing tool rather than a cloth to avoid trapping air against the primed surface.
- Work seams tight but not overlapped, checking pattern match as you go rather than after the whole wall is up.
- Trim excess at baseboards, outlets, and fixture edges with a sharp blade and metal straightedge.
Peel-and-stick behaves differently from paste on a primed tile wall. You get real repositioning time, often several minutes, before the adhesive fully grabs, which makes it far more forgiving for a first-time installer working around light switches and cabinet edges. Traditional paste, once activated, sets faster and gives you less room to correct a crooked strip.
Finish by pressing every edge firmly, especially where wallpaper meets a cabinet or window casing. A thin bead of clear caulk along exposed edges near sinks adds a moisture barrier paste alone doesn’t provide.
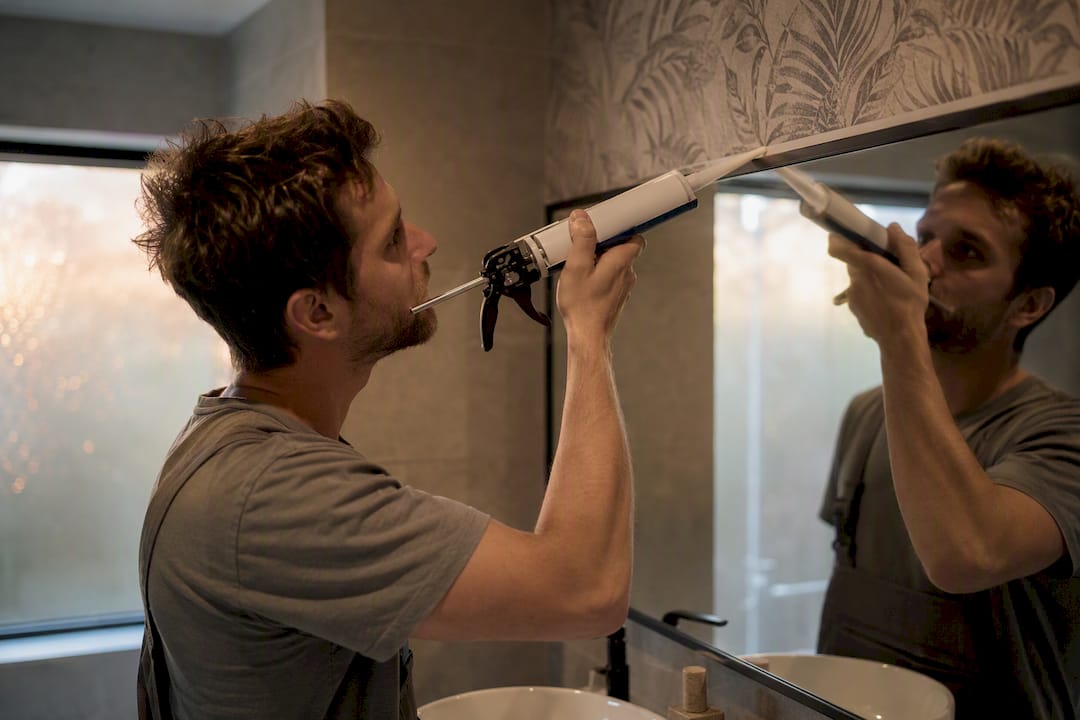
Hold off exposing a freshly papered wall to heavy humidity for at least 48 hours after hanging. That cure window matters more in bathrooms and kitchens than anywhere else in the house.
Pro Tip: Keep a spare piece of your wallpaper aside for at least a year. Tile walls near stoves or sinks take more incidental damage than drywall, and having a matching patch on hand saves a full re-hang later.
Where Wallpaper Belongs in Kitchens and Bathrooms
Not every square foot of a humid room is equally suited to wallpaper, and drawing that line correctly is what separates a five-year install from a five-month failure. Split the room into two zones.
Dry zones — the wall behind a vanity, the area around a mirror, backsplash sections away from direct splash, accent walls facing the tub but outside the spray radius — can support wallpaper when prepped properly. Coohom’s guidance on wallpapering over bathroom tile confirms this works with the right primer and moisture-resistant materials, but flags active wet zones as a poor long-term bet regardless of prep quality.
Wet zones — inside the shower enclosure, tub surrounds that get direct water contact, and any tile that sees standing moisture — should stay tiled or get a waterproof panel system instead. No primer or peel-and-stick product on the market is rated for constant water exposure.
For the dry-zone areas you do wallpaper, seal every edge:
- Use a waterproof trim or caulk line where wallpaper meets a wet-zone boundary.
- Choose vinyl-coated or specifically moisture-resistant peel-and-stick options for anything within a few feet of a sink or tub.
- Run a dehumidifier or exhaust fan during the first week after install to help the primer and adhesive cure fully.
Skipping wallpaper in a full walk-in shower isn’t overcaution. It’s the one placement mistake that leads to mold growth behind the paper where you can’t see it forming.
Fixing the Most Common Tile Wallpaper Failures
Most tile wallpaper problems trace back to one of three root causes: incomplete priming, an unfilled grout line, or moisture that got trapped during install.
- Peeling or lifting edges usually mean the primer didn’t fully bond to that spot. Re-prime the specific area, let it cure, and reapply a small heat press with a hair dryer on low to reactivate the adhesive before pressing the edge back down.
- Grout lines showing through after the fact means the skim coat wasn’t thick enough. You can pull the strip, add another thin joint compound layer, sand, re-prime, and rehang, or switch to a heavier textured wallpaper that disguises minor ridges going forward.
- Bubbles and wrinkles on peel-and-stick are the easiest fix: lift the section back, smooth from the center out, and reseal. On paste-backed installs, a small slit with a blade lets you inject a bit of extra paste underneath before pressing flat.
- Widespread failure across a whole wall is your signal to stop patching and reconsider. If more than a third of a wall is lifting, removing the wallpaper and starting the prep sequence over costs less time than endless spot repairs.
Removable peel-and-stick wallpaper generally comes off clean, and most adhesives soften with gentle heat if you decide to change course, though long-installed papers in humid rooms may leave residue that needs a light scrub before the tile underneath is reusable.
WallsNeedLove Products Built for Tile-Backed Walls
Wallsneedlove ships custom-printed peel-and-stick and vinyl-coated wallpaper made to order, typically within one to three days, and every roll carries Greenguard Gold certification for low chemical emissions, a real consideration in kitchens and bathrooms where ventilation is already limited. Designs come from a network of independent artists, and Wallsneedlove’s own installation guides walk through the same primer-and-prep sequence covered above.
For tile projects specifically:
- Peel-and-stick styles suit renters and anyone prioritizing easy removal.
- Vinyl-coated and mural-weight options suit permanent kitchen or living space walls where durability matters more than reversibility.
- Order a sample swatch before committing to a full custom size, and measure your prepped wall (not the raw tile) for accurate yardage.
h3: Editorial Perspective: Practical Rules of Thumb for DIYers vs Hiring Pros
DIY makes sense on small, flat tiled walls, especially for renters who need a reversible fix. Hire a pro once you’re leveling large areas or wallpapering a permanent wet-zone wall. Expect a shorter lifespan than full tile replacement, and plan for that tradeoff honestly.
— WallsNeedLove
Ready to Choose Your Wallpaper for a Tile Wall
Once your tile wall is cleaned, sanded, and primed, the material choice is what determines whether the project lasts. A pattern like Monkeying Around or a geometric option like Pixel Diamonds gives you the repositionable, renter-friendly benefits peel-and-stick offers on a primed tile substrate, without the commitment of paste.

Both are custom made to your wall dimensions, so you’re not stretching a standard roll to cover an odd backsplash or accent wall. Order a sample first to check color and texture against your actual primed surface under real lighting. For a full kitchen or bathroom wall, Wallsneedlove’s product catalog includes installation guides covering exactly the prep sequence outlined above, and larger or more complex tile jobs are good candidates for professional install support if you’d rather not tackle the leveling yourself. Browse the collection and request a sample before you buy the full run.
Sources
- Can Wallpaper Go Over Tile?
- Peel And Stick Wallpaper Over Tile? (Here’s What You Need To Know) - Build It Fine


Leave a comment