

Seamless Pattern Design: A Complete Guide for Designers
Seamless pattern design is the practice of creating a rectangular tile whose left edge matches its right edge and whose top edge matches its bottom edge exactly, so the tile can repeat across any surface without visible seams. A floral fabric print that flows continuously across fabric is one example. A seamless geometric wallpaper that covers an entire wall without a visible grid is another. To check any tile immediately, duplicate it into a grid and zoom in to check for seams: if you can see where one tile ends and the next begins, the edges do not match.
Key Takeaways
A seamless pattern tile must match on all four edges and all four corners; testing at 4×4 scale and ordering a strike-off before full production are the two steps most designers skip and most regret.
| Point | Details |
|---|---|
| Core definition | A seamless tile matches left-to-right and top-to-bottom edges exactly, including all four corners. |
| Test method | Duplicate the tile into a 4×4 grid and inspect at 100% for seams and 25% for density rivers. |
| Export standard | Use TIFF at 300 DPI in CMYK for print; PNG at 72–96 DPI in RGB for web. |
| Most common mistake | Wrong scale for the substrate: always test at actual print dimensions, not screen scale. |
| Wallsneedlove | Accepts designer-uploaded seamless tiles for custom wallpaper and murals, with sample panels available before full production. |
Table of Contents
- What makes a pattern truly seamless?
- What are the main repeat types for surface design?
- How to create a seamless tile from motif to export
- Which tools work best for seamless pattern design?
- How to test, export, and prepare files for print or web
- Common mistakes and best practices
- Where seamless patterns are used and how the application changes design choices
- How to think like a surface pattern designer
- Ready to print your pattern as custom wallpaper?
- Sources
What makes a pattern truly seamless?
A seamless repeat tile is a rectangular image whose left matches right and top matches bottom. That definition sounds simple, but three geometric constraints make it harder than it looks.
- Edge continuity: Any motif that exits the right edge must reappear at the exact corresponding position on the left edge, and the same rule applies top to bottom. A petal that crosses the right border at 340 px from the top must re-enter the left border at exactly 340 px from the top.
- Corner joints: Corners are shared by four tiles simultaneously. A motif that touches any corner must work across all four of those junctions at once, not just the two adjacent edges.
- Visual continuity: Balanced density, consistent scale, and controlled contrast prevent the eye from reading a grid. A tile that passes the edge-matching test can still look tiled if one quadrant is noticeably darker or more crowded than the others.
To visualize all three constraints at once, place your tile in a 4×4 grid mockup before sending any file to production. Seams that are invisible at 1×1 become obvious at 4×4.
Pro Tip: Zoom to 25% after tiling. At small scale, rivers of empty space and density clusters become visible that are easy to miss at 100%.
What are the main repeat types for surface design?
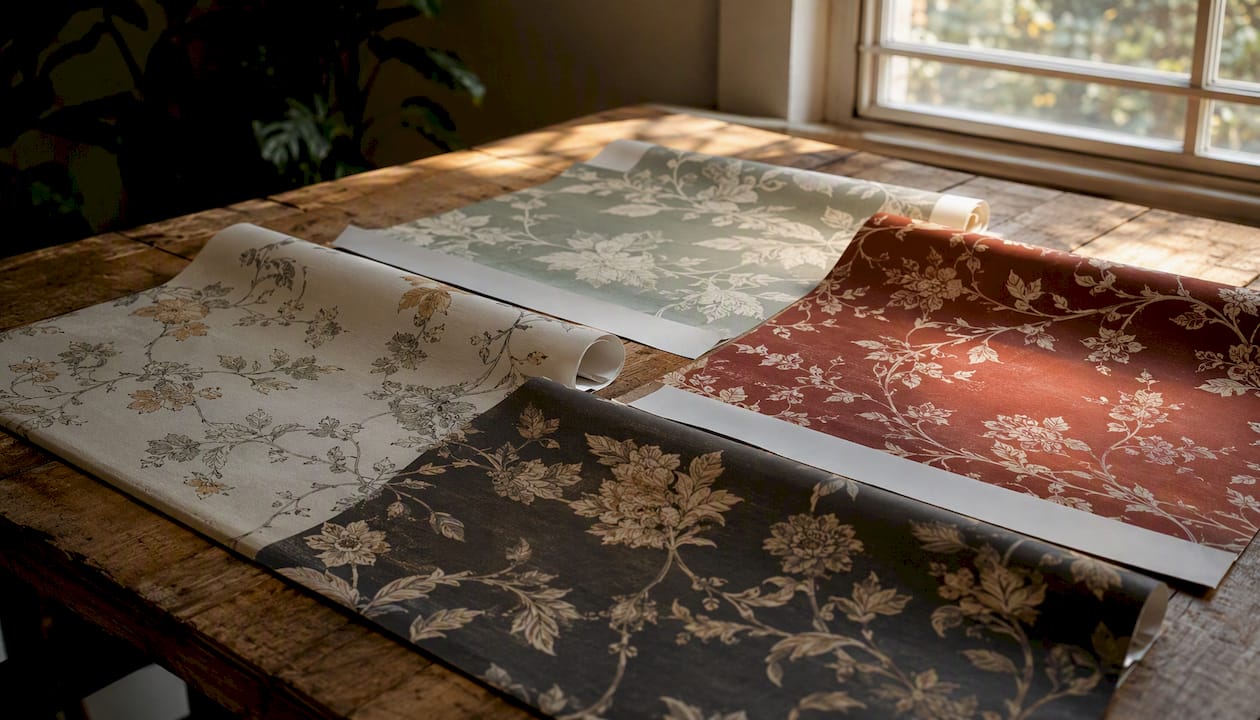
Seamless vector patterns use four core repeat geometries, each with different offset math and different visual results.
| Repeat type | Offset | Best for | Difficulty |
|---|---|---|---|
| Block (straight/full-drop) | None | Geometric, grid-based, architectural motifs | Low |
| Half-drop | 50% vertical shift | Florals, organic shapes, flowing motifs | Medium |
| Brick (half-brick) | 50% horizontal shift | Textiles, wallpaper, wide horizontal motifs | Medium |
| Mirror/reflect | Quadrant reflection | Symmetrical motifs, fast production | Low |
| Diamond/ogee | Diagonal offset | Classic wallpaper, damask, formal interiors | High |
Block repeats require exact top-to-bottom and left-to-right equality; half-brick and half-drop add a 50% offset on one axis; mirror repeats use quadrant reflection and are mathematically seamless with no offset math required. Mirror repeats are the fastest route to a seamless tile, but they force a mirrored aesthetic that does not suit every motif.
Diamond and ogee repeats suit formal wallpaper and upholstery. They require diagonal offset calculations and are best handled in Adobe Illustrator or a dedicated pattern tool.
Pro Tip: Match the repeat type to the motif shape first, then to the substrate. A directional bird motif rarely works in a block repeat; a geometric hex tile almost never needs a half-drop.
How to create a seamless tile from motif to export
This workflow applies regardless of the tool. Different methods suit different inputs: offset-and-heal works well for photographic textures; mirror/quad-mirror suits symmetrical hand-drawn motifs; hand-painted seam fixes give the most control for complex organic artwork.
- Define tile size and repeat length. Start with a square tile sized appropriately for the intended output resolution, such as high resolution for print or standard resolution for web. The tile size sets the physical repeat length on the substrate.
- Isolate or create the motif. Remove backgrounds, clean edges, and keep the motif on its own layer. For hand-drawn work, scan and vectorize before building the tile to preserve texture without losing production-readiness.
- Arrange center motifs. Place primary motifs away from edges. Fill secondary motifs around them, leaving deliberate negative space.
- Apply the offset or 4-way split-and-swap. Move edge-crossing elements to the opposite edge at the exact corresponding position. In raster tools, use the Offset filter. In vector tools, use the pattern tool or manual copy-paste with precise coordinates.
- Tidy the seams. Clone-stamp, heal, or redraw any motif that was cut awkwardly by the offset. Check all four edges and all four corners.
- Run a 4×4 tile test. Duplicate the tile into a 4×4 grid. Inspect at 100% for edge mismatches and at 25% for density rivers.
- Create colorways. Build alternate color versions on separate layers or swatches before exporting. Keep the source file editable.
- Export production files. SVG or AI/EPS for vector print work; TIFF at 300 DPI for raster print; PNG for web.
Production checklist per step:
- Step 1: Confirm DPI matches the output (300 DPI print, 72–96 DPI web)
- Step 4: Verify offset coordinates are exactly 50% of tile width/height
- Step 6: Check seams at 100% and density at 25%
- Step 8: Confirm color mode (CMYK for print, RGB for web)
Pro Tip: Keep a master source file with all layers intact and export a flattened production copy. Never send the only editable version to a printer.
Pro Tip: Scale matters more than most designers expect. Print a physical swatch before committing to a full run. A motif that looks balanced on screen can read as either too small or overwhelming at actual substrate scale.
Which tools work best for seamless pattern design?
Adobe Photoshop
Photoshop suits texture-heavy and photographic repeats.
- Use Filter > Other > Offset to shift the tile by exactly 50% on both axes, then heal or clone-stamp the seam.
- Work in 300 DPI, CMYK color mode for print files from the start.
- Use the Pattern Preview mode (available in recent versions) to see the tile repeat live while editing.
- Export as TIFF for print or PNG for web; keep a layered PSD as the source file.
- Typical pitfall: flattening layers before the seam is fully clean. Always heal on a separate layer.
Pro Tip: Photoshop’s Healing Brush works well on organic textures but can smear geometric edges. Switch to the Clone Stamp for hard-edged motifs.
Adobe Illustrator
Illustrator is the standard for scalable vector repeats and production-ready color separations.
- Use Object > Pattern > Make to enter the built-in pattern editor, which handles offset math automatically.
- Work in CMYK from the start; define spot colors as swatches for fabric printing.
- Export as AI or EPS for print vendors; SVG for web and screen applications.
- Typical pitfall: accidentally expanding pattern swatches before export, which locks the color structure.
Pro Tip: Save a version with the pattern swatch unexpanded. Printers and production partners often need the original swatch to adjust colorways.
Procreate
Procreate suits hand-drawn repeats and analog-to-digital workflows.
- Use the Canvas Wrap technique: draw motifs that cross the canvas edge, then use the Selection tool to move and mirror them to the opposite edge.
- Work at 300 DPI on a square canvas for print-ready output.
- Export as a high-res PNG; import into Illustrator or Photoshop for final production prep.
- Typical pitfall: exporting at screen resolution (72 DPI) by default. Always check export settings before saving.
Pro Tip: Procreate’s symmetry guides speed up mirror repeats significantly. Combine symmetry drawing with manual edge-crossing for half-drop layouts.
Canva
Canva works for digital mockups and low-resolution web backgrounds.
- Use the background tile feature or manually duplicate elements across a canvas.
- Good for social media graphics, digital presentations, and quick client mockups.
- Not suitable for print production: Canva exports at 96 DPI by default, and color management is limited.
- Typical pitfall: using a Canva mockup as the final print file. Always re-create the tile in Photoshop or Illustrator for anything going to a printer.
Inkscape
Inkscape is a free vector option with solid SVG and PDF export.
- Use Extensions > Generate from Path > Tile Clones to build repeating patterns from a base motif.
- Export as SVG for web or PDF for print; both formats are widely accepted by production vendors.
- Typical pitfall: inconsistent node handling when importing from other tools. Clean paths before tiling.
Pro Tip: Inkscape’s Tile Clones dialog supports rotation, scaling, and color shifts per clone, making it useful for complex geometric repeats without manual copy-paste.
How to test, export, and prepare files for print or web
Testing checklist
- Run a 4×4 tile test at 100% to check edge and corner alignment.
- Zoom to 25% to identify density rivers or visual clusters.
- View the tile on a mockup at actual substrate scale (a 54-inch fabric width or a standard wall panel).
- Order a strike-off or sample print before a full production run. Fabric is printed continuously on rolls, so a non-seamless tile shows visible seams across the full width at scale.
Export and print-prep reference
| Output | File format | Resolution | Color mode |
|---|---|---|---|
| Fabric print (vector) | AI / EPS / SVG | Vector (scalable) | CMYK / spot colors |
| Fabric print (raster) | TIFF | 300 DPI minimum | CMYK |
| Wallpaper print | TIFF or PDF | 300 DPI | CMYK |
| Web / digital | PNG | 72–96 DPI | RGB |
| Screen printing | AI / EPS | Vector | Spot colors |
For fabric printing on platforms like Spoonflower, download the printer’s tile template before building your file. Templates specify exact tile dimensions, bleed, and color profile. Ordering a one-yard strike-off before a full run catches scale and color issues that no screen preview will reveal.
Print-prep checklist:
- Confirm tile dimensions match the printer’s template exactly
- Add bleed if the printer requires it (typically 0.125 inches)
- Convert all fonts to outlines in vector files
- Embed or link all placed images
- Confirm color mode: CMYK for offset and digital print, RGB only for screen/web
Common mistakes and best practices
Mistakes that produce amateur or failed prints:
- Visible seams: Usually caused by a mismatched edge pixel or a motif that was not copied to the opposite edge at the exact corresponding position.
- Rivers of empty space: Uneven motif distribution creates diagonal or horizontal gaps that read as a grid at small scale.
- Wrong scale for the substrate: A motif that looks balanced at 5 inches on screen may read as tiny on a 54-inch fabric width or overwhelming on a 9-foot wall.
- Too many spot colors: Most fabric printers limit economical runs to 4–6 spot colors. Designs with more colors require digital printing at higher cost.
- Improperly handled corners: Motifs that touch corners must work across all four tile junctions. Ignoring this produces a cross-shaped artifact at every corner junction.
Best-practice checklist before sending to production:
- Test tiled mockups at actual substrate scale, not just screen scale
- Limit colorways to 4–6 spot colors for fabric unless digital printing is confirmed
- Create mockups at multiple scales (100%, 50%, 25%)
- Keep fully editable source files with named layers and saved colorway swatches
- Use clear file naming:
pattern-name_colorway_v01_300dpi_CMYK.tif
Pro Tip: Name every layer and save each colorway as a named swatch group. Production partners and printers work faster with clearly labeled files, and it prevents costly revision rounds.
Where seamless patterns are used and how the application changes design choices
Apparel and soft goods
Repeat size for apparel typically ranges from small to medium scale appropriate for garments. Smaller motifs read better on fitted garments where the pattern is cut and sewn; large repeats can be lost in seams. Half-drop and brick repeats suit organic florals and conversational prints. Color durability matters: dye-sublimation and digital printing handle complex gradients, while screen printing favors flat spot colors.
Wallpaper and murals
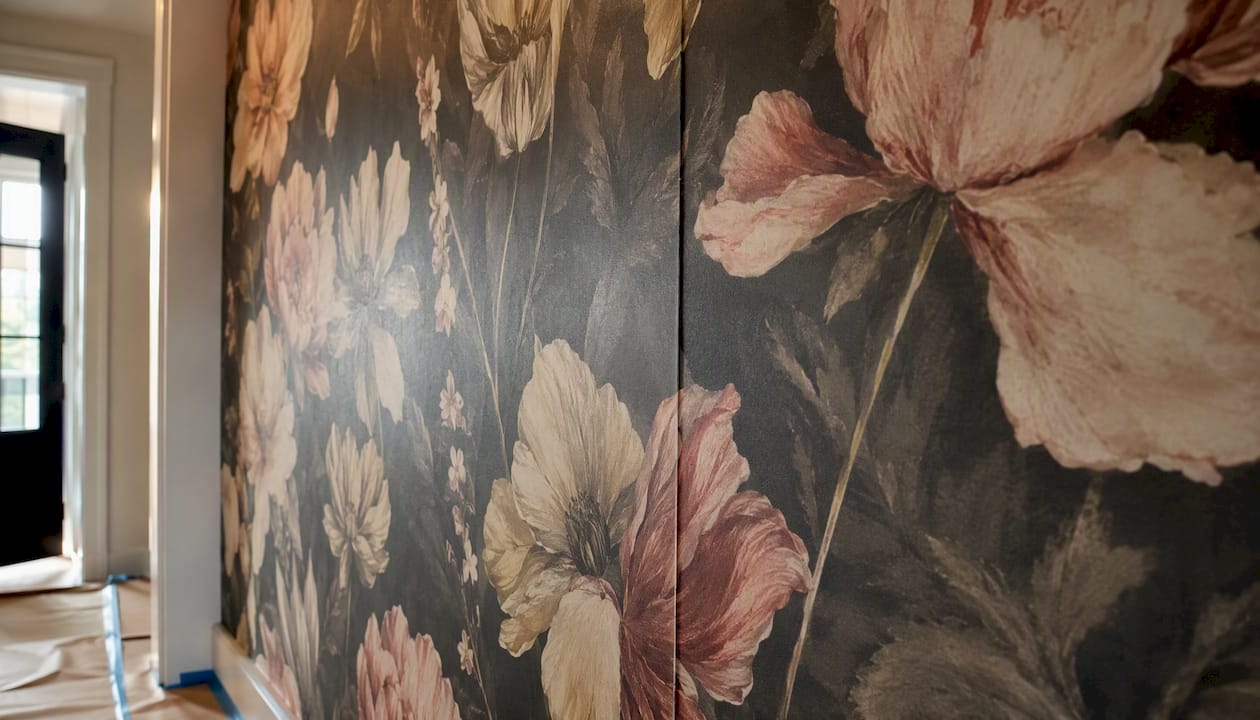
Wallpaper scale is generally larger, suited for viewing across full rooms, because the pattern is viewed across a full room. Vertical match requirements are critical: a half-drop wallpaper requires careful planning for waste and installation alignment. Large repeats on upholstery and wallpaper also require a vertical-match allowance in the installation spec. For open-plan spaces, scale and pattern density affect how the room reads at distance.
Packaging and labels
Packaging patterns often use small repeat sizes suitable for small-scale surfaces and high contrast to read clearly at small sizes. Color accuracy is critical: packaging often uses Pantone spot colors for brand consistency across substrates.
Digital backgrounds and UI
Web and UI patterns use standard screen resolutions and RGB color for digital display. Tile sizes can be small (100–400 px) because the browser or application handles the repeat. File size matters: a PNG tile under 50 KB tiles efficiently without slowing page load. Interior door placement and sight-lines are worth considering when a digital pattern is being adapted for a physical interior, since architectural elements affect how a repeat reads across a wall.
How to think like a surface pattern designer
The most useful shift in mindset is moving from “does this look good as a single tile?” to “does this hold up at scale?” A tile that looks balanced in isolation often reveals a diagonal river or a density cluster the moment it tiles. The fix is almost always in the distribution of secondary motifs, not the primary ones.
Scale adjustment after a strike-off is one of the most common production saves. A geometric repeat that looked precise on screen can read as visually busy on a physical wall panel. Reducing the motif by 20–30% and re-testing often resolves it without redesigning the pattern.
Textile design history shows that seam rules and strike-off proofing are not modern digital conventions. They reflect longstanding production realities: fabric is printed on continuous rolls, and a tile that fails at the seam fails across the entire run. The digital tools change; the constraint does not.
For designers preparing files for wallpaper production, Wallsneedlove’s upload guidelines specify exact tile dimensions, DPI, and color mode requirements, which removes the guesswork from file prep and reduces revision rounds.
Ready to print your pattern as custom wallpaper?
Designing a seamless tile is one part of the process. Getting it onto a wall is another. Wallsneedlove prints custom wallpaper and wall murals from designer-supplied files, available in peel-and-stick or traditional paste, with orders typically produced within 1–3 days. Every product carries Greenguard Gold environmental certification.

Designers can upload files directly and order a sample panel before committing to a full wall. The Pixel Diamonds geometric wallpaper and the hand-drawn pattern wallpaper show how seamless tiles translate to finished wall panels at residential scale. To get started, visit Wallsneedlove to review upload specs, order a sample, or contact production support.
Sources
- Create Seamless Vector Patterns from Images
- What Is a Seamless Repeat Pattern? Everything You Need to Know | Pattern Weaver
- Seamless Pattern: Definition, Repeat Types & How To Make One | Texloom Studio
- 5 steps to illustrating a repeat pattern by hand
- Textile Design and Colour
Suggested search terms for templates: “Spoonflower tile template download,” “wallpaper production PDF template,” “Illustrator seamless pattern swatch template,” “Photoshop offset filter seamless tile tutorial.”


Leave a comment