

Stair Riser Wallpaper Ideas That Transform Any Staircase
Yes, wallpapering your stair risers is one of the highest-impact, lowest-cost DIY projects you can tackle. Peel-and-stick is the easiest choice for renters and quick refreshes. Traditional pasted paper or heavy-duty vinyl, sealed properly, holds up better for the long haul. Before you pick a pattern, measure every riser. Staircases settle unevenly, and no two risers are guaranteed to match.
- Peel-and-stick: ideal for renters, beginners, and quick refreshes
- Pasted or vinyl: best for permanent homes and high-traffic stairs
- First step: measure each riser individually before you shop
Key Takeaways
Stair riser wallpaper succeeds when you measure every riser individually, prep the surface properly, and seal high-traffic steps with water-based polyurethane.
| Point | Details |
|---|---|
| Measure every riser | Don’t assume uniform sizing; measure and label each panel before cutting. |
| Choose material by use case | Peel-and-stick suits renters and quick updates; pasted paper or vinyl suits permanent homes. |
| Prep prevents peeling | Clean, sand, and prime raw or glossy surfaces before applying any wallpaper. |
| Seal for durability | Use 2 to 3 thin coats of water-based polyurethane, never oil-based varnish. |
| Custom or off-the-shelf | Wallsneedlove offers custom murals and peel-and-stick repeats sized for easy riser alignment. |
Table of Contents
- 12 Stair Riser Wallpaper Ideas Worth Copying
- Which Material Holds Up Best on Stairs?
- How Do You Install Wallpaper on Stair Risers?
- Design Rules That Keep Stairs Looking Intentional
- How Do You Keep Riser Wallpaper Looking Good for Years?
- Where Should You Buy Stair Riser Wallpaper?
- Common Mistakes When Wallpapering Stair Risers (and How to Fix Them)
- How Do You Clean and Maintain Wallpapered Risers?
- Ready to Pick Your Stair Riser Pattern?
- Frequently Asked Questions
- Sources
12 Stair Riser Wallpaper Ideas Worth Copying
Staircases are transitional spaces, not living rooms, which is exactly why design experts point to stairs as the place to take pattern risks you’d never try elsewhere. Here are 12 stair riser wallpaper ideas organized by the room style and skill level they fit best.
- Bold geometrics — best for modern homes, high-contrast entryways.
- Small-scale geometrics — forgiving for beginners; easiest pattern to align.
- Large-scale mural panels — best when risers form one continuous scene.
- Ditsy florals — soft, traditional look for cottage or farmhouse stairs.
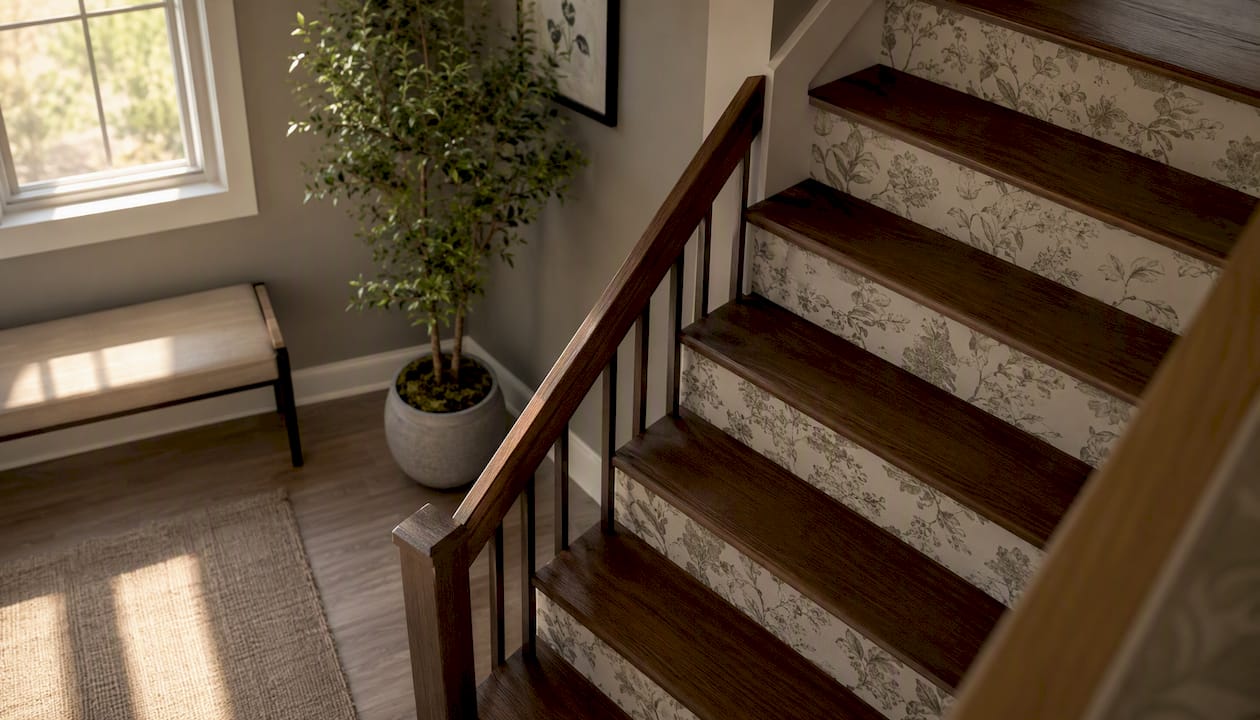
- Toile or damask — classic elegance for formal staircases.
- Metallic accents — small doses of shine for a glam statement stair.
- Textured grasscloth (peel-and-stick faux versions) — organic texture without real grasscloth’s install headaches.
- Faux tile or Portuguese tile decals — Mediterranean charm, no grout required.
- Monochrome stripes — makes a narrow stairwell feel taller.
- Ombré or gradient — subtle color shift from bottom step to top.
- Mixed-pattern patchwork — eclectic, one-of-a-kind, great for creative renters.
- Playful kid-friendly decals or polka dots — ideal for family homes and playrooms nearby.
Pro Tip: Pick a repeat size smaller than your riser height whenever possible. A pattern that repeats every 4 to 6 inches lines up far more forgivingly than one that repeats every 18 inches.
- High-traffic stairs: skip glossy metallics on treads, keep them to risers only
- Rentals: peel-and-stick patchwork or florals remove cleanly at move-out
- Kid zones: decals and polka dots hide scuffs better than solid colors
Which Material Holds Up Best on Stairs?
Your material choice matters more on stairs than almost anywhere else in the house, because risers take kicks, vacuum bumps, and shoe scuffs daily.
- Peel-and-stick: easiest to apply and remove, ideal for rentals, but less scrub-resistant without a sealant.
- Traditional pasted paper: gives a seamless, professional finish and tends to outlast peel-and-stick under heavy use.
- Vinyl: the most scrubbable option, good for households with kids or pets.
- Grasscloth (peel-and-stick faux): adds real texture but is trickier to cut cleanly around riser edges.
Stick with matte or satin finishes for safety and to hide minor imperfections. Save metallic finishes for accent risers rather than every step. A wide range of finishes works on risers, but glossy surfaces show scuffs and glare under stair lighting faster than anything else.
Pro Tip: Whatever material you choose, plan to seal high-traffic risers with a water-based polyurethane once the adhesive fully cures. Skipping this step is the single fastest way to see peeling within a year.
How Do You Install Wallpaper on Stair Risers?
The reliable process is: measure each riser, prep the surface, cut with extra margin, dry-fit before committing, apply top-down, smooth out air bubbles, trim clean, then seal.
- Measure every riser individually. Staircases are rarely uniform, and assuming identical dimensions is one of the most common causes of gaps and misfit panels.
- Clean and lightly sand each surface to remove dust, grease, and glossy sheen that blocks adhesion.
- Prime raw wood or glossy paint with an oil-based primer when needed, since proper prep prevents peeling and bubbles down the line.
- Cut panels with a half-inch of extra material on every edge before you commit to a final trim.
- Dry-fit and match the pattern across adjacent risers before any adhesive touches the wall.
- Apply the panel, starting from the top edge for peel-and-stick or brushing paste evenly for traditional paper.
- Smooth with a wallpaper tool to push out air bubbles and press corners flat.
- Trim excess with a fresh utility blade against a straight edge for a factory-clean line.
- Let the adhesive cure fully, then seal high-traffic risers with polyurethane.
Work in a ventilated space, since primers and some adhesives carry fumes worth avoiding in a closed stairwell.
Pro Tip: Label each cut panel with a sticky note matching its riser number before you start applying. Mixing up panels mid-project is the fastest way to waste a perfectly cut piece.
Design Rules That Keep Stairs Looking Intentional
A staircase full of mismatched patterns reads as chaotic instead of curated, so a few simple rules make all the difference.
- Pull 1 to 2 anchor colors from your entryway or hallway and repeat them across every riser pattern and door design to create a cohesive look.
- Choose small or non-directional repeats. Small prints are easier to align across multiple narrow panels than large directional ones.
- Large-scale murals need planning ahead: either commit to one continuous scene across every riser or lean fully into patchwork instead of a half-measure.
- Stripes and gradients change how tall a staircase feels, so use them when you want to stretch a short stairwell visually.
- Orient patterns sideways when your wallpaper roll is narrower than the riser height. It often lets you use a single cut instead of piecing two together.
Pro Tip: When mixing patterns across risers, keep at least one color consistent in every design so the staircase reads as a set, not a grab bag.
If your staircase opens into a great room or landing, tying the riser palette into the broader room design keeps the whole space feeling connected rather than segmented.
What Tools Do You Need for This Project?
Gather everything before you start cutting, since running to the hardware store mid-project stalls momentum fast.
- Tape measure, pencil, and a level or straight edge
- Smoothing tool or roller for pressing out bubbles
- Utility knife with fresh blades (dull blades tear instead of cut)
- Sanding block and primer or adhesive, depending on your material
- Paintbrush for sealant and drop cloths to protect treads
Pro Tip: Keep a drywall rasp and a small metal ruler nearby for tight trim work around uneven riser edges.
How Do You Keep Riser Wallpaper Looking Good for Years?
Sealing is what separates a stair project that lasts from one that peels within a season. Apply two to three thin coats of water-based polyurethane once the adhesive is fully cured, letting each coat dry before the next. Matte or satin sheens resist glare better than gloss.
- Clean vinyl-sealed risers with mild soap and water; skip oil-based cleaners, which can dull the finish.
- Avoid glossy finishes on treads themselves. If you’re covering treads too, choose textured, non-slip overlays and reserve wallpaper for risers only.
- The most common mistakes are skipping prep entirely, assuming every riser is the same size, and reaching for oil-based varnish, which tends to yellow over time instead of staying clear.
Where Should You Buy Stair Riser Wallpaper?
Where you shop depends on whether you want a custom continuous scene or a fast, off-the-shelf update. Custom mural sellers work best when you need one image to flow seamlessly across every riser without visible seams. Peel-and-stick marketplaces suit quick refreshes and rental-friendly projects where removability matters more than a perfect custom fit. Tile-decal vendors are worth a look specifically for faux Portuguese or Moroccan tile looks without the weight or cost of real tile.
For DIYers weighing both routes, Walls Need Love carries custom murals for full-panel scenes, small-scale geometric repeats built for easy riser alignment, and peel-and-stick options for anyone who wants a quick, removable update.
Pro Tip: If you’re torn between custom and off-the-shelf, order a sample swatch first. Pattern scale looks different on a screen than it does on an actual 8-inch riser.
Why Consider Walls Need Love for Custom Risers?
Walls Need Love prints custom wallpaper and murals on demand, offering both peel-and-stick and traditional paste with fast turnaround.
- Custom prints made to order, typically within 1 to 3 days
- Greenguard Gold certified materials for indoor air quality
- Support for local artists and detailed installation guides for DIYers
Common Mistakes When Wallpapering Stair Risers (and How to Fix Them)
The biggest mistake is treating every riser as identical. Stairs settle over years, and heights or widths often vary by a quarter inch or more between steps. Skipping individual measurements leads to gaps at the edges or panels that overlap awkwardly. Measure and label each riser before you cut a single piece.
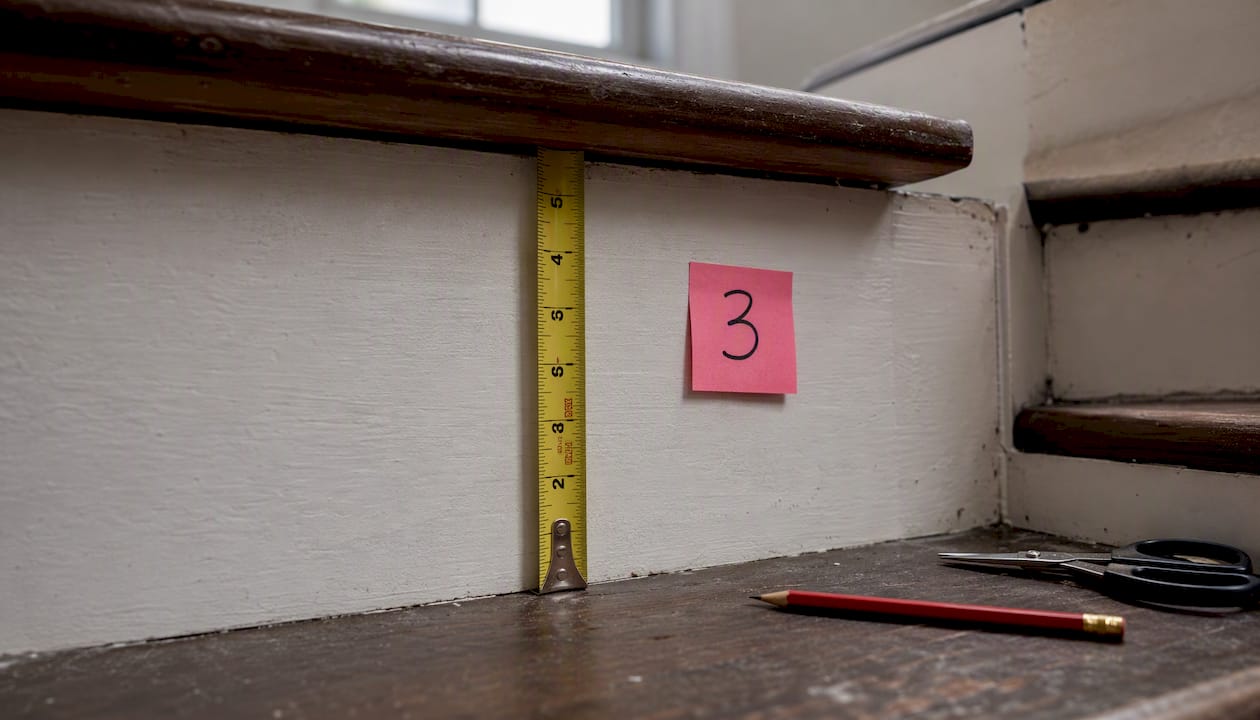
Skipping surface prep is a close second. Glossy paint and raw wood both resist adhesive, which is why paper bubbles or peels within months on unprepped surfaces. A quick sand and clean, plus a primer coat where needed, solves this before it becomes a problem.
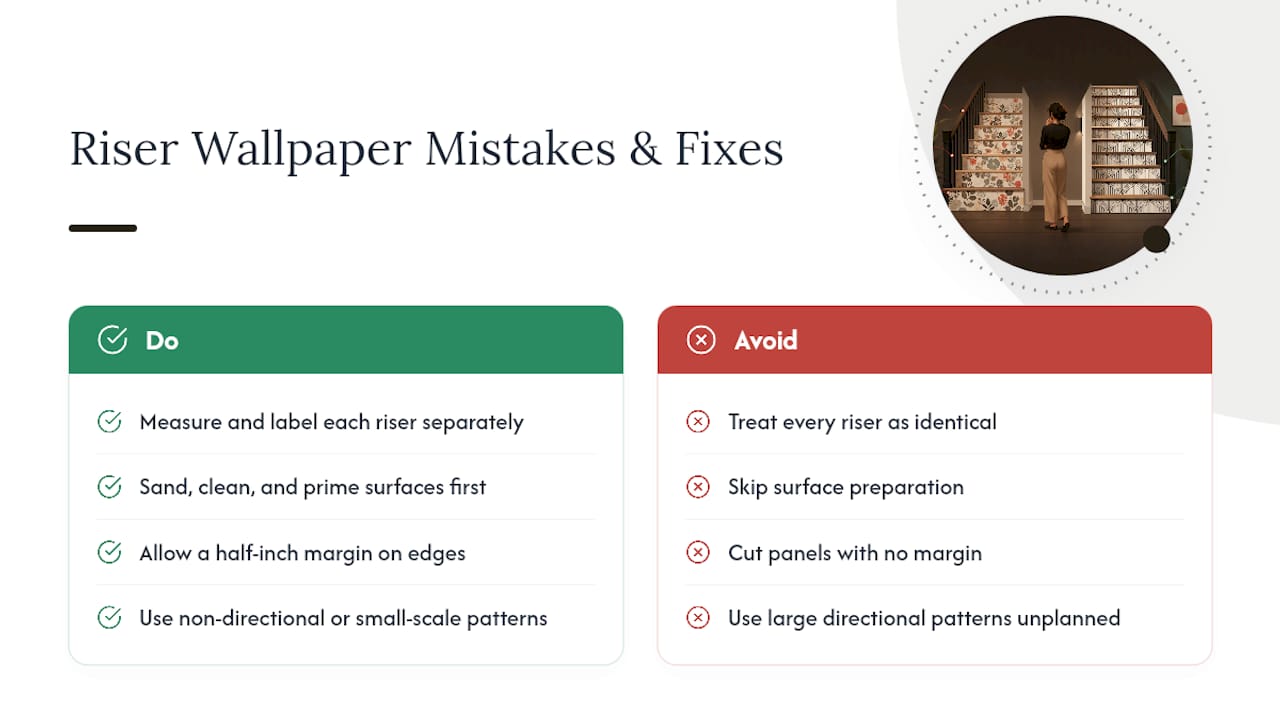
Cutting panels to the exact riser size, with no margin, is another common misstep. Wood and paper both shift slightly during application, so a half-inch of extra material on each edge gives you room to trim precisely instead of coming up short.
Choosing a large directional pattern without planning ahead trips up plenty of first-timers too. If your risers don’t align perfectly, a bold directional print makes every seam obvious. Non-directional or small-scale patterns hide minor misalignment far better.
Finally, sealing with the wrong product undoes good work fast. Oil-based varnish yellows over time and can discolor lighter patterns within a year or two. Water-based polyurethane stays clear and protects without altering your color palette.
How Do You Clean and Maintain Wallpapered Risers?
Maintenance depends heavily on whether your risers are sealed. Sealed peel-and-stick or vinyl wipes clean with a damp cloth and mild soap, since the polyurethane coat creates a wipeable barrier against dust and scuffs. Unsealed paper is far more vulnerable. Avoid wet cleaning altogether and stick to a dry microfiber cloth or a soft brush attachment on your vacuum.
Shoe scuffs are the most frequent damage point, especially on the bottom two or three risers where foot traffic concentrates. A quick wipe with a barely damp cloth usually lifts most marks on sealed surfaces. For unsealed paper, a white eraser can lift light pencil-like scuffs without damaging the print underneath.
Check your sealed coats every year or two, especially in entryways with heavy foot traffic. If you notice the finish looking cloudy or worn in specific spots, a fresh single coat of water-based polyurethane over just those risers extends the life of the whole staircase without a full redo.
Avoid harsh degreasers or ammonia-based cleaners on any riser, sealed or not. They can break down adhesive backing over time, even on vinyl. If you ever plan to swap the pattern down the road, proper removal technique now saves you from damaging the wall surface later.
A Quick Note From Hands-On Experience
Peel-and-stick is genuinely the easier starting point for a first riser project, and sealing afterward is what makes the difference between a design that lasts and one that needs redoing next year.
Ready to Pick Your Stair Riser Pattern?
Big box stores limit you to whatever repeat happens to be in stock that season. Wallsneedlove takes a different route: every pattern is custom printed to order, typically within 1 to 3 days, so you’re never stuck squeezing a mismatched roll onto an odd-sized riser.

Whether you want a playful monkey-themed peel-and-stick pattern for a family stairwell or a full continuous scene with a custom wall mural, both peel-and-stick and traditional paste options are available with Greenguard Gold certified materials. Browse the full wallpaper and mural collection to find a repeat sized right for your risers, and order a sample swatch before you commit to the whole staircase.
Frequently Asked Questions
Is peel-and-stick wallpaper durable enough for stair risers? Yes, especially when sealed with water-based polyurethane. Without sealing, it holds up fine for renters or short-term updates but shows wear faster under heavy foot traffic.
How much wallpaper do I need for stair risers? Measure each riser’s height and width individually, add a half-inch margin per panel, then total the square footage. Order a bit extra for mistakes since exact leftover matching later is difficult.
Can I wallpaper stair risers without removing carpet or treads? Yes. Most stair riser wallpaper projects only involve the vertical riser boards, leaving treads and any carpet runners untouched.
Do I need a professional to wallpaper stairs? No. This is a genuinely DIY-friendly weekend project with the right prep, tools, and a pattern sized for easy alignment.
What’s the best wallpaper pattern for a narrow staircase? Small-scale geometrics or vertical stripes tend to work best, since they’re forgiving to align and can visually stretch a narrow stairwell taller.
Sources
- Helpful Tips For Wallpapering On Stairs (And Mistakes To Avoid) — House Digest
- Stair wallpaper ideas: 10 ways with stairwell wallpaper — Homes & Gardens
- Wallpaper Your Stair Risers For A One-Of-A-Kind Look — Hunker
- Stair Riser Ideas — The Spruce
- Wallpapered stair risers — JourneymanHQ


Leave a comment