

Beginner-Friendly Wallpaper Projects: 8 Easy Ideas to Start
Peel-and-stick wallpaper is the fastest path to a confident first install. It works on smooth, untextured surfaces, removes cleanly, and suits renters and homeowners alike. The five quickest wins for beginners are:
- Accent wall — one flat wall, no corners required
- Stair risers — small, individual panels with minimal pattern matching
- Bookshelf or closet backs — short cuts, hidden edges, forgiving placement
- Dresser or drawer fronts — tiny surfaces, fast results
- Framed wallpaper panels — no wall contact at all, fully removable
Peel-and-stick options are recommended for beginners because the adhesive is repositionable, mistakes are fixable, and removal does not damage properly prepared drywall.
Table of Contents
- What are the best beginner-friendly wallpaper projects to try first?
- What tools and materials do you need for a basic wallpaper job?
- How do you install peel-and-stick wallpaper step by step?
- How do you create a painted gingham or geometric “wallpaper” look?
- How do you care for and remove peel-and-stick wallpaper?
- How much do beginner wallpaper projects cost and how long do they take?
- What are the most common beginner mistakes and how do you avoid them?
- How do you handle corners and edges as a beginner?
- Key Takeaways
- The case for starting smaller than you think you should
- Ready-made peel-and-stick wallpaper for every project on this list
- Useful sources and further reading
What are the best beginner-friendly wallpaper projects to try first?
These eight examples of beginner-friendly wallpaper projects are ordered from simplest to slightly more involved. Each one includes a time estimate, a short materials list, and the key steps.
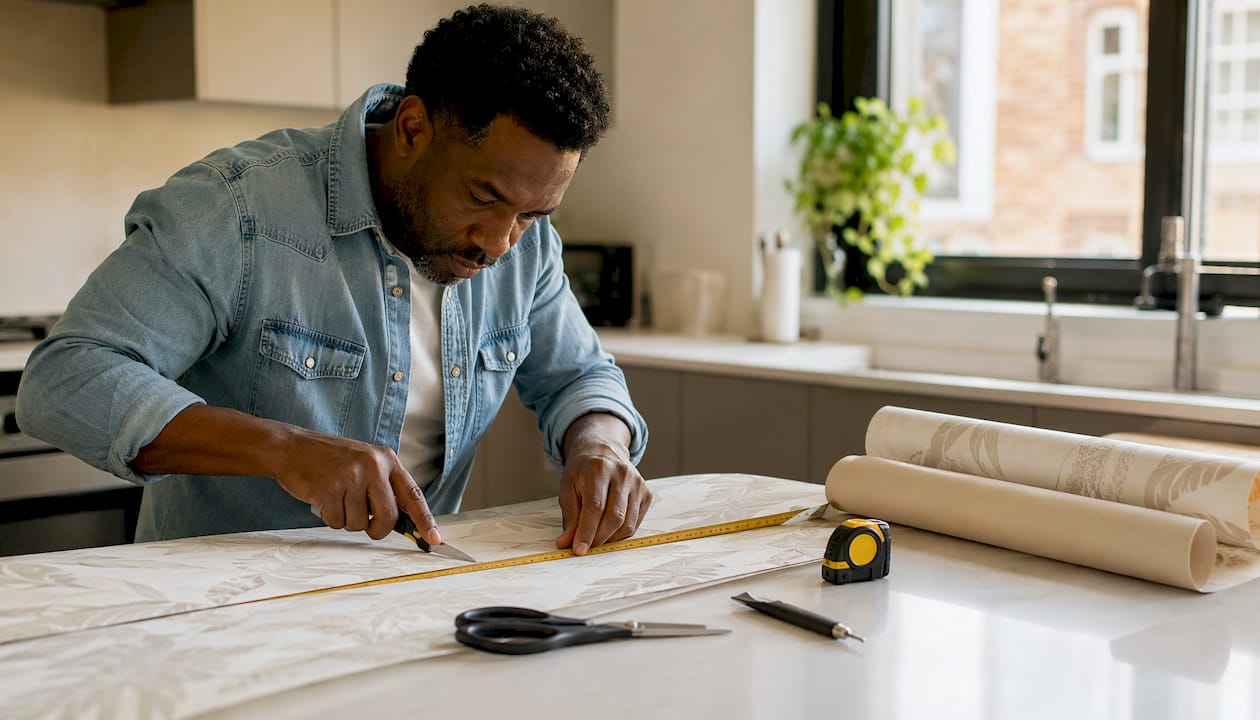
Accent wall
Why it works for beginners: One flat surface, no furniture to work around, and a single focal point that hides minor imperfections at the seams.
Time: 2–4 hours. Materials: Peel-and-stick wallpaper, measuring tape, level, utility knife, smoothing tool.
- Measure wall height and width; add 2 inches to each panel for trimming.
- Mark a plumb vertical line with a level.
- Align the first panel to that line and press from top to bottom.
- Smooth outward from center with a squeegee to push out air.
- Butt the next panel edge-to-edge and match the pattern repeat.
- Trim top and bottom with a utility knife against a straight edge.
Quick tip: Limit bold patterns to a single accent wall to control visual weight and keep material costs down.
Stair risers
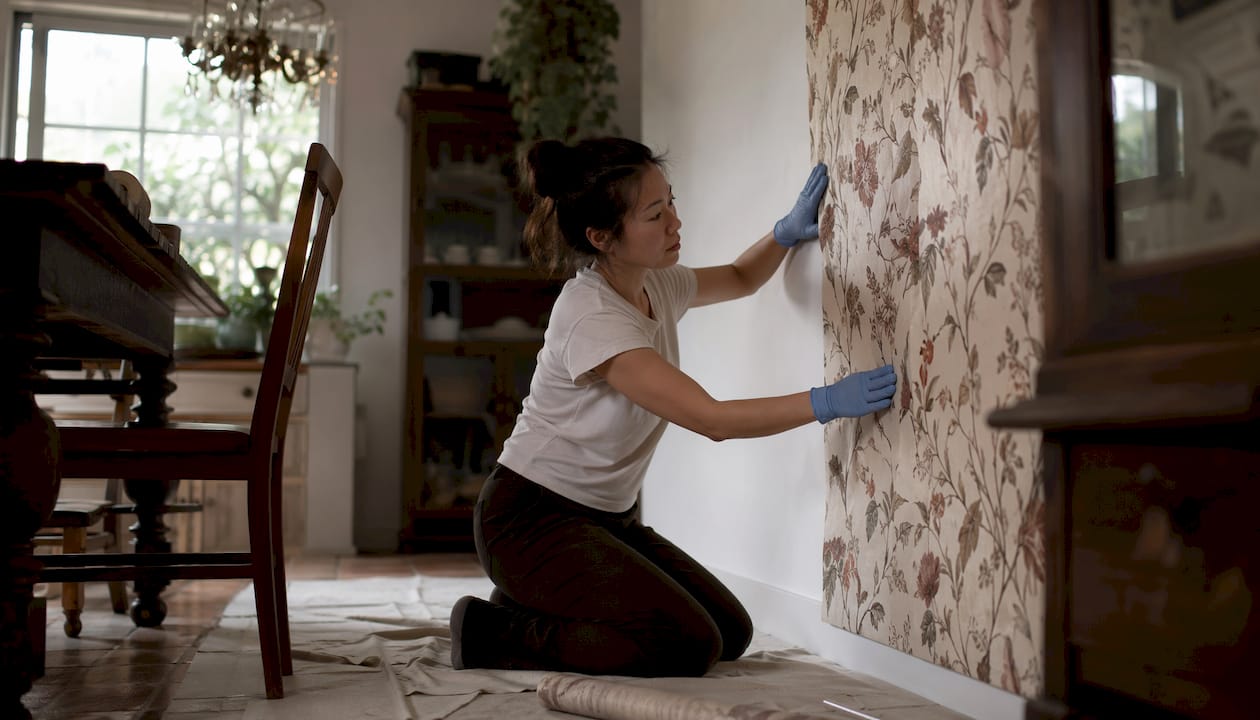
Why it works: Each riser is an independent panel. No seam matching across panels is required if you choose a pattern with little or no repeat.
Time: 1–3 hours. Materials: Peel-and-stick wallpaper, scissors, utility knife, ruler.
- Measure each riser individually (they often vary slightly).
- Cut panels to size with a 1-inch overlap on all sides.
- Peel backing and press panel onto the riser, starting at one end.
- Smooth firmly, then trim excess with a utility knife.
Quick tip: A small geometric or solid pattern eliminates repeat-matching stress entirely on stairs.
Bookshelf and closet backs
Mounting wallpaper to rigid foam board or cardboard cut to size, then sliding the board into the shelf, is a renter-friendly trick that avoids awkward corner work and lets you swap the look later. Number the backs of each board so reinstallation is simple.
Time: 1–2 hours. Materials: Foam board or cardboard, peel-and-stick wallpaper, utility knife, straight edge.
- Measure each shelf back and transfer dimensions to foam board.
- Cut foam board to size.
- Lay peel-and-stick wallpaper sticky-side up, press board onto it, then trim excess.
- Slide finished board into the shelf.
Dresser and drawer fronts
Small surface area means a single roll often covers an entire dresser. Drawer fronts are also easy to remove if the look does not work.
Time: 1–2 hours. Materials: Peel-and-stick wallpaper, scissors, utility knife, ruler.
- Remove drawers and lay flat.
- Cut wallpaper panels slightly larger than each drawer front.
- Apply, smooth, and trim edges flush.
- Reinstall drawers.
Powder room accent wall
Small rooms are ideal for experimenting because the transformation is immediate and the total square footage is low. A guest bathroom or powder room with a single flat wall is one of the best places to practice.
Time: 2–3 hours. Materials: Peel-and-stick wallpaper, level, utility knife, smoothing tool.
Steps follow the same process as the accent wall above. The key difference: cut around the toilet tank and vanity mirror carefully with a utility knife rather than trying to work around them before hanging.
Framed wallpaper panels
Place peel-and-stick wallpaper behind a standard matted frame for custom wall art that requires no wall contact at all. Center the pattern on the mat before pressing down, then trim the inner opening with a precision craft blade.
Time: Under 1 hour per frame. Materials: Frame with mat, peel-and-stick wallpaper, scissors, craft blade.
Switch plates
Cover a standard switch plate with a small scrap of peel-and-stick wallpaper, trim around the openings with a craft blade, and reinstall. A fast, low-cost accent that ties a room together.
Book-page accent wall
This project uses book pages instead of printed wallpaper. Prep takes roughly two days (sorting, trimming, and arranging pages), while the actual installation can be done in a single afternoon. Material costs can stay around $50 when pages come from thrift-store books. Seal the finished surface with Minwax Polycrylic for humidity resistance.
What tools and materials do you need for a basic wallpaper job?
Tools checklist
- Measuring tape
- Level or laser level
- Utility knife and spare blades
- Squeegee or hand roller (smoothing tool)
- Seam roller
- Scissors
- Smoothing cloth
- Ladder or step stool
- Straight edge or T-square
Materials checklist
Peel-and-stick projects: Peel-and-stick wallpaper rolls, painter’s tape (for marking guidelines), foam board or cardboard (for shelf-back mounting).
Paste-the-wall projects: Traditional wallpaper, premixed paste or activator, sponge, bucket, seam roller.
Peel-and-stick vs. paste: quick comparison
Peel-and-stick is repositionable, renter-friendly, and requires no paste or drying time. It performs best on smooth, primed drywall. Paste-the-wall options are more durable in high-humidity areas like full bathrooms, where moisture can weaken peel-and-stick adhesive over time. For most beginner projects, peel-and-stick is the practical choice.
| Tool tier | What’s included | Best for |
|---|---|---|
| Basic beginner kit | Measuring tape, scissors, smoothing cloth, utility knife | Stair risers, drawer fronts, shelf backs |
| Recommended kit | All basic tools plus level, seam roller, squeegee, straight edge | Accent walls, powder rooms, framed panels |
Pro Tip: Buy two extra blades before you start. A dull blade drags and tears wallpaper edges, which is the leading cause of ragged trim lines on beginner projects.
How do you install peel-and-stick wallpaper step by step?
The core method is five steps: measure, cut, align, smooth, trim. Here is the full walkthrough.
- Prep the surface. Walls must be clean, dry, and smooth. Wipe with a damp cloth and let dry completely. Fill any holes with spackle and sand flush. Check which wall types work best before starting — textured or unpainted surfaces will cause adhesion failure.
- Measure and cut. Measure wall height and add 2 inches. Cut the first panel. If the pattern has a repeat, note the repeat length before cutting subsequent panels so the design lines up.
- Mark a plumb line. Use a level to draw a faint vertical pencil line. This is your alignment guide for the first panel.
- Peel and apply. Peel about 12 inches of backing. Align the panel edge to your plumb line and press the top section to the wall. Peel the remaining backing gradually as you work downward.
- Smooth as you go. Use a squeegee or smoothing cloth, working from the center outward to push air toward the edges. Never smooth top-to-bottom in one stroke — that traps bubbles.
- Hang subsequent panels. Butt edges together (do not overlap). Match the pattern repeat before pressing each new panel down.
- Trim edges. Press a straight edge firmly against the baseboard or ceiling line and trim with a fresh utility knife blade.
- Roll seams. Run a seam roller lightly along each joint for a flat, clean finish.
Common mistakes and quick fixes
- Air bubbles: Lift the panel slowly from the bubble point and re-smooth. Peel-and-stick is repositionable on most surfaces.
- Misaligned pattern: Peel back to the last good seam and reapply. Do not try to shift a fully pressed panel sideways.
- Working on textured walls: Peel-and-stick will not adhere properly to orange peel or knockdown textures. Sand smooth or apply a skim coat first.
Pro Tip: To lift and re-seat a panel without stretching it, peel from one corner at a 45-degree angle back toward the wall rather than pulling straight out. This keeps the material from distorting.
How do you create a painted gingham or geometric “wallpaper” look?
Painted gingham is the most reliable paint-based alternative to printed wallpaper. The finished result looks like wallpaper, costs less per square foot in many cases, and performs well in humid areas when sealed correctly.
Timeline: 2–3 days, with most of that time spent waiting for paint to dry between layers rather than actively working.
Materials
- Latex wall paint (base color and accent color)
- High-adhesion painter’s tape
- Delicate-surface painter’s tape
- Laser level or chalk line
- Paint roller and brushes
- Clear topcoat (optional, for durability)
Steps
- Apply base coat. Roll on the lighter color as a full base coat. Allow to dry fully, at least 24 hours.
- Plan the grid. Use a laser level and chalk line to map out the gingham grid on the wall. Mark lightly with pencil.
- Tape the first pass. Apply high-adhesion painter’s tape along the first set of lines. Press edges firmly to prevent bleeding.
- Paint the first stripe color. Apply the accent color within the taped sections. Let dry completely.
- Switch tape for the second pass. Use delicate-surface tape for subsequent layers to avoid pulling partially cured paint from the first pass.
- Paint the crossing stripes. The overlapping sections will create the darker gingham squares automatically.
- Remove tape and cure. Peel tape at a 45-degree angle while paint is still slightly tacky for the cleanest edge. Allow full cure before adding a topcoat.
Why choose paint over wallpaper: Lower upfront cost, easier color-matching to existing decor, and better performance in high-humidity rooms when sealed. The tradeoff is time: planning the design and testing color samples first reduces wasted paint and poor color matches.
Timeline note: The 2–3 day schedule is almost entirely drying time. Active work on a standard accent wall is typically 3–5 hours spread across those days.
How do you care for and remove peel-and-stick wallpaper?
Removal is straightforward when the surface was properly prepped and the product is genuinely removable. On unpainted drywall or surfaces that were not primed, adhesive can pull the paper face off the wall.
Removal steps
- Start at a top corner and peel the panel back slowly at a low angle toward the wall.
- If adhesive resistance is high, apply gentle heat with a hair dryer on a low setting to soften the glue.
- Work down the panel gradually, never yanking.
- Remove any remaining adhesive residue with a damp cloth or a small amount of rubbing alcohol on a clean rag.
- Wipe the wall clean and allow to dry before repainting or reapplying.
For a full walkthrough, the DIY wallpaper removal guide from Wallsneedlove covers surface-specific steps and common problem areas.
Day-to-day maintenance
- Wipe with a lightly damp cloth for dust and light marks.
- Avoid abrasive cleaners or scrubbing pads, which can lift the print layer.
- Do not use bleach-based sprays near seams.
Humidity caution
In full bathrooms with showers, steam can weaken peel-and-stick adhesive over time. Paste-the-wall wallpaper is the more durable choice in those spaces. For powder rooms with no shower, peel-and-stick generally performs well. Wallsneedlove products carry Greenguard Gold certification, confirming low chemical emissions for indoor use.
How much do beginner wallpaper projects cost and how long do they take?
Most beginner projects fall into a low-to-medium cost range depending on surface size, pattern repeat length, and wall prep needed.
| Project | Estimated material cost | Estimated time |
|---|---|---|
| Accent wall (one wall, standard room) | around $50 | 2–4 hours |
| Stair risers (full staircase) | — | 1–3 hours |
| Dresser or drawer fronts | — | 1–2 hours |
| Framed wallpaper panels (set of 3) | — | Under 2 hours |
| Book-page accent wall | Around $50 | 2 days prep + half day install |
| Painted gingham accent wall | $50 in paint and tape | 2–3 days (mostly drying) |
Variables that shift cost and time: a large pattern repeat increases waste and material cost; walls taller than 9 feet require longer panels; unprimed or textured walls add prep time before any wallpaper goes up.
What are the most common beginner mistakes and how do you avoid them?
Skipping surface prep. Peel-and-stick adhesive needs a clean, smooth, primed surface. Dust, grease, or texture causes early peeling. Wipe walls and let them dry before starting.
Not using a plumb line. Walls are rarely perfectly straight. Hanging the first panel by eye almost always results in a noticeable lean by the third or fourth panel. A level takes two minutes and saves the whole project.
Cutting all panels at once. Cut one panel, hang it, then cut the next. This accounts for any variation in wall height and keeps pattern matching accurate.
Overlapping seams instead of butting them. Overlapped seams create a visible ridge. Butt edges together firmly and roll with a seam roller.
Choosing a large pattern repeat for a first project. Large repeats increase waste and require precise alignment. Start with a small geometric, a solid, or a pattern with a short repeat for the first install.
Rushing the trim. Dull blades and fast cuts leave ragged edges at baseboards and ceilings. Use a fresh blade and a straight edge, and cut slowly.
How do you handle corners and edges as a beginner?
Corners are the part of a wallpaper project that trips up most beginners, but the fix is simple: never try to wrap a single panel around a full corner.
Inside corners: Hang the first panel so it overlaps the corner by about half an inch. Crease the overlap into the corner with a smoothing tool. Hang the next panel on the adjacent wall, starting flush at the corner. The small overlap hides any gap from wall irregularities.
Outside corners: Wrap the panel around the corner by about 1 inch. On the adjacent wall, start a new panel at the corner edge and align it carefully. Outside corners take more wear, so press the adhesive firmly and run a seam roller along the wrap.
Ceiling and baseboard edges: Press a metal straight edge firmly against the trim line and score with a fresh utility knife blade. Pull the trimmed strip away cleanly. A second pass with the blade cleans any remaining tag.
Window and door frames: Cut the panel to within 2 inches of the frame, then make relief cuts at corners so the paper lies flat. Trim flush with a craft blade. For coordinating the wallpaper with your door and trim finishes, guidance on choosing interior door styles can help you plan the full wall composition before you hang the first panel.
Key Takeaways
Peel-and-stick wallpaper on a smooth, primed surface is the fastest way for beginners to complete a real wallpaper project with confidence and minimal risk.
| Point | Details |
|---|---|
| Start small | Stair risers, drawer fronts, and shelf backs build skills fast with low material cost. |
| Surface prep is non-negotiable | Clean, smooth, primed walls are required for peel-and-stick adhesion to hold. |
| Use a plumb line every time | A level line on the first panel prevents cumulative drift across the whole wall. |
| Never wrap a full corner with one panel | Overlap inside corners by half an inch and start fresh on the adjacent wall. |
| Wallsneedlove for ready-made options | Wallsneedlove offers Greenguard Gold-certified peel-and-stick and mural prints with detailed installation guides for all the projects listed above. |
The case for starting smaller than you think you should
Most beginners overestimate how much wallpaper they need to hang to feel like the project “counts.” A single bookshelf back or a set of stair risers produces a visible, satisfying result in an afternoon. That matters because confidence in wallpaper installation comes from completing something, not from planning something large.
The conventional advice to “start with an accent wall” is reasonable, but a dresser front or a framed panel is actually lower stakes and teaches the same core skills: measuring, aligning, smoothing, and trimming. Once those four steps feel natural on a small surface, an accent wall is a straightforward next move rather than a leap.
Wallsneedlove’s installation guides and sample ordering process support exactly this approach. Testing a pattern on a small surface before committing to a full wall is a practical step, not a hesitation.
Ready-made peel-and-stick wallpaper for every project on this list
Wallsneedlove offers a direct solution for beginners who want quality prints without sourcing materials separately. Every pattern is available in peel-and-stick format, custom-sized to the project, and printed to order within 1–3 days.

Key details for beginners:
- Greenguard Gold certified — low chemical emissions, safe for bedrooms and nurseries
- Custom sizing — order panels cut to your exact wall or surface dimensions
- Detailed installation guides — step-by-step instructions included with every order
- Sample ordering — test a pattern on your actual wall before committing to full coverage
The Java Mountain wall mural and the seamless geometric pattern are two strong starting points for beginners: the mural handles pattern matching for you, and the seamless geometric has no repeat to align. Browse the full collection and request samples at Wallsneedlove.
Useful sources and further reading
- Peel-and-stick project ideas and design pro tips — design advice on scale, pattern choice, and small-surface applications
- Ten DIY projects with leftover wallpaper scraps — foam board mounting method, stair risers, drawer fronts, and framed art
- DIY custom wall art with peel-and-stick wallpaper — step-by-step framed panel tutorial with photos
- Painted gingham DIY tutorial — tape selection, layering sequence, and cure guidance for painted patterns
- 64 wallpaper ideas for every room — project location inspiration including built-ins, ceilings, and stair risers
- Wallsneedlove: peel-and-stick wallpaper for renters — renter-safe installation and removal guidance
- Wallsneedlove: DIY wallpaper removal best practices — step-by-step removal and residue cleanup


Leave a comment