

The Complete Brand Identity Wallpaper Checklist for Businesses
A commercial brand identity wallpaper checklist needs seven components before any vendor gets a purchase order: a project brief with branding goals and assets, a measured site survey, a material and finish selection, production-ready artwork specs, an installation plan with realistic lead times, an itemized quote, and a written warranty. Skip any one of these and the project slips, the color drifts off-brand, or the vinyl bubbles off the wall within a month.
Three named requirements belong in every spec sheet from day one: ASTM E84 fire-rating documentation for Class A compliance, Greenguard Gold certification if indoor air quality matters to your tenants or staff, and a named production partner (Wallsneedlove, for instance) who can confirm turnaround before you commit to a date.
Here’s the shortlist to copy into your procurement brief:
- Project brief: branding goals, logo files, color codes, usage rules
- Site survey: dimensions, substrate type, obstructions, waste allowance
- Material and finish: Type II vinyl or Greenguard Gold-certified alternative, removable or permanent
- Artwork file specs: resolution at final print scale, file type, color profile, bleed
- Installation plan: site access requirements, HVAC status, lead times
- Procurement quote: itemized materials, labor, laminates, and travel
- Warranty and maintenance: cleanability instructions, warranty length in writing
Order a site survey or request sample swatches before you lock in a design. That single step catches most problems early.
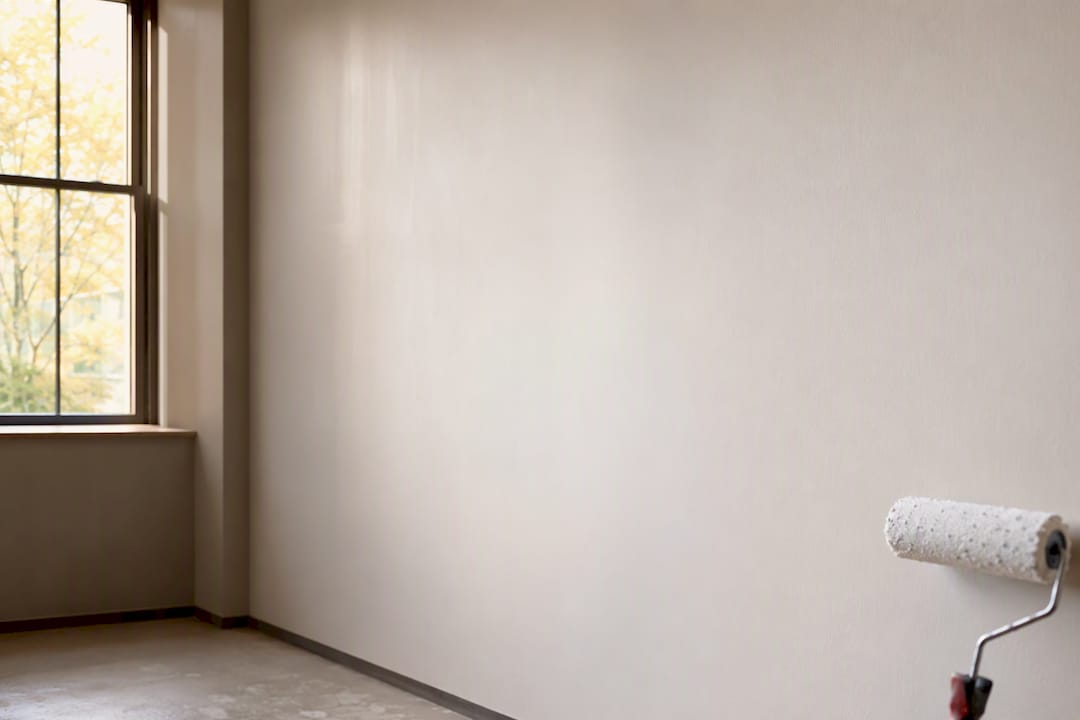
Pro Tip: The number one cause of installation failure is inadequate surface prep, often from outgassing in freshly painted walls. Wait at least ten days after painting and run an adhesion test on a hidden section before the crew shows up with the full roll.
Key Takeaways
A brand identity wallpaper project succeeds when the brief, survey, materials, artwork files, installation plan, and warranty are all documented in writing before production starts.
| Point | Details |
|---|---|
| Start with the brief | Capture branding goals, approved files, and performance requirements before contacting vendors. |
| Survey before you order | Measure dimensions and test moisture and substrate conditions to avoid mid-project surprises. |
| Match material to traffic | Specify Type II vinyl or Greenguard Gold options based on foot traffic and air-quality needs. |
| Require written sign-off | Get proof approval, sample matching, and warranty terms documented before production begins. |
| Work with a certified provider | Wallsneedlove offers Greenguard Gold options and custom production typically completed in 1 to 3 days. |
Where to Find the Technical Details
- Installation and priming guides from manufacturer PDFs
- ASTM E84 fire-rating and Class A reference standards
- Greenguard Gold certification documentation
- High-performance wallcovering specification guides
Table of Contents
- What Should a Brand Identity Wallpaper Project Brief Include?
- How Do You Measure and Survey a Wall for Custom Wallpaper?
- How Do You Choose the Right Material for Commercial Wallpaper?
- What File Specs Does Production-Ready Wallpaper Artwork Need?
- What Should the Installation Timeline and Site Access Plan Cover?
- What Cost Line Items Should a Wallpaper Vendor Quote Include?
- What Maintenance and Warranty Terms Should You Require?
- What Belongs on a Final Sign-Off Checklist Before Production?
- Do You Need Fire-Rating and Environmental Certification for Commercial Wallpaper?
- How Do You Get Final Sign-Off Before Production Begins?
- How Do You Keep Wallpaper Design Aligned With Your Brand Identity?
- How Should Typography and Graphics Work on Branded Wallpaper?
- When Should Wallpaper Update for Seasonal or Campaign Branding?
- Sources
What Should a Brand Identity Wallpaper Project Brief Include?
The brief is the single document every vendor, printer, and installer will reference, so treat it as the source of truth, not a casual email thread. At minimum, it needs: project name, site location, the decision authority who signs off on changes, brand goals for each wall elevation (logo placement, approved color references, tone of voice for any text), the intended lifespan of the install (a three-month campaign wall behaves differently than a five-year lobby identity), and the performance requirements the space demands, such as scrubbability or bleach cleanability.
Attach the actual files, not descriptions of them. That means exact color values (Pantone or approved swatch numbers), vector logotype files in EPS or AI format, confirmation that your fonts are licensed for wide-format printing, any pattern repeat restrictions, and the original high-resolution photography if a scenic mural is part of the plan.
Three brand alignment checks get missed constantly: confirm the logo’s clear space is respected at mural scale, verify minimum type sizes stay legible from the expected viewing distance, and flag any spot where a critical brand element (a wordmark, a tagline) would land directly on a seam. A feature-wall built around a retail brand’s colors only works if the logo survives the panel breaks intact.
Pro Tip: Centralize every asset in one shared folder with version control, and name a single approver for final sign-off. Split ownership across three people is how a brief gets revised twice after production has already started.
How Do You Measure and Survey a Wall for Custom Wallpaper?
Accurate survey data prevents scope creep and installation failure. Collect every dimension, tolerance, and obstruction before you order a single production file, because a $4,000 mural reprint over a mismeasured column is not a hypothetical.
Measure and record:
- Overall wall width and height, plus the usable print area after trim
- Ceiling and floor offsets, corners, and any columns breaking the plane
- Windows, doors, HVAC returns, baseboards, and permanent fixtures
- A waste allowance (typically built in for seam overlap and paneling)
Then assess the surface itself. Note the substrate (painted drywall, concrete, masonry, plaster, or tile), the finish level, moisture content, and whether the wall carries a history of previous wallcoverings or recent low-VOC paint that could still be outgassing. Best-practice installers want walls finished to a Level 4 or 5 standard before vinyl goes up, and Linemark’s field teams run a 10-point inspection that flags moisture above 12% as unsafe for application, noting that roughly 15% of installation failures trace back to poor surface prep alone.
- Shoot straight-on elevation photos with a scale reference object in frame.
- Photograph close-ups of any problem areas: cracks, patches, discoloration.
- Mark wall orientation (north or south facing) since lighting changes how color reads.
- Record measurements in inches or feet with decimal precision, and calculate panel width against overlap needs before finalizing paneling math.
How Do You Choose the Right Material for Commercial Wallpaper?
Specify material by performance need, not by appearance alone. For high-traffic corridors, lobbies, and retail floors, Type II commercial vinyl is the industry standard because it resists scuffs and tears far better than residential-grade stock, and it can meet Class A fire-rating requirements where local code demands it. Where indoor air quality is a stated goal, such as healthcare waiting rooms or wellness studios, look for Greenguard Gold certified substrates or comparable PVC-free alternatives.
Three material categories cover most commercial jobs:
- Removable peel-and-stick: short-term campaigns, pop-ups, low wall damage on move-out
- Permanent adhesive vinyl: longer lifespan, higher durability, better for five-plus year identities
- Textile or woven alternatives: tactile finish, premium feel, best for lower-traffic executive spaces
Confirm certification paperwork before you sign anything. Ask for ASTM E84 Class A documentation on permanent installs in public buildings, and request Greenguard Gold or equivalent low-emission proof if sustainability is part of your brand story. On finish, matte controls glare in offices with heavy overhead lighting, satin splits the difference, and gloss makes colors pop but shows every imperfection in the substrate underneath. Textured options like linen or plaster finishes hide wall flaws well, and a protective laminate adds scratch and UV resistance.
Key performance checks worth requesting in writing include bleach cleanability, scrubbability, and colorfastness, along with EPD or HPD documentation for material transparency. A quality laminate can push a mural’s usable life from about one year unprotected to a full decade with proper lamination, which changes the math on any long-term brand investment.
Pro Tip: Match the substrate to your actual cleaning protocol before you order. If your janitorial team uses bleach-based disinfectant, confirm that specific claim with the manufacturer and test it on a sample panel first, not the finished wall.
What File Specs Does Production-Ready Wallpaper Artwork Need?
Supply production-ready vector artwork wherever the design allows it, and size any raster images for the final print dimensions at the correct resolution and color profile, with bleed built in. Guessing on any of these four items is the fastest way to get a mural back that looks nothing like the proof.
File requirements to lock down before sending anything to print:
- Preferred formats: PDF/X-4 or a flattened TIFF at the required DPI
- Resolution guidance: roughly 150 DPI for viewing distances under 3 feet, and as low as 75 DPI for anything viewed beyond 10 feet
- A 2 inch bleed with crop and registration marks included
- A paneling overlay showing where seams fall, so no logo or headline splits across a panel
Color management deserves its own line item. Call out Pantone values for any spot colors, specify the ICC profile the printer should use, and request a soft proof before committing to a physical run. Order a printed sample swatch, not just a digital mockup. Testing wallpaper samples against the actual wall lighting before full production catches color shifts that never show up on a monitor. Require a formal sign-off on the physical proof, with a defined turnaround window for approval so the schedule doesn’t quietly slip by a week while someone reviews it.
Typography needs the same rigor as color. Set minimum readable type sizes based on expected viewing distance, and check contrast ratios anywhere text carries wayfinding or safety information, not just brand messaging.
Pro Tip: Never assume “close enough” on color. A logo that reads correctly on a laptop screen can shift several shades once it’s printed at 8 feet tall under fluorescent lighting.
What Should the Installation Timeline and Site Access Plan Cover?
Confirm lead times, required site conditions, and a firm installation window before you release anything to production. Wallsneedlove typically prints custom orders within 1 to 3 days, though laminates or specialty substrates can add extra days to that window, so build the buffer into your schedule rather than discovering it the week of install.
- Lock the production lead time first, then work backward to your install date.
- Book your installer’s window and confirm expected install hours per wall elevation.
- Build in cure time after installation before the space returns to full use.
- Confirm HVAC will be running before, during, and after the install, since manufacturer instructions require climate control for proper adhesive curing.
- Clear wall-mounted fixtures, protect flooring, and arrange overnight security if the job spans multiple days.
On install day, have a client contact onsite, confirm ladder or scaffolding access, verify localized power for tools, and walk through the final approval sign-off once the crew finishes.
Pro Tip: Schedule installation during your lowest-traffic hours, and require a post-installation audit that checks edge adhesion and flags any micro-bubbles before the crew leaves the building. Reviewing common installation mistakes ahead of time saves a callback visit.
What Cost Line Items Should a Wallpaper Vendor Quote Include?
Ask every vendor for an itemized quote that separates design and artwork prep, materials, printing, laminates, installation labor, travel, and warranty coverage. A single lump-sum number tells you nothing about where your budget is actually going, and it makes comparing two bids nearly impossible.
Request these line items specifically:
- Per-square-foot material cost, separated from any fixed setup fee
- Paneling and cutting charges
- Onsite labor hours and hourly rate
- Protective laminate cost, if applicable
- Sample and proofing costs
Build in a contingency line for substrate remediation. Patching, skim-coating poor walls, removing old wallcovering, and any permit or fire-inspection fees can add real cost that a vendor’s initial estimate often leaves out.
Pro Tip: Require turnaround commitments and lead-time penalties written directly into the quote, and ask for a sample at the quoted price before you approve full production. A vendor who balks at that request is telling you something about their actual pricing.
What Maintenance and Warranty Terms Should You Require?
Require cleaning instructions and warranty terms in writing, tied specifically to the substrate and finish you chose, not a generic boilerplate paragraph. Verbal assurances from a sales rep don’t hold up when a seam starts lifting eighteen months in.
- Get daily and weekly cleaning guidance in writing, including approved cleaning agents
- Confirm bleach cleanability instructions if your janitorial staff uses bleach-based products
- Ask about stain removal steps and abrasion resistance testing
- Request the manufacturer’s recommended lifecycle and a maintenance schedule
On warranty, ask for both material and installation coverage, and get specific about scope: does it cover peeling, seam separation, or color fade? Manufacturer warranties in this category often run around five years on material defects, so use that as your baseline when comparing vendors.
Pro Tip: Ask for a printed care sheet you can hand directly to facilities staff. A warranty is only useful if the people cleaning the wall every week actually know what not to do to it.
What Belongs on a Final Sign-Off Checklist Before Production?
Before anything goes to press, name exactly who approves what. That typically means a brand manager signing off on design accuracy, a facilities manager confirming site readiness, and a design lead verifying the final proof matches the approved brief.
Require sign-off on three specific artifacts: the final production proof, a physical material swatch, and the confirmed installation schedule. Acceptance criteria should include a passed adhesion test and a color sample that visibly matches the approved brand references, not just a close guess under office lighting.
Your sign-off template should capture: approval date, approver name and their authority to approve, the final file version number, confirmed installation dates, and written acceptance of warranty terms.
- [ ] Greenguard Gold or equivalent certification documentation received
- [ ] ASTM E84 Class A confirmation, where code requires it
- [ ] Printed sample received and approved
- [ ] Site readiness confirmed by facilities
Close with a single-line signature field and a date. That one line is what authorizes the vendor to move to production, and it’s worth the thirty seconds it takes to fill in.
Do You Need Fire-Rating and Environmental Certification for Commercial Wallpaper?
Yes, in most public and commercial buildings, and the two certifications you’ll be asked for most often are ASTM E84 Class A fire-test performance and Greenguard Gold for low chemical emissions. Local fire codes vary by jurisdiction and occupancy type, so confirm the exact requirement with your facilities manager or fire marshal rather than assuming your last project’s spec applies here too.
ASTM E84 measures how a material behaves when exposed to flame and smoke, and Class A is the rating most commercial specs demand for wallcoverings in corridors, lobbies, and other high-occupancy areas. Ask any vendor for this documentation upfront, not after the wallpaper is already on the wall. Type II commercial vinyl is generally built to meet this threshold, which is part of why it’s the default choice for high-traffic zones.
Greenguard Gold certification addresses a separate concern: indoor air quality. It verifies that a product meets strict limits on volatile organic compound emissions, which matters most in healthcare facilities, schools, and any workplace where staff spend eight-plus hours a day near the walls. Request EPD or HPD documentation alongside Greenguard Gold if your organization has broader sustainability reporting requirements, since these documents give facilities teams a paper trail for LEED credits or internal environmental audits.
Don’t treat these certifications as optional extras. Building inspectors check for them, insurance carriers sometimes require them, and skipping this step is one of the more expensive mistakes to fix after installation.
How Do You Get Final Sign-Off Before Production Begins?
Final sign-off is a gate, not a formality, and treating it casually is how businesses end up with a wall that technically matches the brief but doesn’t feel right in person. The people who need to approve before a single panel prints are the brand manager (accuracy of logo, color, and messaging), the facilities manager (site readiness and installation logistics), and whoever holds budget authority for the project.
Three artifacts need physical sign-off, not just an email reply saying “looks good.” First, the final digital proof, checked against the approved brief line by line. Second, a physical material swatch, held up against the actual wall lighting rather than reviewed on a screen. Third, the confirmed installation schedule, cross-checked against the facility’s operating hours and any events planned during the install window.
Acceptance criteria should be concrete: does the adhesion test on a sample patch hold for the required period, and does the printed color sample visibly match the approved brand reference under the space’s actual lighting conditions? A proof that looks right under studio lighting can shift noticeably under a retail floor’s LED fixtures.
Document the approval with a date, the approver’s name and authority, the exact file version being approved, and the installation dates both sides have confirmed. That paper trail protects everyone if a dispute comes up later about what was actually approved.
How Do You Keep Wallpaper Design Aligned With Your Brand Identity?
A wallpaper design that technically uses your brand colors but ignores your brand’s actual personality will read as off, even if no one on your team can immediately explain why. Alignment starts with a simple test: does the pattern, scale, and color palette reflect the same tone your logo, signage, and marketing materials already carry?
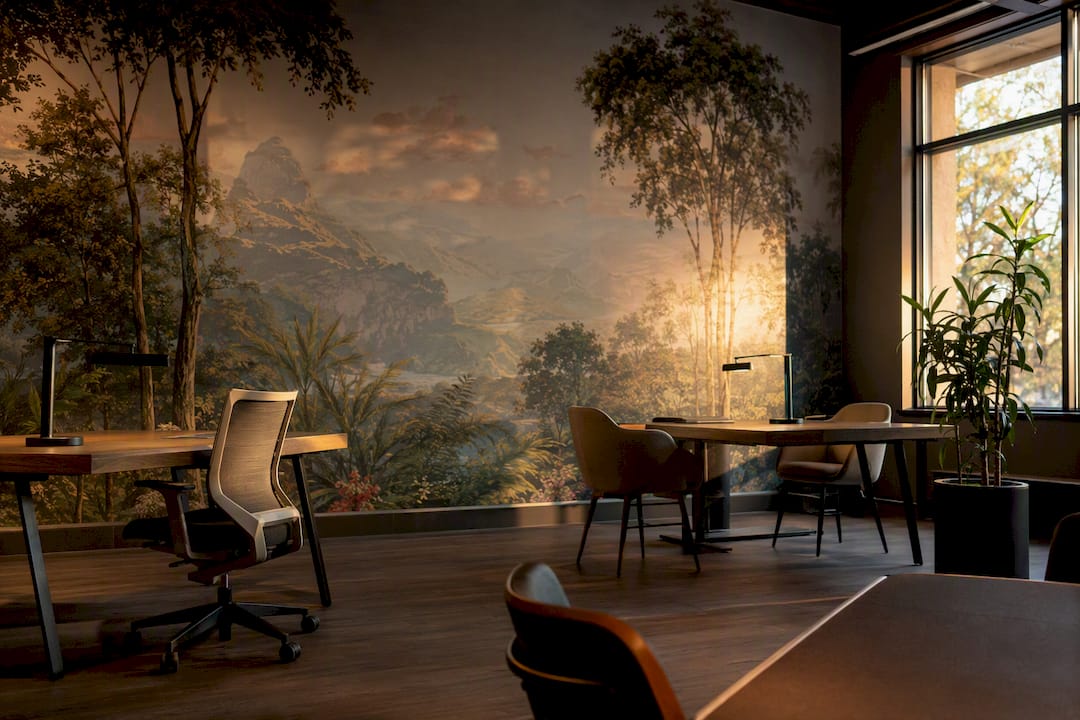
Run every proposed design against a short checklist. Confirm the primary and secondary brand colors are represented accurately, not approximated by eye. Check that any pattern density matches your brand’s overall visual weight, since a minimalist logo paired with a busy, high-contrast pattern will fight itself on the wall. Verify that logo placement respects clear space rules at full mural scale, and that no critical element lands on a panel seam.
Consider how the wallpaper functions within the total room, not in isolation. Office furniture, millwork, and finishes all contribute to how a space reads brand-wise, so a wallpaper choice that clashes with existing fixtures undercuts the investment. Interior designers increasingly treat full-height murals as the anchor for a room’s identity, and 82% of leading designers now favor floor-to-ceiling graphics specifically because partial coverage dilutes the immersive effect a brand wall is meant to deliver.
Get input from whoever owns your brand guidelines document before the design goes to proof, not after. A wall mural is expensive to redo, and catching a misalignment on a screen costs nothing compared to catching it after installation.
How Should Typography and Graphics Work on Branded Wallpaper?
Typography on a wall behaves differently than typography on a business card, and the rules that work at arm’s length fall apart at ten feet away. Set minimum type sizes based on the actual viewing distance in your space, not a generic font-size guideline pulled from a print manual.
Match every typeface to what’s already licensed for wide-format use. A font that displays fine on a website or a printed brochure may carry licensing restrictions that don’t cover large-format wall printing, and that’s a legal problem worth catching in the brief stage, not after the mural is up. Confirm this explicitly with whoever manages your brand assets before artwork goes to file prep.
Contrast matters more on a wall than almost anywhere else in your brand system. Text overlaid on a photographic mural or a busy pattern needs enough contrast to stay legible from across a room, and this becomes an accessibility issue, not just a design preference, whenever the text carries wayfinding or safety information. Test your color combinations against actual contrast ratio standards rather than eyeballing it on a monitor.
Graphic elements like icons, dividers, or secondary logo marks should follow the same clear-space and scale rules as your primary logo. Consistency here is what makes a mural feel like a deliberate extension of your brand system instead of a stretched version of a business card. If your brand already has strong style precedent from office mural work, lean on it rather than reinventing type and layout rules from scratch for this one wall.
When Should Wallpaper Update for Seasonal or Campaign Branding?
Not every branded wall needs to be permanent, and treating a seasonal campaign wall the same way you’d treat a five-year lobby identity usually wastes budget on durability the wall will never need. Decide upfront whether a given installation is a long-term identity piece or a short-term campaign, because that single decision determines your material choice, your budget, and your installation approach.
Removable peel-and-stick wallpaper is the better fit for anything tied to a product launch, a holiday promotion, or a limited-run retail campaign, since it comes down cleanly without damaging the wall underneath when the next campaign rolls around. Permanent adhesive vinyl makes more sense for a core brand identity wall that won’t change for years.
Build a refresh cadence into your original brief if your brand runs seasonal campaigns regularly. Retailers who rotate storefront visuals quarterly benefit from planning the removal and reinstall process at the same time they plan the original design, rather than treating each swap as a brand-new project with a fresh vendor search. That kind of centralized production approach also keeps color and file versions consistent across multiple rotations, which matters if you’re managing brand consistency across several store locations at once.
Keep your core brand elements, logo, primary colors, key typography, consistent across every seasonal variation. The pattern, imagery, or accent colors can shift with the season, but if the logo placement or color codes drift each time, customers stop recognizing the wall as belonging to your brand at all.
A Publisher’s Note on Why This Checklist Exists
We built this checklist because rework is expensive and avoidable. Most failures trace back to skipped measurements or untested materials. Request physical samples early.
Get Your Commercial Wallpaper Project Started With Wallsneedlove
Wallsneedlove handles the parts of this checklist that eat the most time: site surveys, sample kits, and certified materials, so your team spends less time chasing vendor documentation and more time on the design itself. Custom orders typically print within 1 to 3 days, and Greenguard Gold certified substrates are available for spaces where indoor air quality is part of the brief.

What Wallsneedlove offers for commercial brand identity projects:
- Custom murals scaled to full wall elevations
- Peel-and-stick or traditional paste application
- Greenguard Gold certified substrate options
- Fast custom production, typically 1 to 3 days
- Installation support and detailed install guides
If you’re weighing a scenic brand mural for a lobby or reception area, the Java Mountain wall mural shows how a large-format photographic design scales across a full wall. Request a sample swatch or start a quote today to see how your brand’s colors and logo translate to print before committing to a full order.
Sources
- Professional Wall Mural Installation: The Strategic Guide for Commercial Spaces | Linemark
- INSTALLATION INSTRUCTIONS for 54” COMMERCIAL WALLCOVERINGS
- What to Consider When Specifying High-Performance Wallcovering | Carnegie Convo


Leave a comment